Let's be honest, sometimes you just need to capture a thought or a sound, and you need to do it now. Your iPhone is probably the quickest tool you have for the job. For pure audio, nothing beats the built-in Voice Memos app. If you're shooting video and need the sound to match, the Camera app is your best bet.
Your First Recording in Under 30 Seconds
Forget digging through menus. Whether it's a brilliant idea, a quick note-to-self, or a key point from a lecture, you can capture it before it's gone. The Voice Memos app is designed for exactly this kind of speed.
Launch and Record Immediately
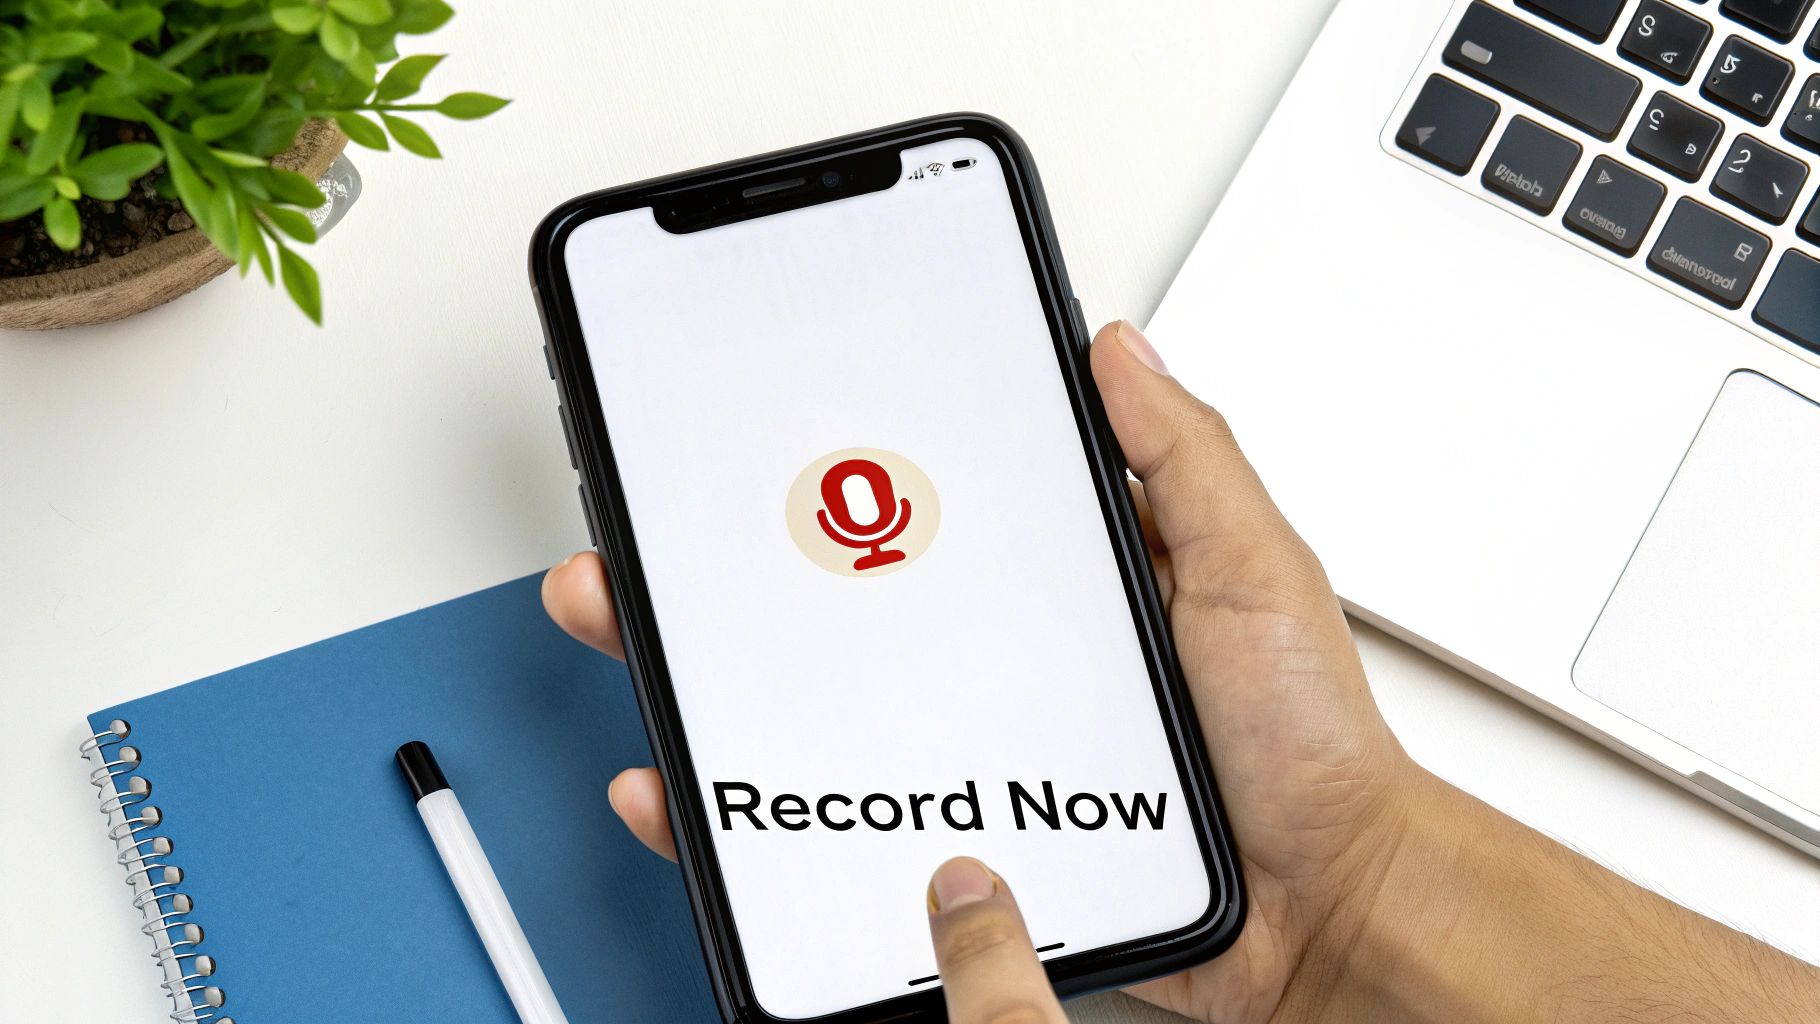
The fastest way to find the app is to swipe down on your Home Screen and just type "Voice Memos" in the search bar. Pop it open, and you'll see a big red record button waiting for you.
Tap it. You're recording. That's it. No setup, no options to fiddle with, just pure, instant audio capture.
When you've got what you need, tap the button again to stop. The new recording instantly shows up in your list, usually named after your location or given a simple title like "New Recording 1." And just like that, you've saved your audio.
Think of your iPhone as a powerful field recorder you always have in your pocket. I've known sound designers who capture interesting ambient city noises and musicians who hum a new melody into their phone, all using this simple app.
This quick-capture workflow is perfect for:
- Saving fleeting ideas: Grab that thought before you forget it.
- Recording meeting notes: Get a perfect record of what was said.
- Capturing lecture snippets: Keep the important bits from class to review later.
We'll get into editing and polishing these recordings later on, but for now, you have a clean, secure audio file saved right on your device.
Mastering the Built-In Voice Memos App
That little red button in your Voice Memos app? It’s the gateway to a surprisingly capable editing suite. Most people just hit record and stop, but you can turn a rough take into a polished audio file without ever leaving the app. It's perfect for everything from meeting notes to a sudden podcast idea.
Once your recording is done, that's where the real magic begins. You can easily trim out dead air, patch up flubbed sentences, and even give the overall sound quality a serious boost.
Simple Edits for Cleaner Audio
Let's imagine you're recording a quick voiceover. You hit record, take a breath, and then start talking. That silence at the beginning? Totally unnecessary.
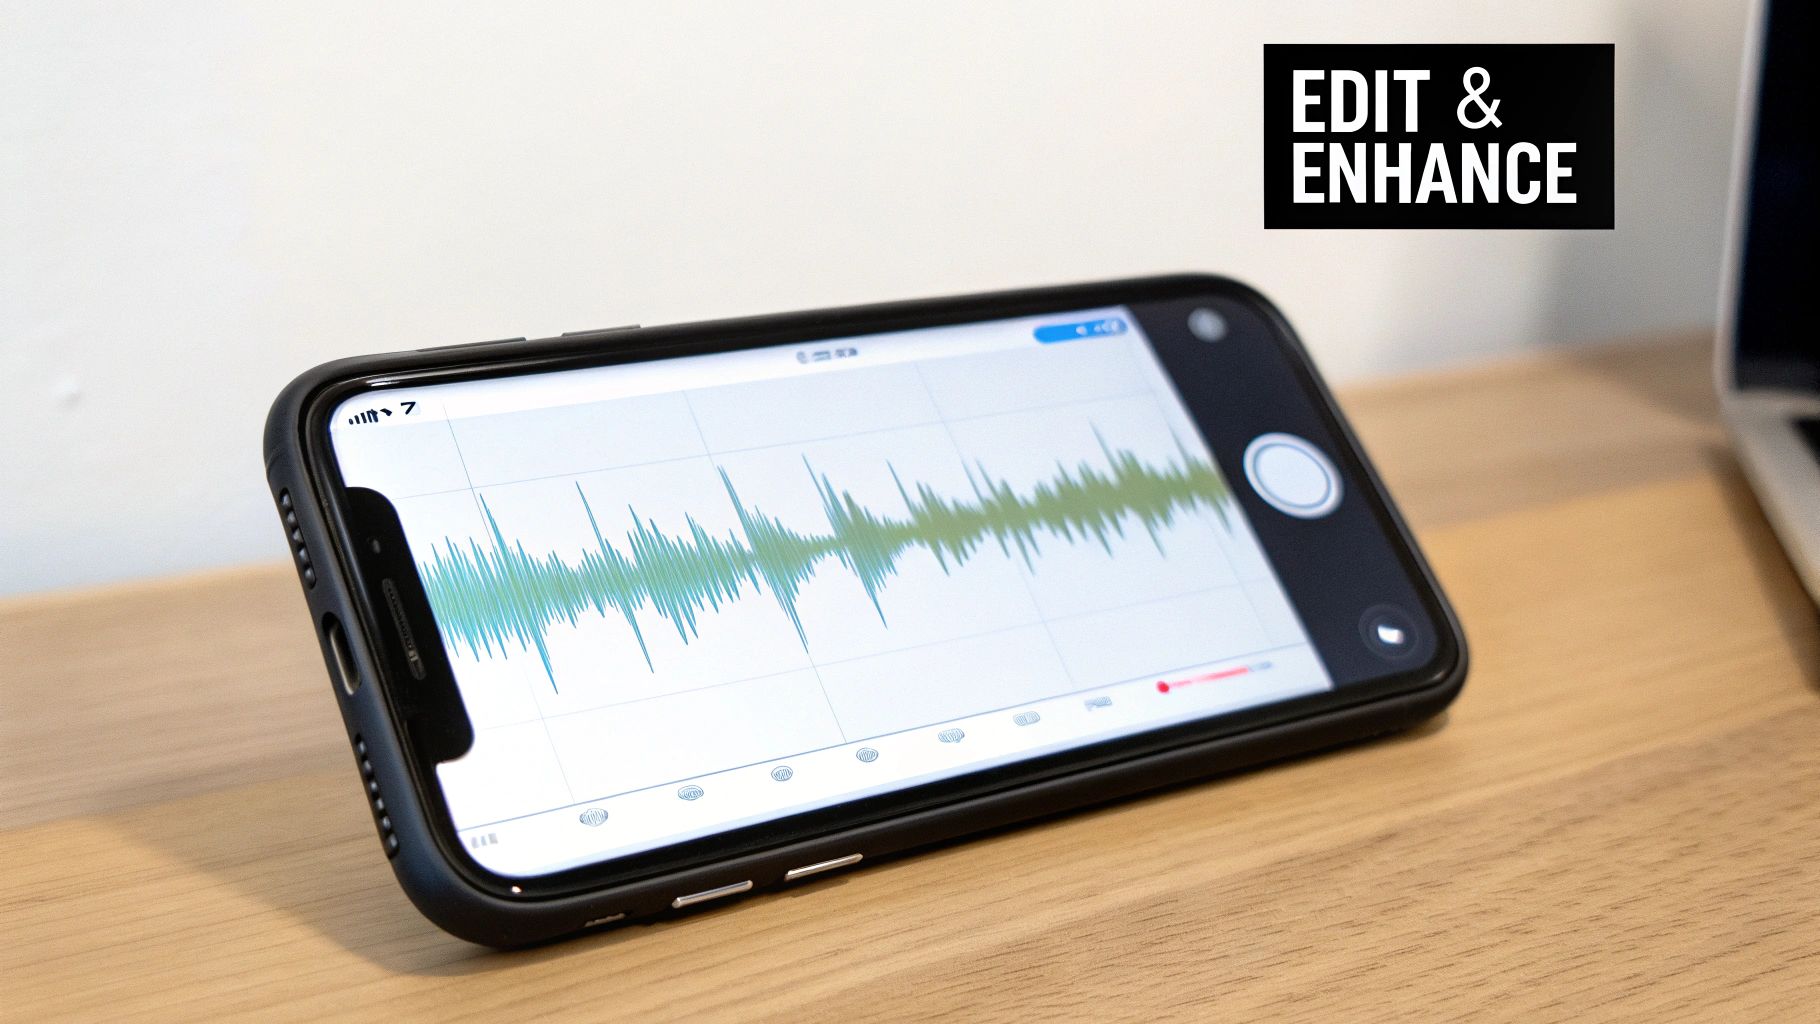
Just tap on your recording, select "Edit Recording," and use the trimming tool to snip off any unwanted quiet spots from the start or finish. It's incredibly straightforward.
And what if you trip over a word halfway through? No need to start the whole thing over. Simply pause, drag the playhead back a few seconds, and hit the Replace button. You can record right over your mistake, and the app seamlessly stitches the new audio in. Honestly, it's a lifesaver for getting a clean take without dozens of attempts.
This is the editing interface you'll be working with. The visual waveform makes it dead simple to spot pauses or mistakes and make your cuts.
The Magic of Enhance Recording
One of the best-kept secrets in Voice Memos is the Enhance Recording feature—look for the little magic wand icon. Tapping this thing is like having a mini audio engineer in your pocket.
This single-tap enhancement uses some of Apple's clever machine learning to instantly clean up your audio. It intelligently dials down background noise (like a humming fridge or distant traffic) and balances your voice to make it sound richer and clearer.
So, what does that actually mean for you?
- For lectures: It helps a professor's voice stand out from the sound of shuffling papers and coughs.
- For interviews: It cuts down on room echo, making the conversation much easier to follow.
- For quick notes: It cleans up the ambient sound you get when recording on the street or in a cafe.
This is a game-changer if you’re planning to get your audio transcribed by a service like TranslateMom. A cleaner audio file with less background noise means a far more accurate transcript, which saves you a ton of time on corrections later. By using these simple built-in tools, you can dramatically improve your recordings before you even think about sending them anywhere.
Here’s a look at one of the best-kept secrets for getting great audio on your iPhone: use the Camera app.
I know, it sounds a bit backward. Why record a video when you just want sound? While the Voice Memos app is perfect for quick notes, the Camera app often captures audio with much higher fidelity. It’s my go-to for anything important, like an interview or a quick musical idea.
The key is knowing where the microphones are. Your iPhone’s primary mics are built into the bottom, right next to the charging port. For the cleanest sound, just point the bottom of your phone directly at whatever you’re recording. This tiny adjustment makes a huge difference because you’re aiming the best mic right at the source.
Why Bother with Video for Audio?
Shooting a video just to get the sound might feel like an extra step, but trust me, the quality is worth it. Video files generally use far less audio compression than a standard voice memo. This means the sound you get is richer, fuller, and has more detail—something you’ll really appreciate if you plan on editing it later.
It's a classic trick that field recordists and sound designers use when they're in a bind. They'll grab a quick video of an interesting sound, not for the picture, but because they know the audio file tucked inside is top-notch.
Getting the Audio File Off Your Video
Once you’ve recorded your clip, you don't need any complex software to pull the audio out. The goal is to separate the sound from the video, leaving you with a clean audio track.
Here are a few easy ways to do it:
- On your iPhone or iPad: The free iMovie app is perfect for this. Import your video, detach the audio from the clip, and then export the project as an audio-only file.
- On a Mac: QuickTime Player makes this incredibly simple. Open your video, head to File > Export As > Audio Only, and you’ll have a clean M4A file in seconds.
- Third-Party Tools: There are tons of free online converters that let you upload a video and download an MP3 or WAV file.
Following this process leaves you with a crisp, high-quality audio track. It’s perfect for everything from a podcast clip to getting a super-accurate transcript from a service like TranslateMom, where clear audio is everything.
Upgrading Your Sound with an External Microphone
Let's be honest, your iPhone's built-in microphone is pretty decent for quick voice notes or a casual video call. But if you're aiming for clean, professional-sounding audio for interviews, podcasts, or music, an external mic is the single best investment you can make. It gets the microphone closer to your sound source, which is the secret to cutting down on all that distracting background noise and room echo.
The market for external mics can feel overwhelming, but you don't need to be an audio engineer to find the right one. Most options fall into a few key categories, and choosing the best one just comes down to what you're actually trying to record.
This little decision tree can help you figure out if you need to level up your gear or if the built-in apps will do the job for now.
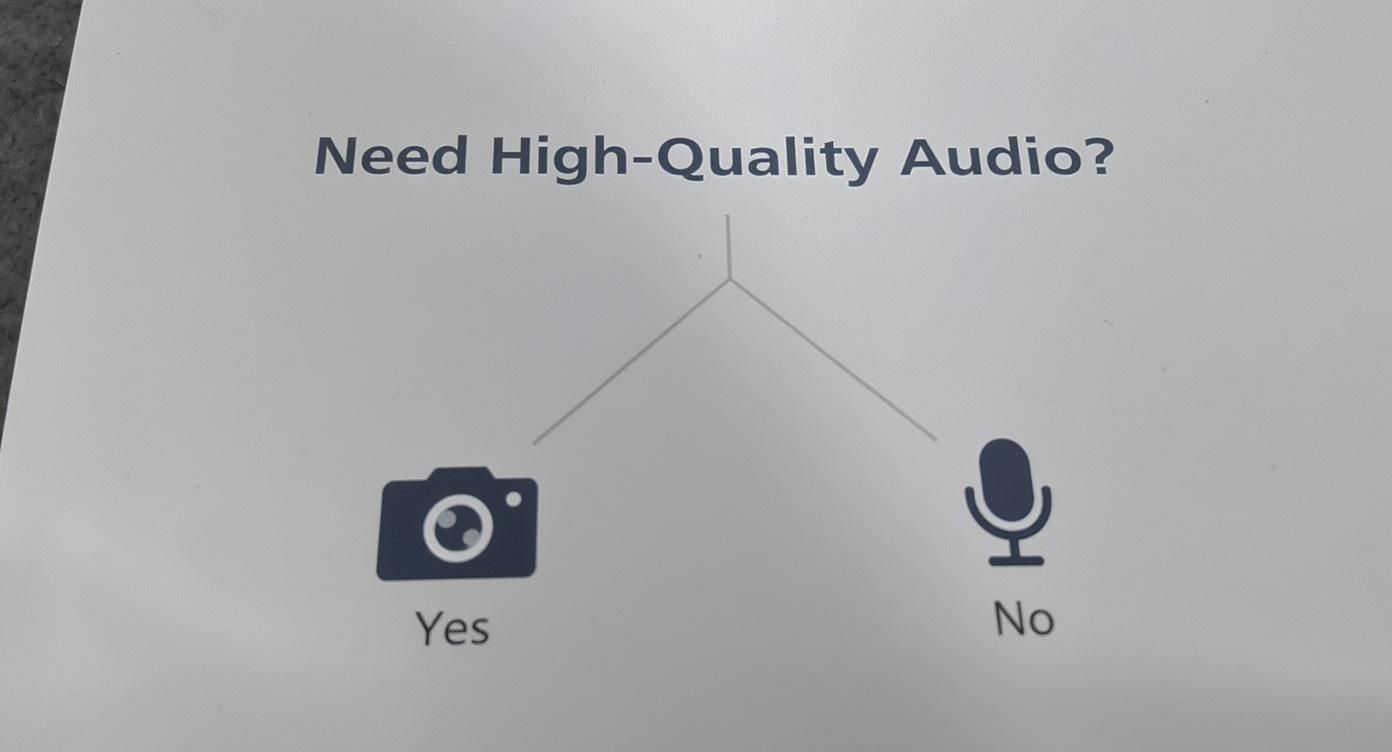
As you can see, the road to better audio often points toward more specialized equipment.
Common Microphone Types for iPhone
Let’s quickly run through the three most common types of external mics you'll find for your iPhone. Each one is a specialist, and knowing the difference will save you a ton of headaches.
- Lavalier Mics (Lavs): These are those tiny clip-on mics you always see on news reporters or interview guests. They're brilliant for capturing crystal-clear dialogue from one person because they stay pinned to their clothing, giving you a consistent audio level even if they move around.
- Shotgun Mics: Think of these as laser pointers for sound. They're designed to pick up whatever they're pointed at while rejecting noise from the sides. If you're recording someone in a busy café or a noisy street, a shotgun mic is your new best friend for isolating their voice.
- Condenser Mics: These are the kind of mics you typically see in a recording studio, known for capturing rich, detailed sound. A portable condenser mic that plugs directly into your iPhone is perfect for recording vocals, acoustic guitar, or a professional-sounding voice-over.
The real trick is matching the tool to the task. You wouldn't use a sensitive studio mic for an interview on a windy day, just like you wouldn't try to record a full orchestra with a tiny lavalier.
Choosing the right microphone is the biggest step, but it's not the only one. You need to know how you're going to plug it in.
Choosing the Right External Microphone for Your iPhone
To make things easier, here’s a quick comparison of the different mic types and what they’re best suited for.
| Microphone Type | Best For | Pros | Cons | Connection Type |
|---|---|---|---|---|
| Lavalier (Lav) Mics | Interviews, vlogging, presentations | Discreet and hands-free; consistent audio levels | Can pick up clothing rustle; usually for one person | 3.5mm jack (with adapter), Lightning, USB-C |
| Shotgun Mics | Filming on-location, focused dialogue | Excellent at isolating sound and rejecting background noise | Can sound thin if off-axis; requires careful aiming | 3.5mm jack (with adapter), Lightning, USB-C |
| Condenser Mics | Voice-overs, podcasting, music recording | Captures rich, high-quality, detailed sound | Sensitive to background noise; less portable | Lightning, USB-C |
| Wireless Systems | Dynamic interviews, action shots, stage performances | Complete freedom of movement | More expensive; potential for interference | Receiver connects via Lightning or USB-C |
Ultimately, the best microphone depends entirely on your project's specific needs—whether that's capturing a quiet conversation or recording in a bustling environment.
Finally, always, always check the connection type. Newer iPhones use USB-C, while slightly older models have the Lightning port. A lot of modern mics come with swappable cables, but it’s a good habit to double-check that you have the right adapter before you hit record. That one simple step will make sure your new gear is ready to go right out of the box.
How to Export and Share Your iPhone Recordings
Getting the recording is just the first half of the battle. The real trick is getting that file off your phone and into the right hands without a headache. Thankfully, the Voice Memos app makes it pretty straightforward.
Just tap on your recording, find the three-dots menu (the "more" option), and hit "Share." This will bring up that familiar share sheet you see everywhere on your iPhone, letting you send it pretty much anywhere.
Choosing the Right Way to Share
How you send your file really comes down to its size and where it's headed.
For a quick, short voice note, email is a classic for a reason—it just works. But if you’ve just recorded a 45-minute interview or a full lecture, that file is going to be way too big for most email servers to handle.
That’s when you need a better plan:
- AirDrop: If you’re sending the file to your own Mac or iPad, or to someone else with an Apple device right next to you, AirDrop is a no-brainer. It’s incredibly fast, direct, and doesn’t compress your file.
- Cloud Storage: This is my go-to for larger files or for sharing with people who don't use Apple products. Upload it to Google Drive, Dropbox, or OneDrive, and you can just send a simple link to anyone, anywhere.
- Messages or WhatsApp: Perfect for sending short audio clips to a friend or colleague for a quick listen. It's fast and informal.
From my own experience, getting your audio ready for the next step is crucial. When I send recordings to a transcription service, I make sure the file is in a universal format like M4A (which is the iPhone's default) or MP3 to sidestep any compatibility issues. A clean, compatible file always means a cleaner, more accurate transcript.
Ultimately, a service like TranslateMom is designed to work smoothly with these standard audio files. By choosing a solid export method like a cloud drive, you’re creating a simple pipeline to turn your recordings into accurate text, subtitles, or even dubbed audio for a bigger audience.
Common Questions About iPhone Audio Recording
Once you start recording audio on your iPhone more often, a few questions always seem to pop up. These usually go beyond just hitting the record button and get into the trickier stuff, like legal issues or specific recording needs. Let's clear up some of the most common ones.
Is It Legal to Record Phone Calls?
This is a big one, and the answer is: it completely depends on where you are. There's a reason your iPhone doesn't have a built-in call recorder—the laws are a minefield. For instance, many places require "two-party consent," which means everyone on the call has to know they're being recorded.
A classic example is California, which has some of the strictest two-party consent laws in the US. Under its penal code, you need explicit permission from every single person in a conversation before you can legally hit record. You can see a full breakdown of these state-by-state recording laws on Justia.com. This is exactly why you'll often hear an announcement like "this call is being recorded" when you use third-party apps—it’s their way of making sure everyone is legally covered.
Can You Record Audio Discretely?
Technically, yes. The Voice Memos app keeps running even after you press the side button and the screen goes dark. You can start a recording, lock your phone, and it will keep capturing audio. But—and this is a big but—you absolutely need to be aware of privacy and consent laws.
Just because you can record someone without them knowing doesn't mean you should. Doing so can land you in serious legal trouble and is an ethical grey area at best. Always be transparent and prioritize people's privacy.
Once you've captured your audio legally and ethically, the next step is often turning those words into text. For incredibly fast and accurate transcripts or subtitles, TranslateMom lets you upload your iPhone recordings and get professional results in just a few minutes. See how easy it is at https://www.translate.mom.
Article created by MontaKaoh