To get a handle on reducing video file size, you really only need to focus on a few key things: picking a modern codec like H.265, dialing back the video's bitrate, and shrinking the resolution to fit where it's being watched. Once you get the hang of balancing these settings, you can cut down file sizes dramatically without making the video look terrible. This means faster uploads and a much smoother experience for your viewers.
Why Smaller Video Files Are a Game Changer

Let’s be honest, huge video files are a massive headache. They're the reason your uploads take forever, your cloud storage bill keeps creeping up, and your audience gets stuck staring at that dreaded buffering wheel. Learning how to properly compress a video isn't just a technical skill—it's a smart move that makes your entire workflow more efficient and keeps your viewers happy.
This guide will walk you through everything you need to know to create lean, high-quality videos. We'll get into the nitty-gritty of compression, helping you choose the right settings for anything from quick social media clips to in-depth tutorials.
The Real-World Impact of Optimization
A well-optimized video is an absolute workhorse. It flies up to platforms like YouTube or Instagram in a fraction of the time, saving you a ton of hassle with every post. If you're managing a lot of content, that time really starts to add up. For a sense of why this matters for different formats, check out our guide on how long Instagram videos can be.
Smaller files are also a massive help for any tools that have to process your video. A service like TranslateMom, for example, can ingest, transcribe, and set up a compact video for translation way faster than it can a bloated, uncompressed file. That speed means you can get from raw footage to a finished, globally accessible video in much less time.
The goal is simple: only send the data you absolutely need to deliver a great viewing experience. Anything more than that is just waste that slows you down and costs you money.
The Growing Demand for Efficiency
The push for smarter compression isn't just about convenience; it's a major trend across the industry. The global video compression market was valued at $1.4 billion in 2020 and is on track to hit $4.5 billion by 2025. That explosion shows just how much demand there is for efficient video delivery. For creators like us, this is great news—it means better and smarter tools are always being developed to help us work more effectively.
Decoding the Language of Video Files
If you want to get good at shrinking video files, you first have to understand what makes them tick. Think of it like learning the basic grammar of video compression. Once you get a handle on the big three—codecs, containers, and bitrate—you can make smart choices that slash file sizes without wrecking the quality.
Codecs: The Language of Compression
A codec (short for coder-decoder) is basically the algorithm used to squeeze and unsqueeze your video data. You can think of it as a specific language for packing visual information. Just like with spoken languages, some are way more efficient than others.
- H.264 (AVC): For years, this was the king. It's the old reliable, compatible with just about everything. Any device, any platform, it’ll play. The downside? It's an older "language" and not very efficient by today's standards.
- H.265 (HEVC): This is the modern successor to H.264, and it's a game-changer. It delivers roughly the same visual quality at about half the file size. While a few ancient devices might struggle with it, H.265 is now widely supported and is the clear winner for almost all web and social media content.
Just switching from H.264 to H.265 is probably the single biggest move you can make to cut down your file size. The difference can be massive, especially with high-resolution video.
Containers: The Box That Holds Everything
So if the codec is the language, the container is the box that holds all the different pieces together. We're talking about the compressed video, the audio tracks, subtitles, metadata—everything.
The container is what determines the file extension. You've seen these a million times:
- .MP4: This is the most popular kid in school. It’s the standard for web video, social media, you name it. It hits that perfect sweet spot of compression, quality, and universal compatibility.
- .MOV: An Apple original, you'll see this a lot in professional editing workflows, particularly in the Mac ecosystem. It's very flexible, but it can create larger files than a well-optimized MP4.
- .MKV (Matroska): This one is a powerhouse. It's an open-source container that can hold a nearly unlimited number of video, audio, and subtitle tracks. It's a favourite for media buffs, but it doesn't have the same out-of-the-box support as MP4 on many devices.
For pretty much anyone looking to shrink videos for the web, MP4 is your safest bet. It’s the standard for a reason—it just works everywhere.
Bitrate: The Flow of Data
This one is huge. Bitrate is probably the single most important factor that dictates both file size and quality. It's a measure of how much data is used for each second of video, usually in megabits per second (Mbps).
More data (higher bitrate) means better quality and a bigger file. Less data (lower bitrate) means a smaller file but can lead to a drop in quality. It's all a balancing act.
There are a couple of ways to handle bitrate, but one method stands out. If you're curious, you can see some examples of parameters for aggressive file size reduction and how they interact.
Here’s the breakdown of the main approaches:
Constant Bitrate (CBR): This is the blunt-force approach. It uses the same amount of data for every single second of video, whether it’s a still shot of a wall or a massive explosion. It's predictable but incredibly inefficient.
Variable Bitrate (VBR): This is much smarter. VBR gives more data to the complex, fast-moving scenes and less to the simple, static ones. This uses data much more intelligently, giving you a smaller file for the same perceived quality.
Constant Rate Factor (CRF): This is the method I recommend for almost everyone. Instead of telling the encoder to hit a specific bitrate, you tell it to hit a specific quality level. The encoder then adjusts the bitrate on the fly to maintain that level of quality.
With CRF, a lower number means higher quality and a bigger file. A higher number means lower quality and a smaller file.
For the H.264 codec, a CRF between 18-28 is the sweet spot. A value of 23 is a fantastic starting point for most web videos. Because H.265 is more efficient, you can get away with a slightly higher CRF (like 24-26) for similar quality.
Combine the H.265 codec, an MP4 container, and a well-chosen CRF setting, and you've got the ultimate recipe for dramatically smaller video files.
Your Practical Toolkit: HandBrake and FFmpeg
Theory is great, but let's get our hands dirty. For most of my video compression work, I rely on two powerhouse tools: HandBrake and FFmpeg. Both are free, open-source, and can deliver some seriously impressive results.
We'll start with HandBrake, which is perfect if you prefer a visual, point-and-click approach. Then, we'll dive into FFmpeg for those who want the raw speed and surgical precision of the command line.
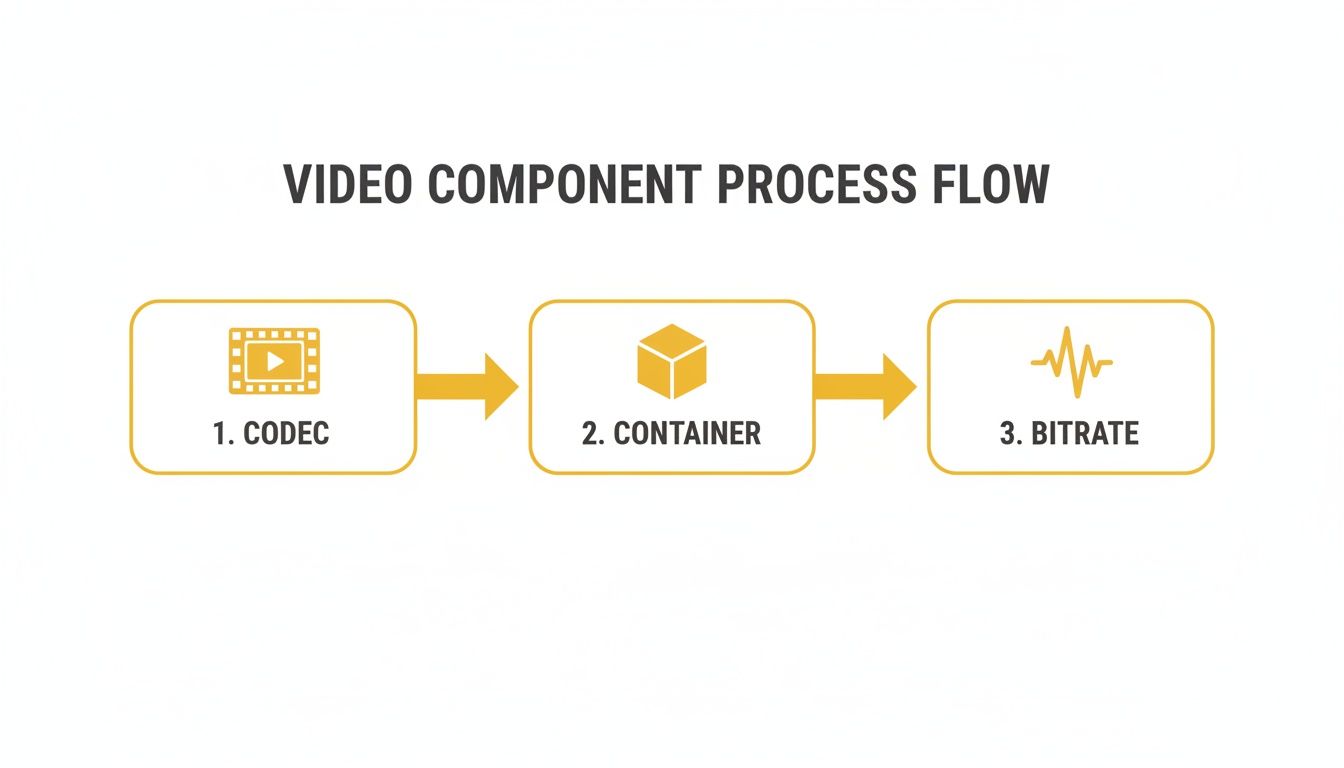
This flowchart breaks down the core pieces we'll be tweaking. Think of the codec as the compression engine, the container as the box it all goes in, and the bitrate as the fuel that determines the final quality and size. Mastering these is the key.
HandBrake vs FFmpeg At a Glance
So, which one should you choose? It really comes down to your comfort level and how much control you need. Here’s a quick comparison to help you decide.
| Feature | HandBrake (GUI) | FFmpeg (Command Line) |
|---|---|---|
| Best For | Beginners, one-off tasks, visual learners | Power users, batch processing, automation |
| Interface | Graphical User Interface (GUI) | Command Line Interface (CLI) |
| Ease of Use | Very easy, with helpful presets | Steep learning curve, requires commands |
| Control | Excellent, covers most common needs | Absolute, granular control over everything |
| Speed | Good, but can be slower for batches | Extremely fast, especially for automation |
In short, if you're just starting or need to compress a few videos, HandBrake is your best friend. If you're building a content pipeline or need to process hundreds of files, learning FFmpeg is a worthwhile investment.
Using HandBrake: The Visual Approach
HandBrake is my go-to recommendation for anyone who finds command-line tools intimidating. It wraps all the complex encoding options in a clean, easy-to-navigate graphical user interface (GUI), so you can see exactly what you’re changing.
When you open a video, you'll see a dashboard with tabs like "Summary," "Dimensions," and "Video." Don't let it overwhelm you—we only need to focus on a few key settings to get big results.
Here’s my quick-start process for shrinking files:
- Start with a Preset: This is the easiest first step. HandBrake’s built-in presets are fantastic. For most web videos, I start with Fast 1080p30. It gives you a solid, balanced foundation.
- Switch to a Modern Codec: Head over to the Video tab. Under "Video Encoder," make the switch from H.264 (x264) to H.265 (x265). Honestly, this one change can often cut your file size by 40-50% with no noticeable quality loss.
- Adjust the Quality Slider (CRF): Just below the codec is the "Quality" setting, which controls the Constant Rate Factor (CRF). For H.265, a CRF value between 22-26 is the sweet spot. A lower number gives you better quality and a larger file; a higher number gives you more compression. I usually start at 24 and see how it looks.
Once that's done, just pick where you want to save the file at the bottom and hit "Start Encode." That’s it! You've just made a massive dent in your video's file size.
Mastering FFmpeg: The Power User's Choice
If you're comfortable in the terminal, FFmpeg is the undisputed king. It’s the engine that powers countless video apps (including HandBrake) and gives you absolute control over every tiny detail of the encoding process. It’s also blazingly fast for batch jobs.
Let's imagine you have a huge video file called input.mov that you need to shrink down.
Basic H.265 Conversion
This one-liner is my workhorse command. It re-encodes the video using the highly efficient libx265 codec with a CRF of 24. The -c:a copy bit is a neat trick—it tells FFmpeg to just copy the audio track without re-compressing it, which saves a ton of time.
ffmpeg -i input.mov -c:v libx265 -crf 24 -c:a copy output.mp4
This single command can often pull off a 70-75% reduction in file size. I've seen 1 GB source files turn into a perfectly watchable 250 MB file with this alone.
Advanced Two-Pass Encoding
When quality is absolutely non-negotiable, I turn to two-pass encoding. On the first pass, FFmpeg just analyzes the video—it learns where the complex, high-motion scenes are and where the simple, static scenes are. On the second pass, it uses that knowledge to allocate bitrate more intelligently.
This method takes longer, no doubt. But for final exports where every megabyte and pixel counts, it often produces a smaller file for the same perceived quality.
Here’s how you do it:
# Pass 1: The analysis run
ffmpeg -y -i input.mov -c:v libx265 -b:v 4M -pass 1 -an -f mp4 /dev/null

# Pass 2: The actual encoding run
ffmpeg -i input.mov -c:v libx265 -b:v 4M -pass 2 -c:a aac -b:a 128k output.mp4
Here, we're targeting an average bitrate of 4 Mbps with -b:v 4M. You can adjust this value up or down based on your resolution and content.
Stripping Unnecessary Audio Tracks
Sometimes, video files come loaded with extra baggage, like multiple language tracks or commentary. These can add unnecessary bulk. FFmpeg makes it easy to cherry-pick only the streams you need.
First, you need to see what's inside the file. Run this:
ffmpeg -i input.mov
The output will show you all the video and audio streams, usually labelled something like #0:0, #0:1, etc. Let's say you only want to keep the main video stream (#0:0) and the first audio stream (#0:1). You can use the -map command to grab just those two:
ffmpeg -i input.mov -map 0:v:0 -map 0:a:0 -c:v copy -c:a copy slim_output.mp4
This command doesn't re-encode anything; it just copies the streams you specified into a new, slimmer container. It's a quick way to shave off a few extra megabytes.
Whether you prefer the visual comfort of HandBrake or the raw power of FFmpeg, getting familiar with these tools gives you complete control over your video files.
Smart Edits That Shrink Files Further
While codecs and bitrates do the heavy lifting, some of the biggest wins for shrinking a video file happen before you even hit the export button. It all comes down to making smart, practical edits.
It’s about being intentional with your settings. Instead of just defaulting to the highest quality possible, you can make context-aware decisions about resolution, frame rate, and audio. These tweaks can slash megabytes from your final file, and your audience will never notice a thing.
Rethink Your Resolution Needs
The obsession with 4K is understandable, but let's be honest—it's often total overkill. Before you export, ask yourself one simple question: where is this video actually going to be watched?
If the answer is an Instagram Reel or a TikTok post, exporting in 4K is a waste of time and data. These platforms compress video aggressively anyway, and most people are watching on small mobile screens. Dropping your project from 4K (3840x2121) to a crisp 1080p (1920x1080) can reduce file size by up to 75% with virtually no noticeable difference on a phone.
Your goal should be to match the resolution to the viewing experience. Sending a 4K file to a platform that will only display it in 1080p just wastes bandwidth and upload time. Be pragmatic.
The Frame Rate Fallacy
Frame rate is another area where you can easily trim the fat. Measured in frames per second (fps), a higher number means smoother motion. But not every video needs it.
Sure, 60fps is essential for fast-paced gaming footage or intense action sequences. But for most things—talking-head videos, interviews, tutorials—30fps is perfectly fine. The visual difference is often negligible for this style of content, but the impact on file size is huge. You're literally cutting the number of frames in half for every second of video, which can slice your file size by nearly 50%.
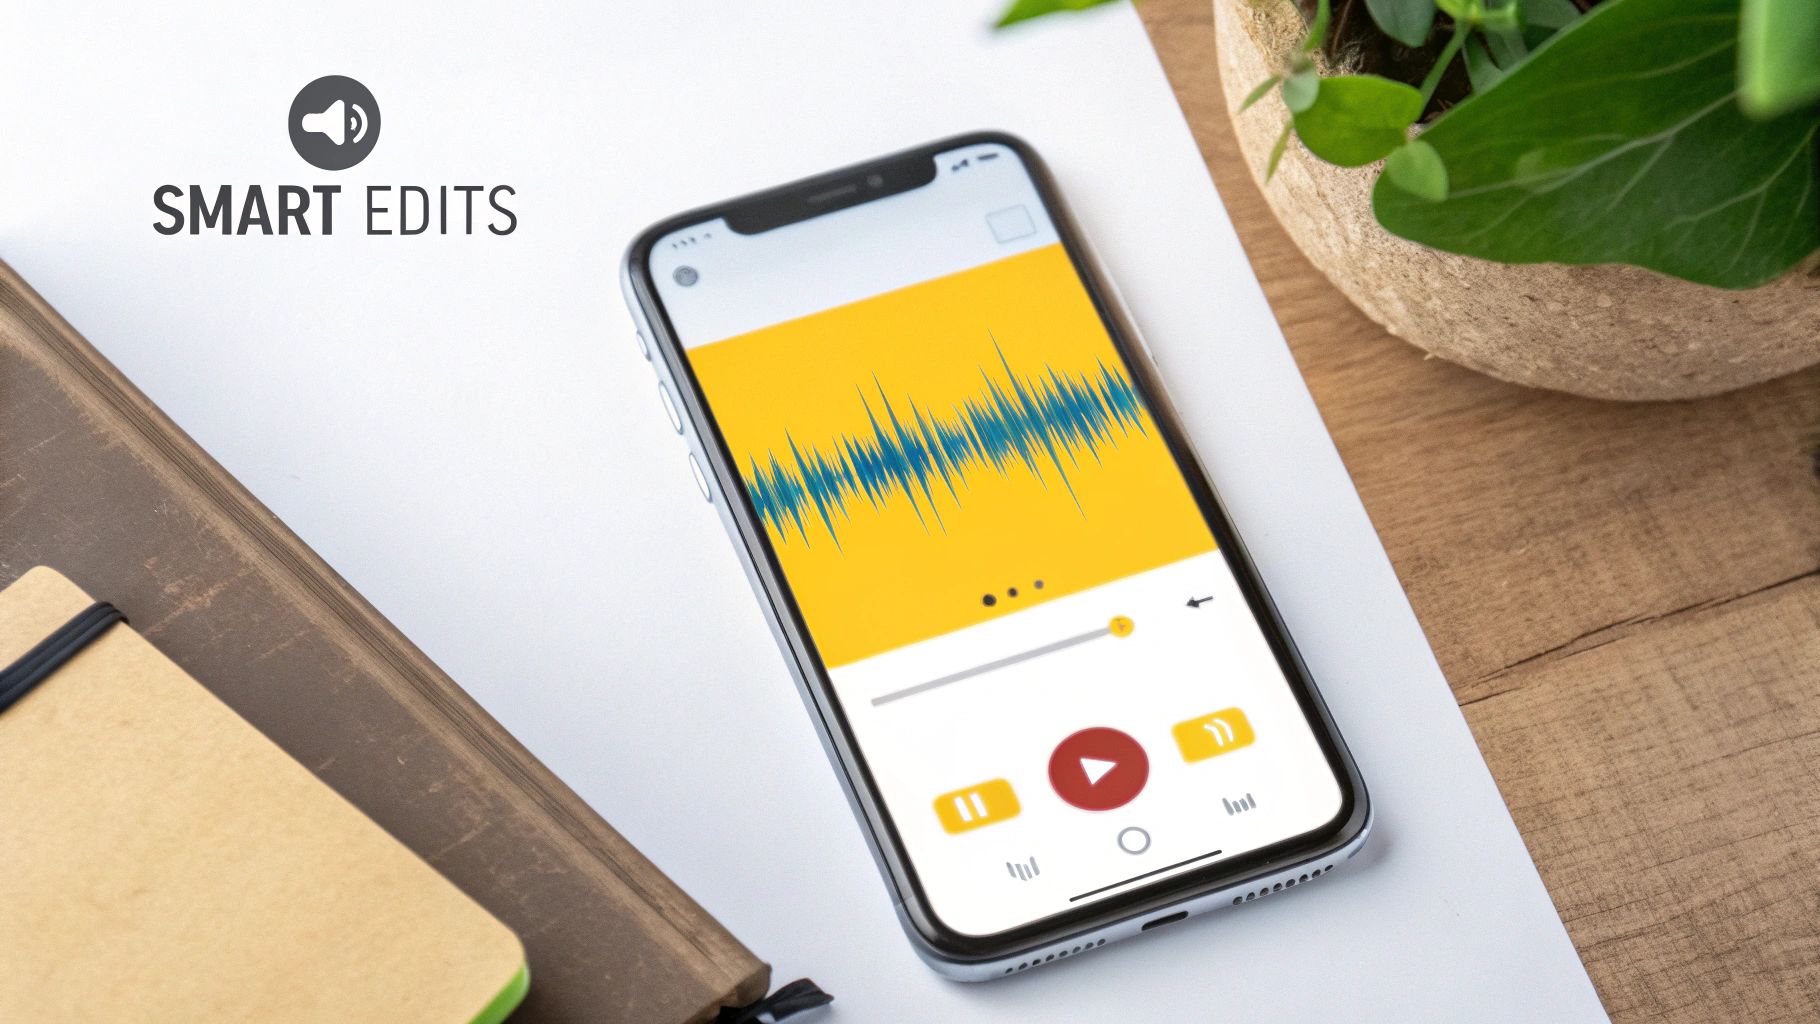
Don't Overlook Your Audio Tracks
Audio is the unsung hero of file size reduction. It's so easy to leave audio settings on high-quality defaults, but for web content, they are often way more than you need. That standard 320 kbps stereo AAC track is packed with data you can probably do without.
Try these simple audio tweaks:
- Lower the Bitrate: For any video where someone is just talking, drop the bitrate from 320 kbps down to 128 kbps. Honestly, for human speech, most listeners won't hear the difference, but the space savings are real.
- Convert to Mono: Does your audio really need to be in stereo? If it's just one person speaking into a mic, a stereo track isn't adding anything. Switching the audio stream to mono instantly halves its data size without affecting vocal clarity at all.
These kinds of technical choices are a key part of creating high-impact marketing videos, where every detail supports your creative goals. And if you're dealing with noisy audio that's bloating your track, our guide on how to remove background audio from video has the steps to clean it up before you compress.
Streamline Your Localization with TranslateMom
Now that you've got your video perfectly compressed, what's next? For many of us, it's getting that content ready for a worldwide audience. And that’s where your new, lean video file becomes a massive advantage, especially if you're using a tool like TranslateMom for localization.
With a compact file, the whole workflow just flies. Uploading, which can be a real drag with huge files, is suddenly a breeze. You can get your project into the system and start working on it almost immediately.
A Faster Workflow from Start to Finish
Once you're on TranslateMom’s New Task screen, you can just drag and drop your optimized file or pull it in from platforms like YouTube or TikTok. Because the file is so much smaller, the platform ingests and processes it in a fraction of the time, getting it ready for the next steps faster than ever.
This is where the magic happens—a clean, simple interface designed to make localization straightforward.
This screenshot gives you a peek at the browser-based studio. It's where you'll manage everything from transcription and translation to dubbing, and it shows just how neatly an optimized file fits into an efficient workflow.
From here, you just pick your source and target languages. Need captions? Choose Transcription. Need subtitles for other languages? Hit Translation. That speed boost from your smaller file carries right through to the editing phase in the Studio Workspace. The player loads instantly, and scrubbing through the timeline feels snappy, letting you nail your subtitle timing without any annoying lag. If you want to get into the weeds of this process, I’ve got a full guide on how to translate videos effectively.
From Editing to Final Export
Inside the Studio Editor, you get granular control over your subtitles. You can adjust timing with the visual waveform, tweak the text on the fly, and even add those cool "Karaoke" style animations where words light up as they're spoken. The Style and Brand tabs are great for customizing fonts and colours or even adding your logo right onto the video. For bilingual content, you can even enable a Dual Language Mode that stacks both the source and target languages on screen.
The real takeaway here is speed. When you learn how to reduce file size video files properly, you're not just saving disk space—you're putting your entire localization pipeline on steroids, from upload to export.
When you’re happy with your edits, you can export a new video file with your perfectly styled captions permanently "burned-in." This final video is already optimized and good to go for any social media platform, helping your message reach a global audience without any more technical headaches. Alternatively, you can download just the subtitle files (like SRT or VTT) for use in other editing software.
Frequently Asked Questions
Got questions? You're not alone. Here are some straightforward answers to the things creators often ask when they're first diving into video compression.
Will Shrinking My Video File Size Ruin the Quality?
Not if you do it right. It’s easy to assume smaller means worse, but modern codecs like H.265 (HEVC) are incredibly smart. They get rid of data your eyes can't even see.
The name of the game is "perceptual quality." If you can't spot the difference after compressing, then for all practical purposes, the quality is still there. But the file size? That's a whole lot smaller.
What’s the Absolute Best Format for Small File Sizes?
For almost anything you’re putting online—social media, your website, you name it—the MP4 container is the way to go. It just works everywhere.
But the real magic happens inside that MP4 file. Pair the H.265 (HEVC) video codec with the AAC audio codec, and you've got the most efficient combo for a tiny file size without sacrificing that crisp look and sound.
Can I Actually Do This on My Phone?
Totally. Both iOS and Android have a ton of apps that can compress videos on the fly. Just look for one that lets you tweak the resolution and bitrate.
That said, for the best results and total control, my recommendation is always to move the file to a computer. A dedicated program like HandBrake gives you the fine-tuning you need to get it just right.
How Do Smaller Files Help with Translation Tools?
This is a big one. Smaller files make your entire localization workflow faster. When you're uploading a video to a service like TranslateMom, a lean, optimized file gets ingested and processed in a fraction of the time.
Think about it: on the New Task screen, you can drag and drop your compact file (or import a link from YouTube, TikTok, etc.), and it’s ready for transcription, translation, or dubbing in the Studio Workspace almost instantly. The specialized player, waveform editor, and style controls all load faster, which means you get from upload to a final, exported video with burned-in subtitles that much quicker. It just smooths out the whole process.
Ready to take your optimized videos global? With TranslateMom, you can add captions, translate, and even dub your content without the headache. It’s a faster, smoother way to handle your entire localization workflow. Start translating your videos for free today.