It all boils down to one simple question: can your viewer hear the audio? That’s the real difference between subtitles and closed captions.
Subtitles are for people who can hear just fine but don't speak the language in the video. They're a straight-up translation of the dialogue.
Closed captions (CC), on the other hand, are designed for viewers who can't hear. They don't just transcribe dialogue; they describe every important sound, like [door slams] or [tense music], to paint a full picture.
Understanding The Fundamental Difference
People throw these terms around interchangeably, but they serve completely different masters. One is for translation, and the other is for accessibility.
Mixing them up doesn't just create a clunky viewing experience—it can mean failing to meet crucial accessibility standards.
Think about it this way: subtitles are a localization tool. Their only job is to translate what's being said from one language to another. When you're watching a French film with English text, you're reading subtitles. They don't bother telling you about background noises because the assumption is you can already hear them.
Closed captions are an accessibility feature, period. They capture all significant audio information from the video in its original language. This means you get the dialogue, who's speaking, how they're saying it (like [shouting]), and any sound effects that add to the story. That distinction is everything when it comes to creating truly inclusive content.
This little flowchart breaks it down perfectly.
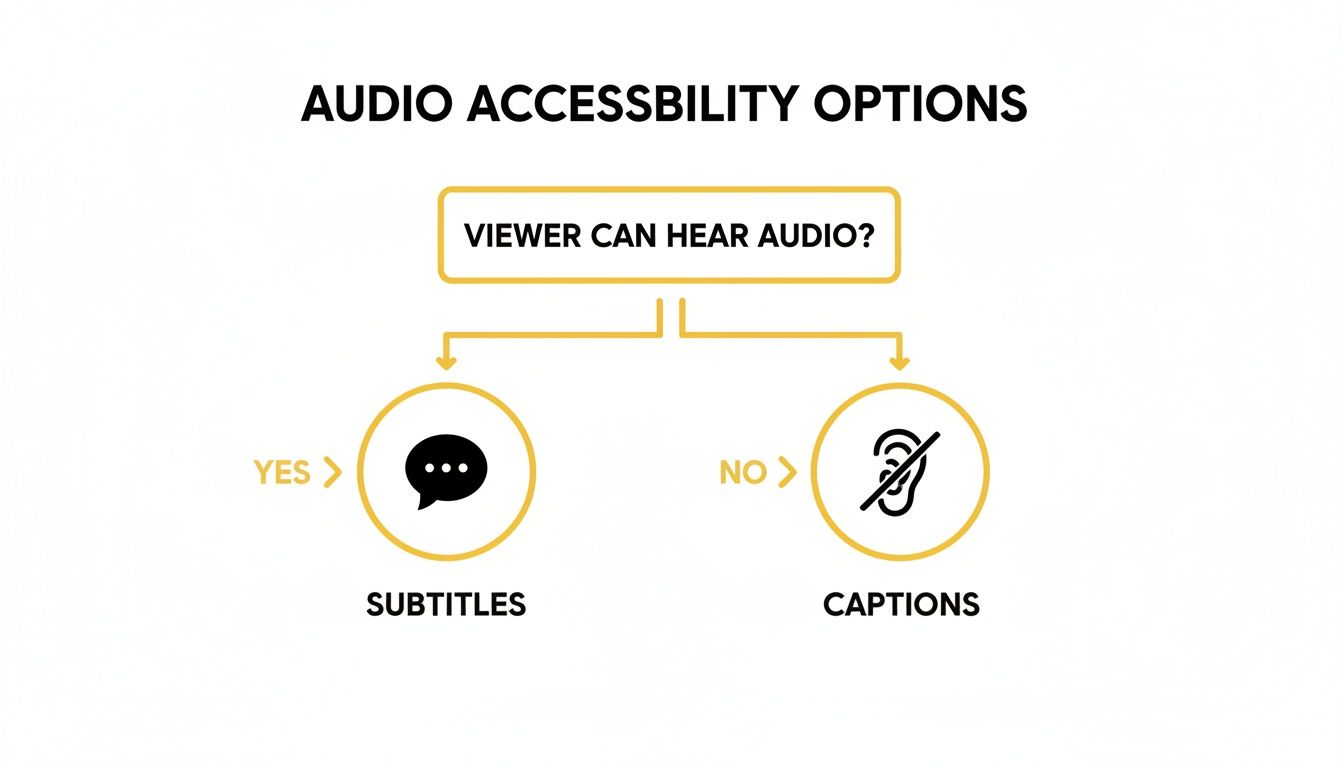
The choice you make hinges entirely on whether the viewer can hear the original audio. One is for bridging a language gap, the other for ensuring no one misses out.
Quick Comparison of Subtitles and Closed Captions
To make this crystal clear, let's put them side-by-side. This table gives you a quick snapshot of what each one does and who it's for.
| Feature | Subtitles (For Language) | Closed Captions (For Accessibility) |
|---|---|---|
| Primary Purpose | Translates spoken dialogue for viewers who can hear. | Provides a text version of all audio for viewers who are Deaf or hard of hearing. |
| Target Audience | Viewers who don't understand the language being spoken. | Viewers who cannot hear the audio, regardless of language. |
| Content Included | Just the dialogue. Nothing more, nothing less. | Dialogue, speaker IDs, and important sounds (music, effects). |
| Typical Use Case | Watching a foreign film or an international news report. | Making broadcast TV, online courses, and social media videos accessible. |
So, while they both put text on a screen, their jobs couldn't be more different. One is about understanding a new language, and the other is about experiencing a story without sound.
Navigating The Legal and Accessibility Landscape in Canada
In Canada, the whole closed captioning vs. subtitles debate isn't just about technical details—it's a legal matter. This isn't just a best practice; it's written into broadcasting rules that treat accessibility as a basic right. If you're a creator or run a business, you need to get a handle on this to stay compliant and find new opportunities.
This legal setup puts closed captions on a different level. They're seen as an essential accessibility service for Deaf and hard-of-hearing viewers. Subtitles, on the other hand, are considered a useful but optional extra for reaching a wider audience.
The CRTC and The Mandate for Accessibility
The Canadian Radio-television and Telecommunications Commission (CRTC) makes the rules for TV broadcasters, and they don't mess around when it comes to captioning. Their regulations are tough and built on the idea that every Canadian deserves equal access to information and entertainment.
Since 2007, the CRTC has required major English and French broadcasters to provide closed captions for 100% of their programs throughout the day. The only exceptions are ads and promos. That’s a world away from subtitles, which aren't legally required and are mostly just used for translating foreign-language content.
This sets a clear standard: captions are a must-have for accessibility, not an afterthought. For a bit more on the specifics, check out our guide on the meaning of closed captions.
The Opportunity for Digital Creators
Here’s the thing: CRTC rules only apply to traditional broadcasters. They don't cover the huge world of online creators on platforms like YouTube, TikTok, or Instagram. This gap is a massive opportunity.
You're not legally required to provide 100% captioning, but if you choose to, it can really make your content stand out.
By offering high-quality, accurate closed captions, you're not just making your videos accessible—you're showing a commitment to inclusivity that resonates with a Canadian audience. And while you're focused on Canada, it doesn't hurt to be aware of international standards like the ADA website compliance requirements to round out your accessibility strategy.
For digital creators, the Canadian legal landscape provides a powerful roadmap. Meeting the spirit of CRTC standards with high-quality captions demonstrates a commitment to accessibility that resonates with all viewers, while multilingual subtitles unlock growth beyond borders.
This is where having a smart workflow really pays off. A tool like TranslateMom lets you tackle both accessibility and global reach without the headache. You can create precise, CRTC-style captions and then easily translate them into other languages.
How TranslateMom Aligns with a Dual Strategy:
- Generate High-Quality Captions: Start by using the Transcription service in TranslateMom. This will create an accurate set of closed captions in your video’s original language. You can then hop into the Studio Workspace to tweak every detail and make sure they’re perfect.
- Expand with Multilingual Subtitles: Once your captions are set, use the Translation service to turn them into subtitles for your international viewers. The app's Dual View is great for this, letting you compare the original text and the translation side-by-side to make sure everything is accurate and makes sense culturally.
With this approach, you can turn what seems like a compliance issue into a real advantage, serving both your local audience and new viewers around the world.
A Detailed Comparison of Technical Features
Sure, the big-picture difference between closed captions and subtitles comes down to their audience—accessibility versus translation. But when you get into the nuts and bolts of how they work, the technical details reveal some crucial distinctions. To get it right, creators really need to understand how these text tracks are built, delivered, and displayed.
The most obvious difference is what's actually in the text. Subtitles are lean, usually just a direct translation of what's being said. Closed captions, on the other hand, are a full-on transcript of the entire soundscape. They include all the important non-speech sounds that give context to someone who can't hear.
That means a caption file will have things like [phone rings], [tense music builds], or even speaker IDs like MARTHA: We need to leave now!. You'd never find those in a standard subtitle file.
Open vs. Closed: To Burn or Not to Burn?
How the text actually shows up on screen is another key technical divide. The choice between "open" and "closed" formats decides whether your viewer gets a say in seeing them.
- Open Captions/Subtitles: These are literally "burned into" the video file. They become part of the image itself and can't be turned off. This is super common for social media videos, where you want to make sure the text is visible even when the sound is off.
- Closed Captions/Subtitles: These are delivered as a separate file that syncs up with the video. Viewers can toggle them on or off with the player's controls (think the "CC" button on YouTube). This gives the viewer control and is the standard for TV and most streaming services.
A pro tool like TranslateMom handles both workflows easily. After you’ve polished your text in the Studio Workspace, you can choose to Burn-in (Export Video), which creates a new video file with open captions. Or, you can Download Subtitles as a separate file to use in a closed captioning setup.
The choice between open and closed is a strategic one. Open captions guarantee your message gets seen in sound-off social feeds. Closed captions empower your audience by giving them control, which is a huge part of accessible design.
Getting to Know Your File Formats
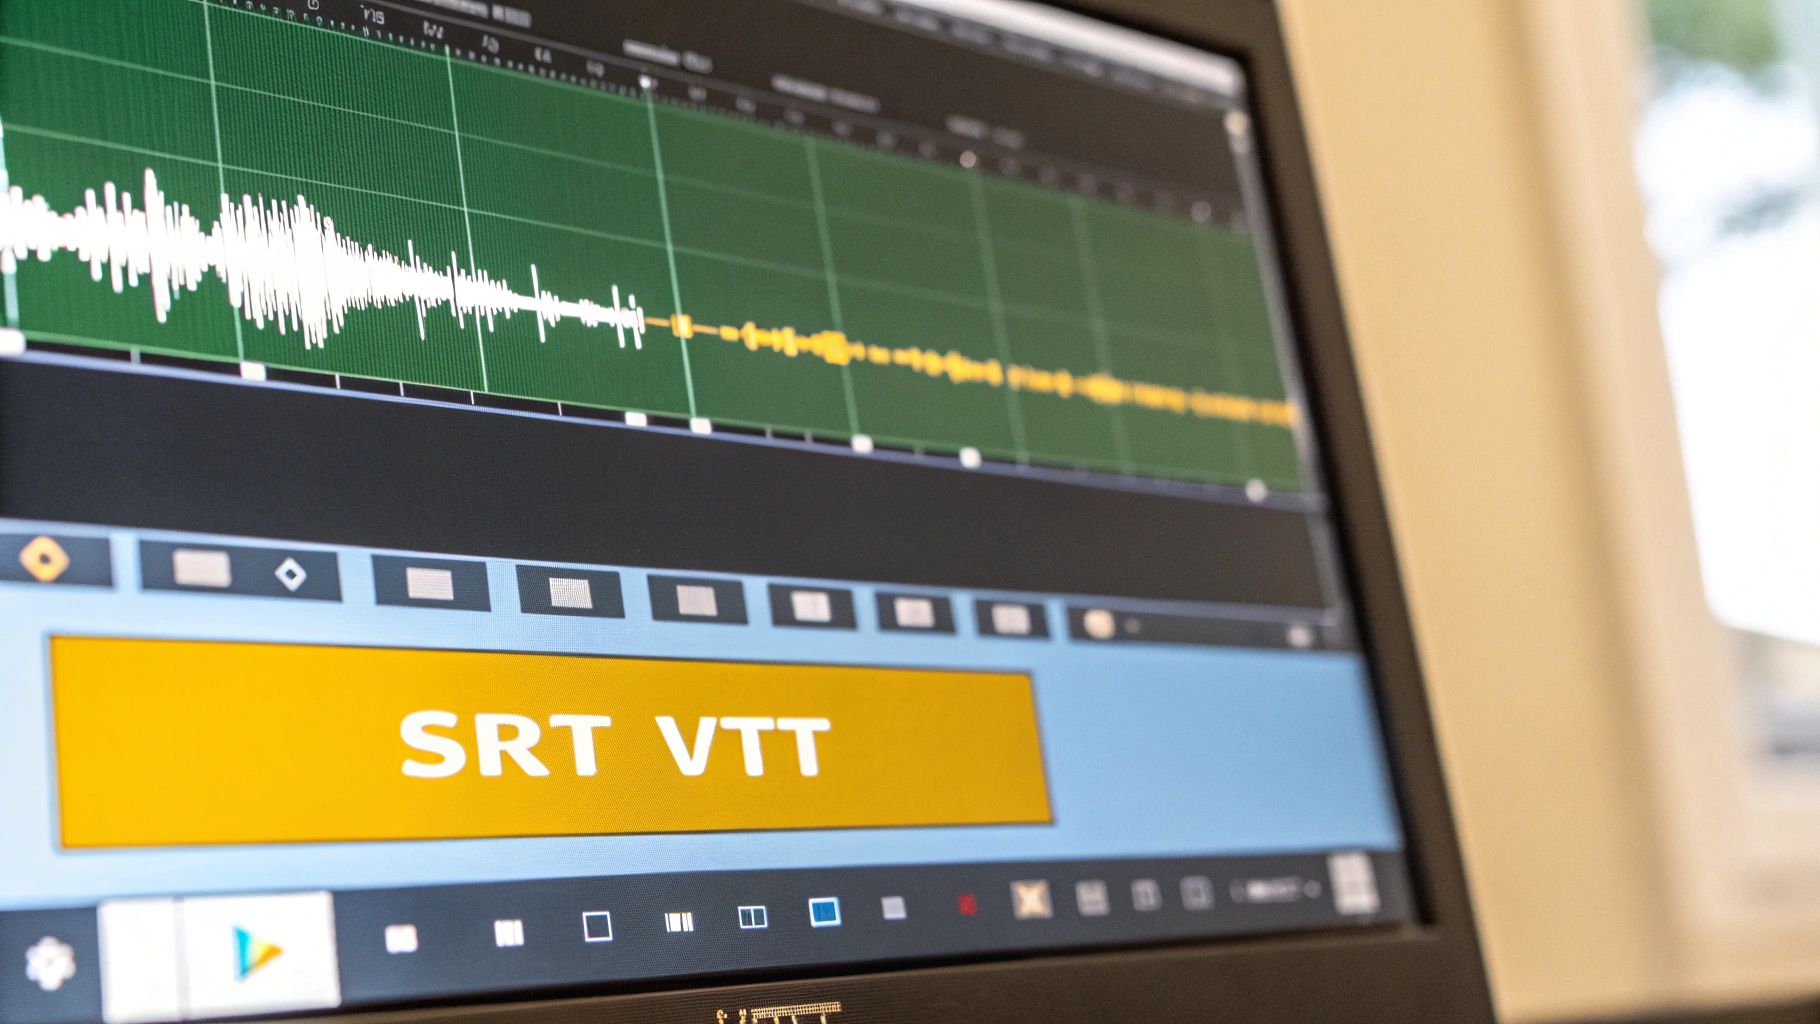
Behind every set of captions or subtitles is a file format that stores the text and timing info. The two big players you'll run into are SRT and VTT. They might look similar, but they have some important differences.
SRT (.srt), which stands for SubRip Text, is the old reliable. It's the most common and basic format, containing a number, a timestamp (start and end), and the text. Its simplicity is its biggest asset, making it compatible with just about everything.
VTT (.vtt), or Web Video Text Tracks, is the modern successor built for HTML5 video. It does everything SRT can but adds advanced styling options right inside the file. Think text positioning, colours, and custom fonts.
When you’re creating these files, getting the timing right is everything. Even a basic text file needs to be perfectly synced to be useful. If you're starting with just raw text, knowing how to structure it is the first step. You can dive deeper into that process in our guide on how to convert a TXT file to an SRT file.
A detailed breakdown helps clarify the differences at a glance.
Technical and Functional Breakdown of Captions and Subtitles
| Attribute | Subtitles (For Translation) | Closed Captions (For Accessibility) |
|---|---|---|
| Content Elements | Dialogue only, translated into a different language. | All audible content: dialogue, speaker IDs, and sound effects (e.g., [door slams]). |
| Common File Formats | SRT (.srt), VTT (.vtt) | SRT (.srt), VTT (.vtt), SCC (.scc) |
| Implementation | Can be "open" (burned-in) or "closed" (toggleable). | Almost always "closed" to give viewers control. |
| Primary Use Case | Making content understandable to viewers who speak a different language. | Making content accessible to viewers who are deaf or hard-of-hearing. |
| Styling Options | Basic styling (if VTT is used), but often controlled by the player. | VTT allows for specific styling like colour and positioning to differentiate speakers. |
Understanding these technical aspects is what separates amateur work from a polished, professional final product.
Why a Professional Editor is a Game-Changer
Trying to create or edit these files by hand is a recipe for frustration and mistakes. For any serious workflow, a dedicated editor isn't just a nice-to-have—it's essential.
A platform like TranslateMom completely changes the game. Its Studio Workspace is built for this kind of precise work, with a few key features:
- Visual Waveform: Stop guessing the timing. You can visually line up your caption blocks with the audio waveform, making sure the text pops up exactly when someone starts and stops talking.
- Real-Time Preview: The Special Player shows you exactly what your captions, styles, and karaoke effects will look like on the final video. No more exporting and re-uploading just to check your work.
- Integrated Services: You can start with a Transcription to get a base file, perfect it in the editor, and then use the Translate (Redo) feature to create subtitle files in multiple languages from that same verified source.
This all-in-one approach guarantees that whether you're building detailed closed captions for accessibility or translating subtitles for a global audience, your final video will be technically perfect, perfectly synced, and look totally professional.
Why High-Quality Captions Are Non-Negotiable
Flipping on auto-captions isn't a real solution—it's just a starting point. True accessibility isn't measured by whether text shows up on the screen, but by its quality. When captions are inaccurate, poorly timed, or incomplete, they don't just fail the audience they’re meant for; they turn a helpful tool into a source of frustration.
This isn't some abstract problem. Just look at the Canadian experience, where we've seen firsthand that just "having captions" isn't the same as having meaningful access. In a landmark 2002 settlement, the CBC agreed to caption every single second of its broadcast day. Sounds good, right? But an independent, multi-year survey found 130 separate instances where captions were missing, including on many newscasts—the one thing Deaf and hard‑of‑hearing Canadians said they needed most. This history is a powerful lesson for creators: just generating text isn't enough. Without a solid quality check, you're leaving huge accessibility gaps. You can learn more about the CBC's captioning compliance history to see how deep this issue runs.
This is exactly why having a real quality assurance (QA) process is non-negotiable if you're serious about creating inclusive content.
Beyond Automation: A Human-Centred Workflow
AI tools are fantastic for getting that first draft done quickly, but they stumble on nuance, context, and complex audio. This is where a human touch becomes absolutely essential. You need a professional editing environment to turn that raw text into closed captions people can actually rely on.
High-quality captions are a commitment to a better viewer experience. They transform a technical requirement from a simple checkbox item into a powerful and reliable communication tool that everyone can benefit from.
This commitment means handling the details that automated systems always miss. Think about verifying who's speaking in a fast-paced conversation, making sound descriptions clearer (like changing a generic "[noise]" to a specific "[distant siren]"), and tweaking the timing so captions pop up at the perfect moment.
Perfecting Captions with Precision Tools
Getting this level of quality means you need a workspace built for detail. This is where a platform like TranslateMom comes in, bridging the gap between AI speed and human precision.
The workflow is designed to ensure quality at every stage:
- Initial Transcription: Start by using the Transcription service to get a fast, AI-generated draft. It saves you hours of typing from scratch.
- Fine-Tuning in the Studio: This is where the real QA happens. Inside the Studio Workspace, you can use the visual Waveform to drag the start and end points of each caption, syncing them perfectly with the audio.
- Editing with Context: The video automatically pauses when you click to edit text. If you’re translating, you can switch on Split View to see the original source text right next to your translation, making it easy to stay accurate and true to the original intent.
- Styling and Branding: Use the Style and Brand tabs to customize how your captions look, and even add a logo, to make sure everything lines up with your brand.
By combining the efficiency of AI with a powerful human-in-the-loop editor, you can create closed captions that are more than just present—they're genuinely helpful, accurate, and professional. You're not just making your content accessible; you're making it truly inclusive.
How Captions and Subtitles Actually Grow Your Audience
A smart approach to captions and subtitles isn't just about ticking an accessibility box—it’s a massive lever for audience growth. While subtitles open your content up to new countries, high-quality closed captions are a mainstream engagement tool that hooks viewers who would otherwise scroll right past.
This is where the line between closed captioning vs subtitles often gets fuzzy, but the result is crystal clear. Captions actually help a surprisingly wide range of people focus and understand what they're watching, turning them from passive viewers into engaged learners. Your investment in text suddenly becomes a direct investment in building a loyal audience.
This isn't just a hunch. Research from right here in Canada shows just how common caption use has become, especially when people are trying to learn something.
The Overlooked Power of Captions in Education
It turns out, closed captions are for way more people than just those with hearing loss. A survey featured in Canadian Audiologist found that over 65% of all post-secondary respondents said closed captions were “very” or “extremely” helpful for their learning.
What’s really telling is that 70.8% of respondents without hearing difficulties still used captions at least some of the time to help them focus and retain information. This proves that descriptive captions—the kind that include details like background noise and who's speaking—do a much better job of supporting concentration than basic subtitles. You can dig into the full study on how post-secondary students use captions to see the data for yourself.
The message for creators, educators, and marketers is loud and clear. If you pair accurate closed captions with great multilingual subtitles, you squeeze every last drop of value out of your video content.
The modern viewer uses captions for more than just accessibility; they use them for focus, clarity, and learning in noisy environments. Neglecting high-quality captions means you are overlooking a massive segment of your potential audience who prefer to watch with text.
My Workflow for Maximum Reach
Nailing this dual strategy means having a workflow that handles both captioning and translation without giving you a headache. This is exactly what a professional tool like TranslateMom is built for. It lets you create one perfect source file and then easily spin it out for different audiences.
Here’s how I get it done:
- Create a Solid Foundation: I start a New Task in TranslateMom by uploading my video or just pasting a link from YouTube. I select the video's original language and choose the Transcription service to get a solid draft of my closed captions.
- Perfect the Captions: Next, I jump into the Studio Workspace. Using the audio Waveform is a game-changer for getting the timing just right. I'll tweak the text for 100% accuracy and add those crucial non-speech details like
[music fades]to make it a great experience for everyone. - Go Global with Translation: Once my captions are pristine, I use the Translate (Redo) feature in the sidebar. I just pick a new Target Language, and it instantly generates translated subtitles from my verified text. No re-doing work.
- Export for Any Platform: Finally, it's time to export. I can choose Burn-in (Export Video) for social media, where I want captions to be visible all the time. Or, I can Download Subtitles as separate SRT or VTT files for platforms like YouTube, where viewers can turn them on or off.
Following this process ensures my content meets accessibility standards with top-notch closed captions while also being ready for a global audience with translated subtitles. It effectively doubles my video's potential reach, all from a single project.
Building a Professional Caption and Subtitle Workflow
Moving beyond just knowing the difference between closed captions and subtitles means building a solid, repeatable workflow. You need a process that guarantees your captions are always top-notch and accessible, while also letting you quickly spin up translated subtitles to reach a global audience.
The secret? It all starts with a perfectly timed and accurate transcription. While there are lots of tools out there, a truly professional setup brings transcription, editing, and translation together. This integration is what saves you a ton of time and headaches down the road.
The Core Two-Step Process
A smart workflow that handles both captions and subtitles can be boiled down to two simple phases. The key is to perfect your source file before you start translating.
- Phase 1: Create Flawless Closed Captions. First things first, you need a perfect caption file in your video’s original language. This isn't just about getting the words right; it's about including all those crucial non-speech descriptions that make content accessible.
- Phase 2: Generate Translated Subtitles. Once you have that flawless source file, creating accurate subtitles in other languages becomes a breeze.
This method is a game-changer because any tweak or correction you make to the original captions automatically flows through to all your translations. No more fixing the same mistake in five different language files.
A Practical Walkthrough Using TranslateMom
Let's walk through how this looks in practice using a tool like TranslateMom.
First, you need to get your video into the system. Head to the New Task screen. From there, you can just drag and drop your video file or paste a URL from a platform like YouTube or TikTok to import it.
Next, it's time to set up the project.
- Tell the system the Source Language (what language is spoken in the video).
- For this first step, set the Target Language to be the same as the source. We're focused on getting the original captions perfect first.
- Choose the Transcription service. This will create your initial closed caption file.
The visual audio waveform in the Studio editor is your best friend. It lets you visually grab the start and end points of each caption block and drag them to line up perfectly with the audio. No more awkward timing.
Once the initial transcript is done, you'll land in the Studio Workspace. This is where the real magic happens. You’ll clean up the text for 100% accuracy and add in those essential non-speech cues, like [music] or [door slams]. The live video preview shows you exactly how it will look, so you can make adjustments on the fly.
With your English closed captions polished to perfection, you're ready to create subtitles. Use the Translate (Redo) function, pick a new target language, and the system will instantly generate a new set of subtitles based on your corrected source text. If you want to get into the nitty-gritty of this process, we have more detailed guides on how to add subtitles to a video.
Finally, getting your work out is easy. You can choose to Burn-in (Export Video), which creates a new video file with the text permanently embedded—perfect for social media. Or, you can Download Subtitles as separate SRT or VTT files to use with your video player. To round out your toolkit, it's always good to know what's out there; exploring the best free transcription software options can help you build an even more robust process.
Got Questions? We've Got Answers
Diving into the world of captions and subtitles can bring up a few tricky questions. I've put together some quick answers to the most common things people ask, so you can get your content strategy sorted out.
What's the Deal with SDH Subtitles?
SDH stands for "Subtitles for the Deaf and Hard-of-Hearing." You can think of them as a clever mash-up of closed captions and subtitles.
They have all the descriptive details of captions—like [phone rings] or [upbeat music]—but are formatted and delivered like subtitles. The main reason they exist is for compatibility. Some platforms and media players just don't play nice with traditional closed caption files, so SDH ensures that accessibility isn't lost.
Can I Just Use One File for Both Captions and Subtitles?
Not really, because they're built for different jobs. A closed caption file is all about accessibility in the original language, packing in those crucial sound descriptions. A subtitle file is designed to translate the dialogue for a new audience in a different language.
Here's a pro tip: always, always perfect your original language captions first. Any mistake you make in that initial file will be copied and multiplied across every single language you translate it into, causing a huge quality control headache.
A workflow with a tool like TranslateMom handles this perfectly. You start by using the "Transcription" service to get a solid caption file. Once you've polished it up in the Studio Workspace, you then run it through the "Translation" service. This creates brand-new, separate subtitle files for your target languages, typically leaving out the sound descriptions to focus just on the spoken words.
Do I Actually Need Captions for My Social Media Videos?
Yes, one hundred percent. While you might not face the same legal requirements as broadcast television, adding captions is a no-brainer for a few key reasons:
- It's an accessibility must. Making your content inclusive should be a top priority for any creator.
- Most people watch with the sound off. It's just a fact of social media. Captions grab their attention and make sure your message lands, which is huge for engagement.
- It's great for SEO. Search engines can read the text in your captions, helping your videos show up in search results and reach way more people.
Honestly, it’s one of the easiest ways to boost your reach, engagement, and inclusivity all at once.
Ready to create professional-grade captions and subtitles that connect with a global audience? With TranslateMom, you can generate accurate transcriptions, perfect them in a powerful editor, and translate them into over 100 languages in minutes. Start for free and see how easy it is to make your content accessible to everyone, everywhere. Get started with TranslateMom today!