When you need to translate Spanish audio into English, you're doing more than just swapping words. You're building a bridge between cultures, making sure the original nuance, context, and feeling all make it across. It's about connecting with a completely new audience, whether that's through sharp subtitles, a natural-sounding dub, or a crystal-clear transcript.
Why Getting Spanish to English Audio Translation Right is a Game-Changer
In a world this connected, translating audio accurately isn't just a nice-to-have; it's your ticket to reaching new people, unlocking opportunities, and fostering real understanding. Get it right, and the possibilities are endless.
Think about a company expanding from Spain into North American markets. Their training materials need to be perfectly translated for their English-speaking teams. Or an online educator whose lectures in Spanish could enlighten thousands of students in the US, but only if the captions are actually correct. Even a filmmaker’s powerful story could fall flat at international festivals if the subtitles lose all the emotional punch of the original script.
In every one of these cases, precision isn't a minor detail. It’s everything.

Unlocking Growth and Making Content Inclusive
The demand for seamless bilingual communication is huge, particularly in diverse places. Just look at a state like California, where Spanish is so prevalent that reliable audio translation is essential in almost every sector. Back in 2021, over 10.4 million people there spoke Spanish, making up 28.18% of the population. That single stat highlights how crucial good translation is for public services, legal work, and day-to-day business. You can read more about the language's impact in this deep-dive on the Spanish language in California.
At the end of the day, translation is a powerful tool for both growth and inclusion. It makes sure a language barrier doesn't turn into a barrier to information, services, or opportunity.
When you translate your content accurately, you're building trust with new audiences. You're also showing a real commitment to making your message accessible to everyone, no matter what language they speak.
The Power of Modern Tools
It wasn't that long ago that professional-grade audio translation was a massive headache. The process was slow, complicated, and incredibly expensive, pretty much reserved for big corporations or film studios. This left smaller creators and businesses stuck with clunky, automated tools that missed all the cultural subtleties and spit out robotic-sounding translations.
Thankfully, that's all changed. Today's browser-based tools have completely simplified the workflow, putting high-quality results within anyone's reach.
A platform like TranslateMom, for example, gives you a full "Studio" environment to manage the entire project from start to finish. You just start a New Task by dragging a file into your browser or even just pasting a link from YouTube or TikTok. From there, you pick your source and target languages and decide if you want a transcript, a translation for subtitles, or a full AI-dubbed audio track. This kind of accessibility empowers anyone to create professional content that truly connects with a global audience.
Choosing Your Translation Method
Before you jump into translating your Spanish audio, you need to figure out what you actually want the final result to look and sound like. The best way to do that depends entirely on your content, who you're trying to reach, and where they'll be watching.
Each approach creates a totally different experience for your audience. Let's break down the three main ways you can tackle this, so you can pick the one that makes the most sense for your project.
Generating Subtitles or Captions
This is probably the most common and flexible route. It starts by creating a text file of everything said in Spanish and then translating that text into English. You end up with a standard SRT or VTT file, which you can use almost anywhere.
This is a fantastic choice for:
- YouTube Videos: It lets viewers decide whether to turn on English subtitles, giving them more control.
- Professional Video Editing: You can drag an SRT file right into programs like Premiere Pro or Final Cut Pro and style the subtitles however you want.
- Improving Accessibility: Subtitles are essential for making your content available to viewers who are deaf or hard of hearing.
With a tool like TranslateMom, this is super simple. Just upload your file, pick "Spanish" as the original language and "English" as the target, then select the Translation service. The tool will give you a time-coded script that you can easily polish up in the Studio editor.
Using AI Dubbing for a Voice-Over
Want to create a more seamless experience? AI dubbing actually replaces the original Spanish voice with a new, AI-generated English one. This means your audience can just watch and listen without having to read along. It makes the content feel like it was originally made for an English-speaking audience.
Dubbing is your best bet for:
- Corporate Training Videos: Helps employees stay focused on the visuals instead of getting distracted by reading subtitles.
- Documentaries and Films: This is how you create that polished, cinematic feel for an international audience.
- Marketing and Ads: Localizing your promotional content makes it feel more authentic and native to the market you're targeting.
When you translate Spanish to English audio in TranslateMom, just choose the Dubbing option during setup. The platform then creates a brand-new audio track perfectly synced to your video, replacing the Spanish speaker with a clear English voice. If you want to dive deeper into the specifics, check out our full guide on how to translate audio to English.
Creating a Transcript for Same-Language Captions
Okay, so this isn't technically translation, but it's often the first step and a powerful tool in its own right. Transcription simply converts the spoken Spanish into Spanish text. This is a game-changer for social media, where tons of people scroll with their sound off.
Transcription is perfect for:
- Social Media Clips: Adding Spanish captions to your Spanish video on platforms like TikTok or Instagram will seriously boost engagement.
- Language Learning: A transcript is an amazing study aid for people trying to learn Spanish, as they can read along with the native speaker.
My Take: There's no single "best" method. It's all about what you need. Subtitles give you flexibility, dubbing creates an immersive experience, and transcription is key for reaching your original language audience on social media.
Still not sure which way to go? This little table should help clear things up.
Comparing Audio Translation Methods
| Method | Best For | Pros | Cons |
|---|---|---|---|
| Translation (Subtitles) | YouTube, E-learning, Professional Editing | Versatile, user-controlled, accessible | Can distract from visuals for some viewers |
| Dubbing (New Audio) | Films, Training, Marketing Videos | Immersive, professional feel, no reading needed | AI voice might not perfectly match original tone |
| Transcription (Captions) | Social Media, Language Learning | Boosts engagement with sound off, aids study | Not a translation; serves original language only |
At the end of the day, thinking about your viewer's experience first will always point you in the right direction.
Your Workflow for Flawless Audio Translation
Alright, let's get into the good stuff. Moving from theory to practice is where the real magic happens. When you need to translate Spanish to English audio, having a solid workflow is your best defence against wonky results and wasted time. Using a modern, browser-based tool takes what used to be a complicated technical chore and turns it into just a few simple clicks.
Let's walk through the entire process, from getting your Spanish audio or video file into the system to exporting a polished English version that’s ready for your audience. We'll use the workflow inside TranslateMom as our guide, since it’s built for exactly this kind of thing.
Kicking Off Your Translation Project
First things first: you need to get your media into the app. This initial step is designed to be as easy as possible, whether your content is on your computer or already online.
On the New Task screen, you've got two main ways to go:
- File Upload: Just drag and drop your video or audio file right into the browser. This works great for large files, so it's perfect for high-res interviews or those long-form video podcasts. (Pro Tip: Press
Fon your keyboard to instantly open the file picker). - Link Import: If your content is already on platforms like YouTube, TikTok, X (formerly Twitter), or Instagram, just paste the URL. The app will pull the media in for you—a huge time-saver. You can see this in action in our guide on how to download a YouTube transcript.
Once your file is in, it's time to tell the tool what to do. You’ll set your Source Language to ‘Spanish’ and your Target Language to ‘English’. Then, just pick what you want: ‘Translation’ for subtitles or ‘Dubbing’ to create a brand new English audio track.
The Studio: Where You Make It Perfect
This is where you'll spend most of your time, and for good reason. No AI is perfect, and that human touch is what takes a translation from good to great. The TranslateMom Studio is a professional-grade video localization tool right in your browser, built for creators, translators, and anyone who needs to caption, translate, and dub videos without pulling their hair out.
The workspace is split into a few key areas to make editing feel natural. You'll see your video preview on the left, a timeline showing the audio waveform, and a scrolling list of all your subtitle segments on the right.
Pro Tip: Learn the keyboard shortcuts right away. Seriously. Simple things like using the
Spacebar to play and pause will speed up your review process like you wouldn't believe. It lets you keep your hands on the keyboard and your eyes on the content.
That visual audio waveform is your best friend for getting the timing just right. You can see exactly where someone starts and stops talking, then just drag the edges of a subtitle to line it up perfectly. No more awkward delays.
Mastering the Subtitle Editor
The heart of the work is reviewing and polishing the AI-generated text. A good editor gives you tools that make this fast and accurate.
For instance, a Split View is a game-changer. It shows you the original Spanish transcript right next to your English translation, line by line. This makes it incredibly easy to check for context and nuance without having to flip between different windows.
As you edit, a smart editor will automatically pause the video when you click on a line of text. This small feature is a lifesaver, letting you focus on typing without the video running on in the background. It gets rid of a common headache and makes proofreading so much smoother.
The image below shows the main ways you can get your Spanish audio in front of an English-speaking audience.
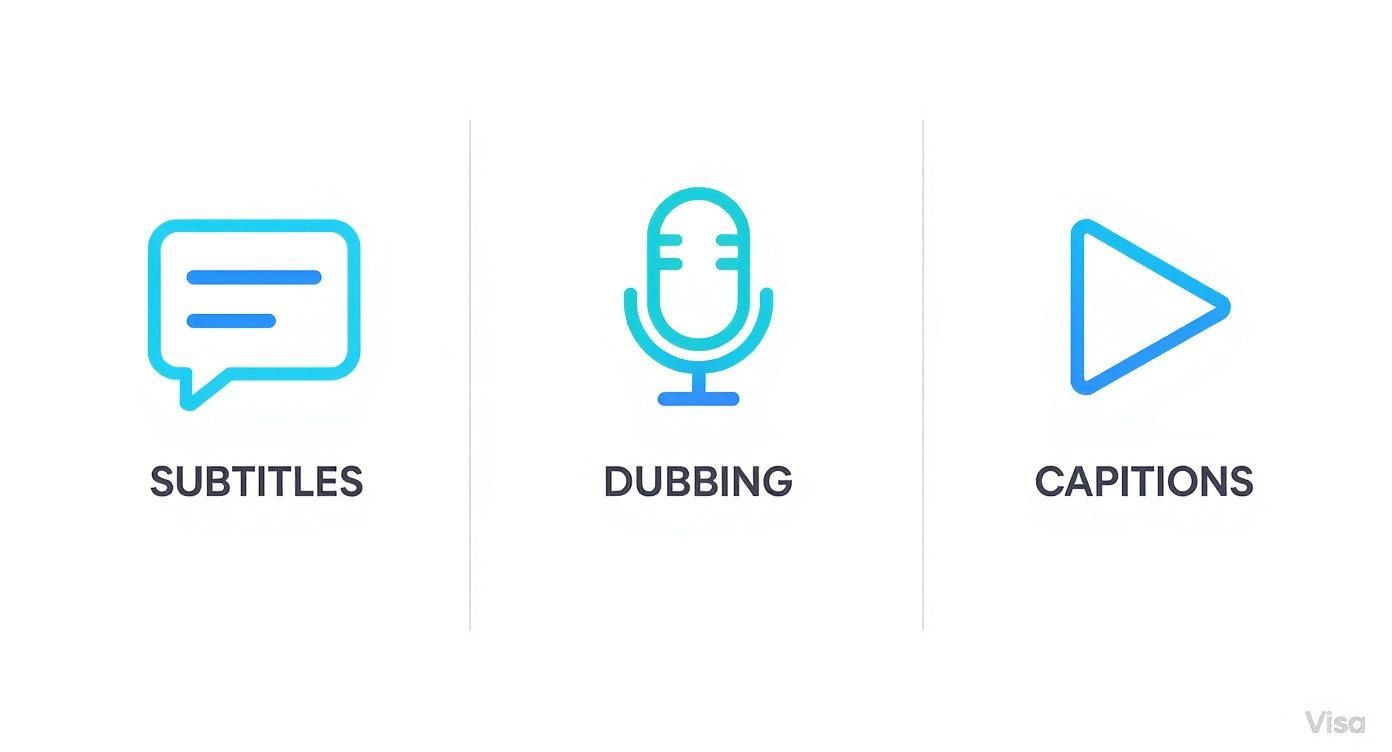
Each of these—subtitles, dubbing, and captions—has its own purpose, and the right tool lets you create any of them from the same starting point.
AI-Assisted Final Touches
Today's workflows don't just stop at translation; they also give you tools to polish the final product. To get the most out of each step, from transcription to voice synthesis, it helps to know about the latest AI tools for content creators.
Inside a dedicated studio tool like TranslateMom, you'll often find an AI tab with some helpful features. These can automatically fix formatting mistakes, rewrite clunky sentences to make them flow better, or even whip up a quick summary of your video. This is especially handy for creating descriptions or social media posts for long videos.
And what if you change your mind or want to add another language? You don't have to start over. A good system will have a Translate (Redo) function that lets you run the translation again into a different language, using the source transcript you already perfected. This saves a massive amount of effort when repurposing content.
Finally, for teams, collaboration is key. Look for features that let you leave suggestions or comments on specific lines instead of editing them directly. This allows a senior translator or manager to review changes before they go live, keeping quality high. Your work should also be saved to the cloud automatically, so you never lose progress if your browser crashes.
Taking Your Translation From Good to Great
An AI translation gets the basics done, but a few thoughtful tweaks can elevate your content from merely functional to genuinely engaging. This is where the real magic happens. It’s not just about swapping words; it’s about crafting a polished, professional viewing experience.
With the right tools, you can add those finishing touches that not only boost engagement but can even turn your content into a powerful learning tool.

This whole refinement process is about taking control of the visual elements tied to your audio. In a tool like TranslateMom, these controls are all conveniently grouped in the Studio Tabs, giving you a command centre to perfect how your final video looks and feels.
Nail Your Brand Vibe by Customizing Subtitle Styles
Your subtitles should feel like they belong to your brand, not just some generic text slapped on a video. Styling them to match your visual identity is a small detail that makes a huge professional impact.
Head over to the Style tab, and you can start playing around with a few key settings:
- Font Family: Pick a font that matches your brand’s personality. Is it sleek and modern? Classic and traditional? Fun and playful?
- Size and Colour: Make sure your text is easy to read. You can tweak the font size and colour, and even plug in specific hex codes to perfectly match your brand’s colour palette.
- Visual Effects: Give your subtitles a little extra pop with an outline, a subtle shadow, or a semi-transparent background. This is a lifesaver for ensuring readability, especially when the video footage behind it is busy or bright.
The best part is that you see these changes happen live on the video player. No guesswork. This instant feedback loop saves a ton of back-and-forth.
Boost Engagement With Dynamic Karaoke-Style Captions
Want to grab and hold your viewer's attention, especially on social media? Try "Karaoke" style captions. You've seen them—the animated subtitles where words are highlighted in real-time as they're spoken.
This dynamic effect is fantastic for drawing the viewer's eye down the screen and reinforcing what’s being said. It's a proven trick to increase both engagement and how much people actually remember. You can apply these animations right from the Style tab in TranslateMom. The app’s smart sync technology handles the word timings automatically, so even if you go back and edit the text, the animation stays perfectly locked to the audio.
This feature is a total game-changer for short-form content. Animating the text turns passive scrolling into an active experience, which can seriously slash drop-off rates on platforms like TikTok and Instagram Reels.
If you want to dive deeper into how audio and text work together, check out our guide on achieving English translation with sound.
Turn Your Videos Into a Learning Tool With Dual Language Mode
Creating content for an audience that’s trying to learn a new language? Then you’ll want to flip on the Dual Language Mode.
This feature stacks both the original Spanish and the translated English subtitles on top of each other, right on the video. It's an incredibly powerful way for viewers to compare the languages side-by-side, turning any video into a practical, immersive lesson. It helps reinforce vocabulary and sentence structure in a way that just feels natural.
Add a Professional Watermark
The final polish for any branded content is your logo. A watermark not only protects your work but also builds brand recognition every time your video gets shared. Instead of dealing with a separate video editor later, you can bake it right into your translation workflow.
That’s what the Brand tab is for. Just upload your logo, resize it, and drag it to wherever it looks best—top-right, bottom-left, you name it. This ensures every video you translate from Spanish to English audio and export looks sharp, professional, and is clearly yours.
Alright, you've put in the work to translate, tweak, and style your Spanish audio. Now for the final step: getting your project out into the world.
How you export really comes down to where the video is headed and who you want to see it. Picking the right option is key to making sure your translated content looks professional and works perfectly on every platform.
But before you hit that export button, I always recommend a quick quality check. This final once-over can catch tiny mistakes that could otherwise take away from the viewer's experience.
Your Pre-Export Quality Checklist
Think of this as your last proofread before you publish. Give your project one final watch-through and ask yourself a few things:
- Is the timing perfect? Are the subtitles popping up and disappearing right when the speaker starts and stops? The waveform is your best friend here for spotting and fixing any little delays.
- Any typos or grammar mistakes? Read every single line of your English translation. You'd be surprised what a fresh set of eyes can catch.
- Does the style match my brand? Check your font, colour, and positioning. Is it all consistent with your other content? Is your logo looking sharp and placed just right?
- Are speaker changes clear? If you've got more than one person talking, is it obvious who is saying what? Double-check your formatting to make sure the conversation is easy to follow.
Honestly, taking just five extra minutes for a final review is the difference between an amateur-looking project and a polished, professional one. It's always worth it.
Once you’re happy with how everything looks, you're ready to export.
Deciding Between Burn-In Video and Subtitle Files
When you're ready to export from TranslateMom, you’ve got two main choices. The one you pick depends on what you need to do, whether it's a quick share on social media or a more complex video editing workflow.
The first option is to Burn-in (Export Video). This kicks off a process that creates a completely new MP4 video file. All your styled subtitles, karaoke effects, and brand logo get permanently "baked" into the video itself. It's a single, self-contained file ready for upload.
This method is perfect for:
- Social Media Platforms: Platforms like Instagram, TikTok, and LinkedIn love single video files where the captions are always visible.
- Simplicity: No need to juggle separate files. Just upload the video, and you're good to go.
- Guaranteed Styling: Your custom fonts and colours will look exactly how you designed them, no matter where the video is viewed.
Your other choice is to Download Subtitles. Instead of making a new video, this option just gives you the text files, usually as an SRT or VTT file. These files have your translated text paired with the exact start and end timecodes for each line.
This is the standard workflow for pros and is the best choice when you need:
- Flexibility in Editing: You can import SRT files directly into software like Adobe Premiere Pro or Final Cut Pro, giving you total control over styling.
- Platform Compatibility: YouTube and other video hosts let you upload a separate subtitle file. This gives viewers the option to turn captions on or off, which is a much better user experience.
- Archiving and Repurposing: A separate text file is fantastic for your records or for turning the content into a blog post or article later on.
So, which one is right for you? If you just need a quick, shareable video, burning in the subtitles is faster. But for more professional workflows where you need more control—or want to translate Spanish audio to English for platforms like YouTube—downloading the subtitle file is the way to go.
Common Questions About Spanish Audio Translation
Diving into audio translation for the first time? You've probably got questions. It's totally normal. Whether you're trying to figure out the best file format or just wondering if AI is really good enough, getting the right answers upfront makes everything go smoother.
Let's walk through some of the most common questions people ask when they start to translate Spanish to English audio.
How Accurate Is AI for Spanish to English Audio Translation?
Honestly, modern AI translation has gotten impressively good. We're often seeing 95-98% accuracy for Spanish audio that's clear and well-recorded. Tools like TranslateMom don't just translate word-for-word anymore; they understand the context, which means the output sounds far more natural and less like a robot.
Of course, it's not magic. Things like heavy background noise, people talking over each other, or really thick regional accents can trip it up.
Think of the AI translation as an excellent first draft. It does the heavy lifting for you. But for a flawless final product, you should always plan on a quick human review in an editor to catch subtle cultural meanings or fix any clunky phrasing.
What Is the Best Format for English Subtitle Files?
When it comes to subtitle files, you'll almost always be dealing with SRT (.srt) and VTT (.vtt). They're the two big players, and which one you choose just depends on what you need to do.
- SRT (SubRip Text): This is the old reliable. It’s the most widely supported format out there and will work on virtually any video player, social media site, or editing software. If you're not sure what to use, SRT is always a safe bet.
- VTT (Video Text Tracks): This is the newer, more powerful option. VTT lets you do more with your subtitles, like adding colour, changing fonts, and positioning text right inside the file. It's perfect for web video players where you want that extra bit of creative control.
Inside TranslateMom, you can easily download your subtitles in either format right from the export screen. No fuss.
Can I Translate Audio Directly from a YouTube or TikTok Link?
Yes, and it's a huge time-saver! The old way of downloading a video just to re-upload it somewhere else for translation is a pain. Modern tools are built to skip that whole process.
With a tool like TranslateMom, you just grab the URL from YouTube, TikTok, X (formerly Twitter), or Instagram, paste it into the New Task screen, and you're good to go. The app pulls in the video and audio automatically, getting it ready for translation in just a few seconds.
How Should I Handle Multiple Speakers in the Audio?
Making a conversation easy to follow is key, especially with multiple people talking. The good news is that smart AI tools can handle this with something called "speaker diarization." This feature automatically detects who is speaking and labels them in the transcript (like Speaker 1, Speaker 2).
Your job is to then jump into an editor, like the TranslateMom Studio, and clean up those labels. You can assign the speakers' actual names or roles to make it crystal clear. A good rule of thumb is to start a new line for each speaker, maybe with their name or a simple hyphen, so your audience never gets lost. If you're looking for more general tips on these kinds of tools, resources like Soreel's frequently asked questions can be a great help.
Ready to tackle your next audio translation project with confidence? TranslateMom provides a complete studio environment to subtitle, translate, and dub your videos effortlessly. Get started today and see how easy it is to reach a global audience. Visit https://www.translate.mom to begin your first task.