You've spent hours, maybe even days, crafting that perfect YouTube video. But once it's live, is it really doing all it can for you?
Turning your YouTube video to text isn't just a techy task for the sake of it. It’s a game-changing strategy that makes your hard work more discoverable, accessible, and way more versatile. You're basically unlocking a whole new level for your content, turning spoken words into assets that work for you 24/7.
Why Turning YouTube Videos Into Text Unlocks Growth
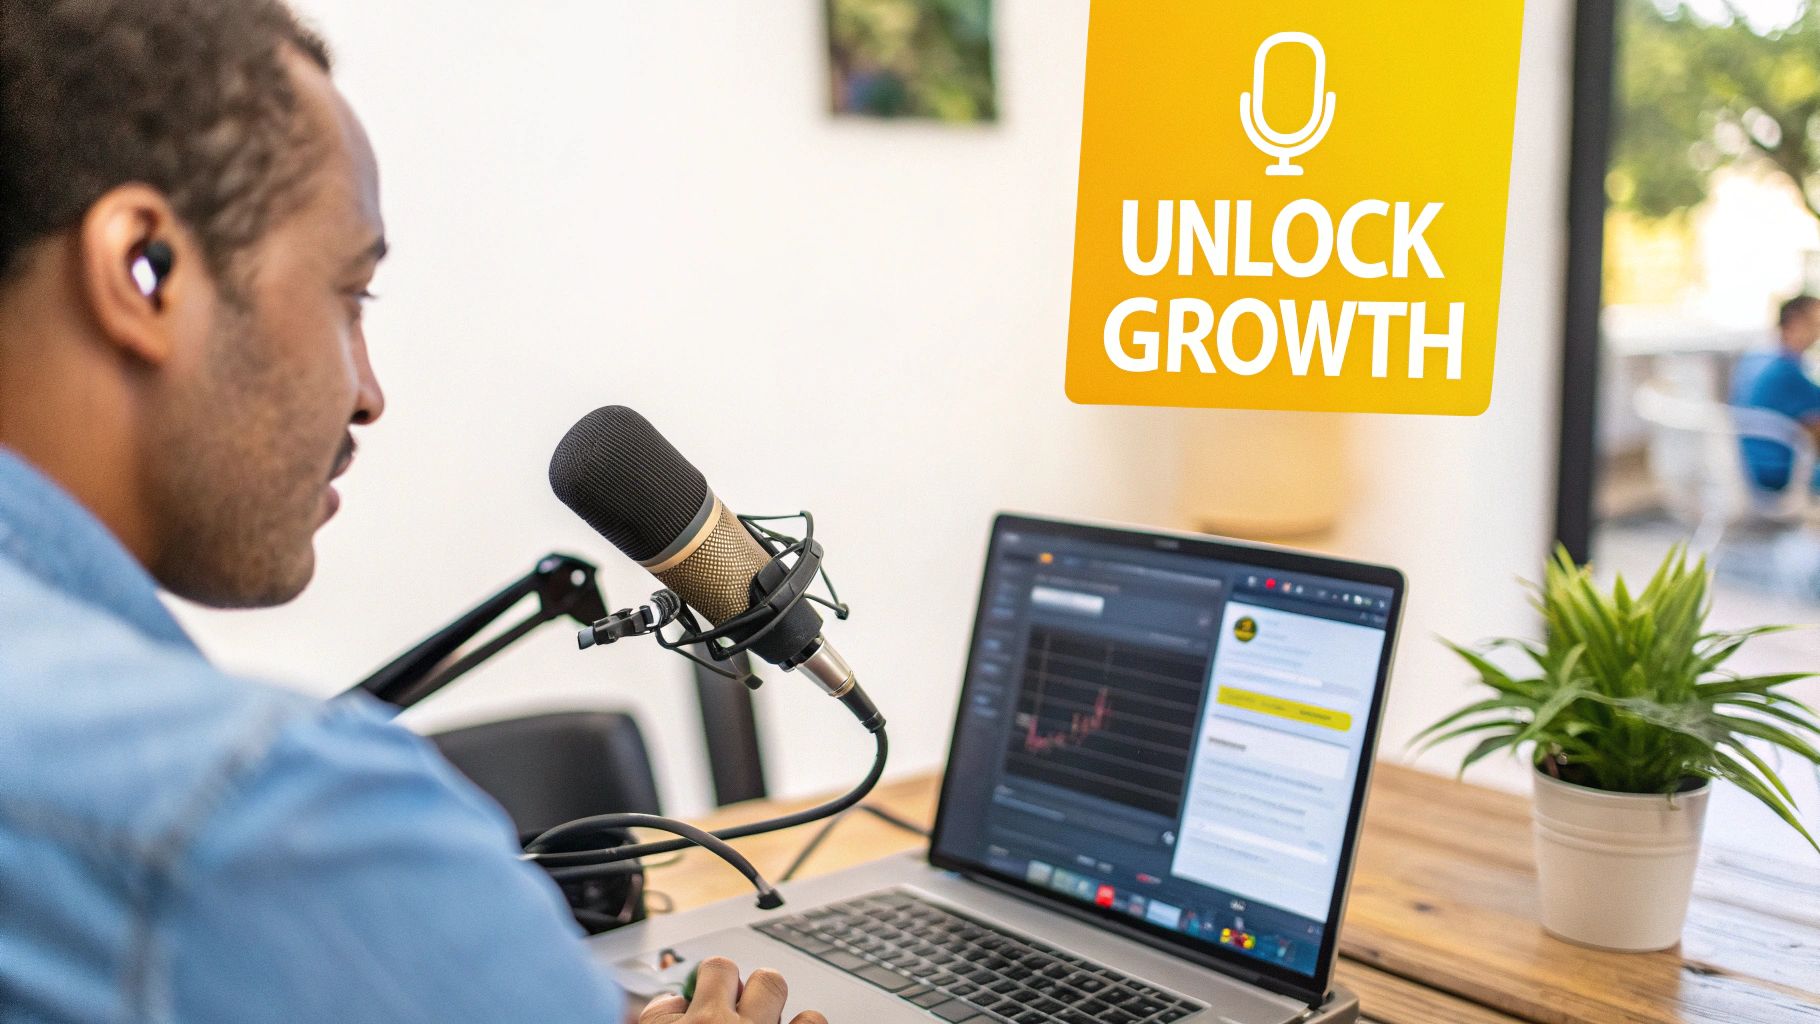
Think of it this way: converting your YouTube video into text is all about smashing the barriers between your message and a much bigger audience.
Video is an amazing medium, no doubt. But to a search engine, the actual content—all your valuable insights—is invisible. Google can’t listen to your killer analysis or witty commentary, but it can crawl and index every single word of a text transcript. This is what we call "SEO rocket fuel."
Suddenly, every word you spoke becomes indexable. This lets you rank for all sorts of long-tail keywords you probably never even thought about. A Toronto-based podcaster, for instance, can now grab the attention of a whole new crowd who would rather read an article than listen to a show.
Expanding Accessibility and Reach
Accessibility is huge. Transcripts and captions open your content up to viewers who are deaf or hard of hearing. It also helps people watching in a noisy coffee shop or silently on their commute. This isn't just some small niche; it's a massive slice of the potential audience you could be missing.
Besides full transcripts, the real magic is how easily you can create captions. If you want to dive deep into how that boosts your numbers, check out this guide on how to add captions to videos for more views.
Showing you care about inclusivity doesn't just grow your audience; it makes you look more professional. To get the basics down, you can learn more about the different types in our guide on the meaning of closed captions.
A Goldmine for Content Repurposing
A transcript is pure gold. Seriously. It's a mountain of pre-written material just waiting for you. Instead of staring at a blank page, you can instantly spin your video content into:
- Blog Posts: Easily turn a 10-minute video into a detailed, SEO-friendly article.
- Social Media Snippets: Pull out those punchy quotes and key stats for Twitter, Instagram, or LinkedIn.
- Email Newsletters: Give your subscribers a quick summary of the video’s key takeaways.
- Training Materials: An e-learning team in Vancouver could convert their video tutorials into easy-to-read written guides for their online courses.
This kind of efficiency is a lifesaver, especially in a place like Canada where video is king. Back in 2022, a whopping 72% of Canadians watched user-generated videos on platforms like YouTube. That's a huge, switched-on audience just waiting for your content, in whatever format they prefer. (You can find the data in Statistics Canada's Internet Use Survey if you're curious!)
Getting Your Video Ready for Transcription
Alright, first things first. Before you can get that perfect transcript, you need to get your YouTube video into TranslateMom. Don't worry, this part is incredibly simple and designed to get you from A to B without any technical nonsense. The process begins at the New Task screen.
The quickest way is to just grab the video link. If your content is already on YouTube, Twitter (X), TikTok, or Instagram, just copy the URL, paste it into the Link Import box, and let the app pull the video for you. Super handy for content that's already out in the wild.
But what if you're working with a video file sitting on your computer? No problem. You can literally just drag and drop it right into your browser window. Or, for a pro move, hit the F key—it's a neat little keyboard shortcut that pops open the file selector instantly.
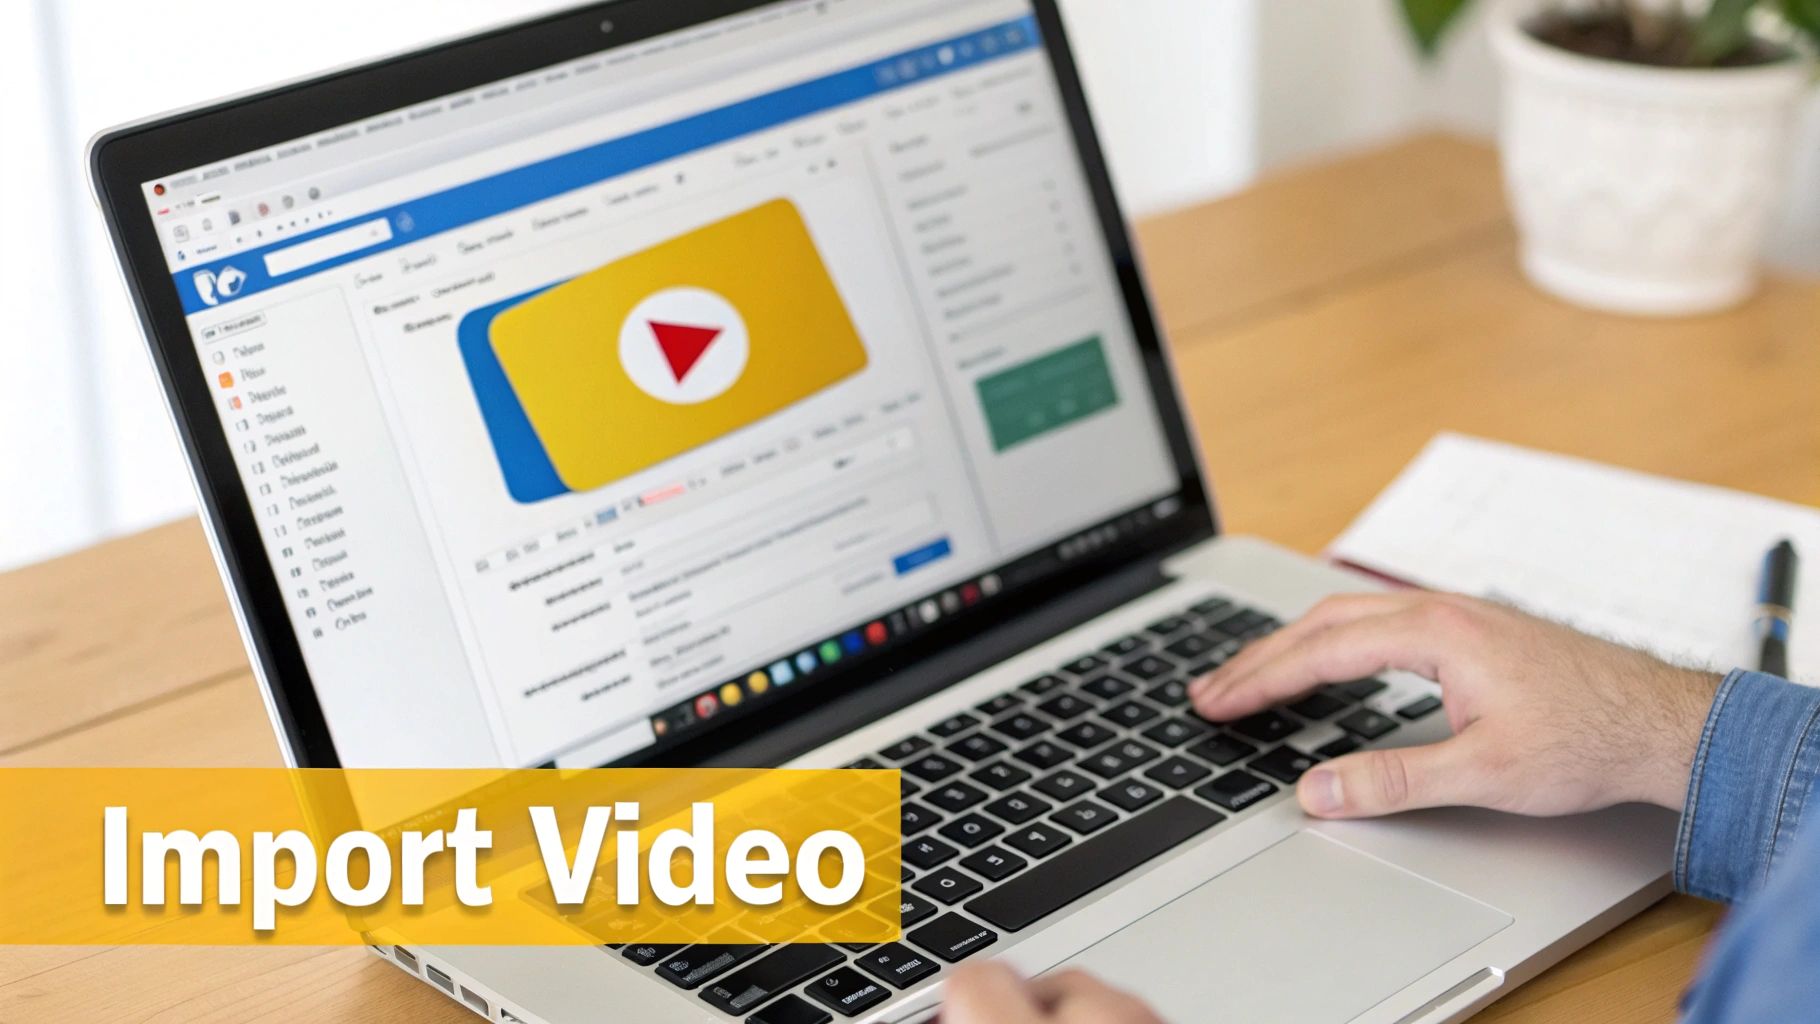
So, which method should you choose? It really just depends on where your video lives.
Choosing Your YouTube Video Import Method
Decide whether to use a direct link or upload a file for your transcription task in TranslateMom.
| Import Method | Best For | Key Benefit |
|---|---|---|
| Pasting a Link | Videos already published on platforms like YouTube, X, or TikTok. | Incredibly fast—no need to download the video to your computer first. |
| Uploading a File | Raw video files, drafts, or content not yet posted online. | Gives you direct control and is perfect for pre-publication workflows. |
Ultimately, both paths lead to the same place. This flexibility just means you can start your transcription project from wherever your content happens to be, making the whole process feel seamless.
Telling the AI What to Do
Once your video is loaded, you'll enter the processing phase where you give the AI its instructions. Getting this right from the start is the key to getting a super-accurate transcript back.
First up, you need to specify the Source Language. This is simply the language being spoken in the video. Being precise here is non-negotiable for a good result.
Next, you'll choose a service to tell the system what you actually want it to do. You've got a few choices:
- Transcription: This is what you'll pick for same-language captions. If your video is in English, this option spits out English captions.
- Translation: Want to reach a new audience? Choose this to create subtitles in a different language. You'll set the Source Language (like English) and a Target Language (like French).
- Dubbing: This one's pretty cool. It generates a whole new AI audio track for your video in the target language you select.
Pro Tip: I can't stress this enough: double-check that the Source Language you selected perfectly matches the language in the video. Even slight mis-matches, like picking "English (US)" for a speaker with a thick Scottish accent, can throw off the AI. A little precision here saves a ton of editing time later.
Think of this setup as your creative brief for the AI. By defining the source and the desired outcome, you're setting the system up for success. If you want to dive deeper into the nuts and bolts of this, our guide on how to get YouTube transcripts has even more strategies. Getting these initial settings right ensures you’ll get a clean, accurate text file that’s ready for you to polish up.
Editing and Refining Your Transcript with Precision
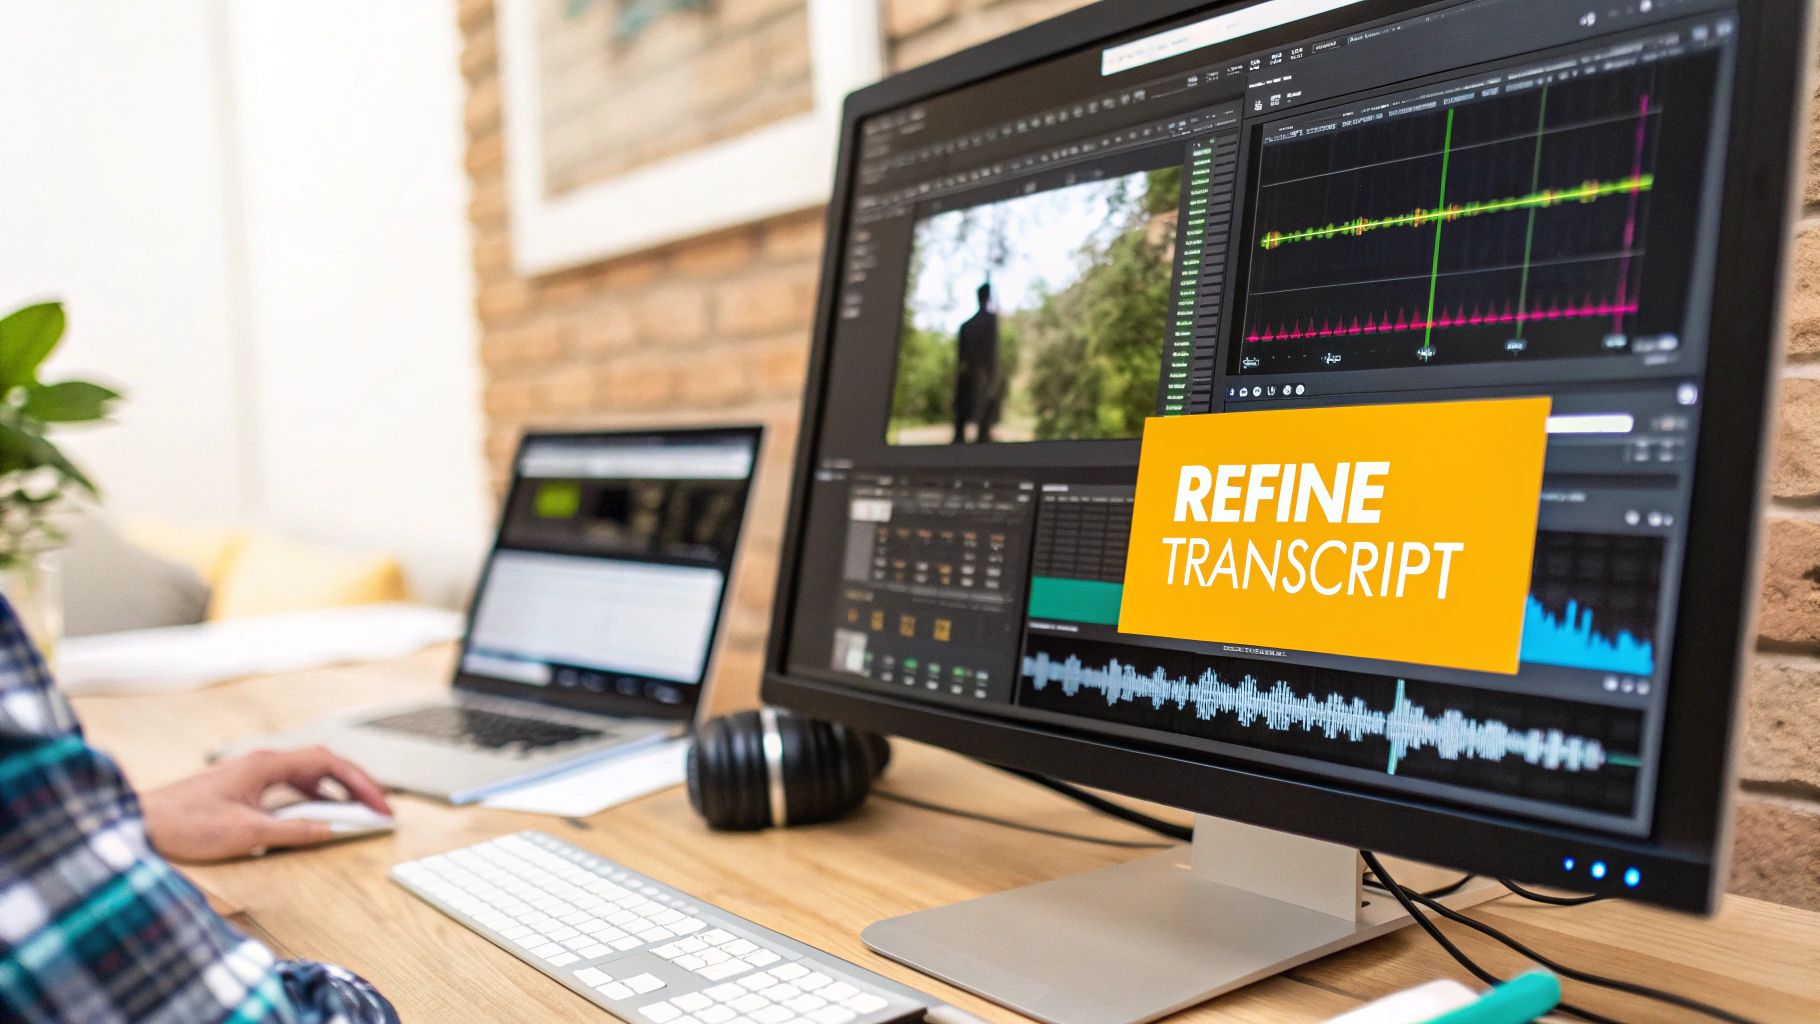
Alright, the AI has done the heavy lifting and given you a first draft. Now comes the most important part of converting your YouTube video to text: the human touch. This is where you'll turn that automated transcript into a polished, accurate, and professional final product.
Your command centre for this is TranslateMom’s Studio Workspace. This environment is designed to make editing fast and intuitive. It's organized into three zones that work together: the video player, the interactive subtitle editor, and the sidebar with all your styling and AI tools.
The Special Player and Subtitle Editor
Right in the middle of the Studio, you've got a custom video player that shows you exactly what your audience will see. As you tweak the text or adjust the timing, the preview of your captions, karaoke effects, and logos updates in real-time. No more guessing how it will look.
Next to the player is the subtitle editor, which is essentially a live, scrolling list of every line in your transcript. Making corrections here is super straightforward.
- Instant Editing: Just click on any line of text and start typing. The video automatically pauses so you can focus without losing your spot.
- Precision Timing: Every line has its own start and end time. You can manually type in new values, right down to the millisecond, to get the sync absolutely perfect.
This setup makes refining the text from your YouTube video feel less like work and more like crafting an experience for your viewers.
Fine-Tuning with the Audio Waveform
For those of us who are sticklers for perfect timing, the audio waveform is a real game-changer. It’s a visual map of your video's sound that shows up right in the editor, letting you see the exact moments where speech starts and stops.
Instead of just listening and guessing, you can visually line up your subtitles. Simply drag the start and end points of any caption to match the waveform. This is perfect for cutting out long pauses or making sure the text appears the instant someone begins talking.
Pro Tip: If you're translating content, you have to try the Split View. One click and you can see the original source text right next to your translation. This side-by-side view is a lifesaver for making sure the meaning and nuance of the original are perfectly captured.
The Power of the Studio Tabs
The sidebar is where you go beyond just text and add that professional polish. These tabs control the look, feel, and advanced functions of your captions.
| Tab Name | Primary Function |
|---|---|
| Captions | This is your main workspace for editing text and timing. |
| Style | Customize fonts, colours, shadows, karaoke effects, and backgrounds. |
| Brand | Upload your logo and position it as a watermark. |
| AI | Access tools to rewrite captions or summarize content. |
From fixing a simple typo to adjusting the timing to match a speaker's natural rhythm, the Studio Workspace gives you full control. You have all the tools you need to produce a flawless final transcript that represents your brand perfectly.
Getting a clean transcript is just the beginning. The real magic happens when you transform that raw text into a polished, branded video that grabs people's attention and won't let go. Once you've got the words right, it's time to dive into the features that will make your content stand out.
Inside TranslateMom's Studio, the Style tab is where all the fun starts. This is your creative control panel. You can tweak everything from the font family and text size to the colour, outline, and even add shadows or a background. Best of all, every little change you make shows up on the video player instantly, so you see exactly what your audience will see.
Make Your Captions Pop
For social media, static captions are old news. You need something dynamic to stop the scroll. That's where "Karaoke" style captions come in. These are the subtitles that highlight words as they're spoken—an incredibly effective way to keep viewers hooked, especially when they're watching on their phones.
- How it works: Just head to the Style tab and pick one of the animation presets or manually configure the effects.
- Keeps up with you: The app handles the word-by-word timing automatically. Even if you go back and tweak the text in a line, the smart sync feature will do its best to keep the animation perfectly aligned with the audio.
This single feature can turn a simple YouTube video to text file into a slick, shareable clip perfect for TikTok, Instagram Reels, or YouTube Shorts.
Add Your Brand's Professional Touch
A consistent look and feel across your content helps build recognition and trust. The Brand tab makes this easy. You can upload your logo or any custom watermark and drop it right onto your video. Just drag it to any corner and resize it until it looks right. It’s a simple move that gives your work a professional finish.
And if you're big on repurposing content, the AI tab is a game-changer. With just one click, you can get the AI to spit out a summary of your entire transcript. Think of the time you'll save! This is gold for writing YouTube descriptions, podcast show notes, or even a quick email newsletter blast, all without having to watch the video again.
Content repurposing is a key strategy for serious creators. In Canada, for instance, the average revenue per user (ARPU) on YouTube is an impressive $2.21. That figure reflects how well creators are monetizing their work beyond just ad revenue. Turning a YouTube video to text is a huge part of this, giving you blog posts and social updates that pull in organic traffic and boost that ARPU. You can find more stats like this on globalmediainsight.com's YouTube report.
Supercharge Your Workflow
Working with different languages? TranslateMom has a unique Dual Language Mode that's fantastic for educational or language-learning content. It neatly stacks the original language subtitles on top of the translated ones. So, a viewer can see both English and Spanish at the same time, which is an amazing tool for comparison.
Finally, the platform is built for teams. Instead of overwriting someone's work, you can "suggest" edits, letting a collaborator or manager approve them first. Everything saves to the cloud as you work, and there's a full version history, so if you ever mess up, you can roll back to an earlier save in seconds. No more lost work.
Exporting Your Transcript in the Right Format
Alright, you've polished your transcript to perfection. Now for the fun part: putting it to work. Getting the text out of your YouTube video is only half the battle; choosing the right export format is what makes it truly useful.
Inside TranslateMom, you have two main export options. Your choice really boils down to a simple question: what are you trying to accomplish with this transcript?
Burn-in Video vs. Downloadable Files
First up, you can "Burn-in" your subtitles directly onto the video. This creates a fresh video file with the captions permanently stamped onto the frames, along with any styling you applied and your logo. This is also called creating "open captions."
This is the go-to option for platforms like Instagram Reels, TikTok, or X (formerly Twitter), where users don’t have an option to turn captions on or off. It ensures your subtitles are always visible, exactly how you designed them.
Your other route is to download the text as a separate subtitle file. This gives you a ton of flexibility for all sorts of things, from uploading caption tracks to video players to repurposing the text for your blog.
If you're unsure which way to go, this quick decision tree should clear things up.
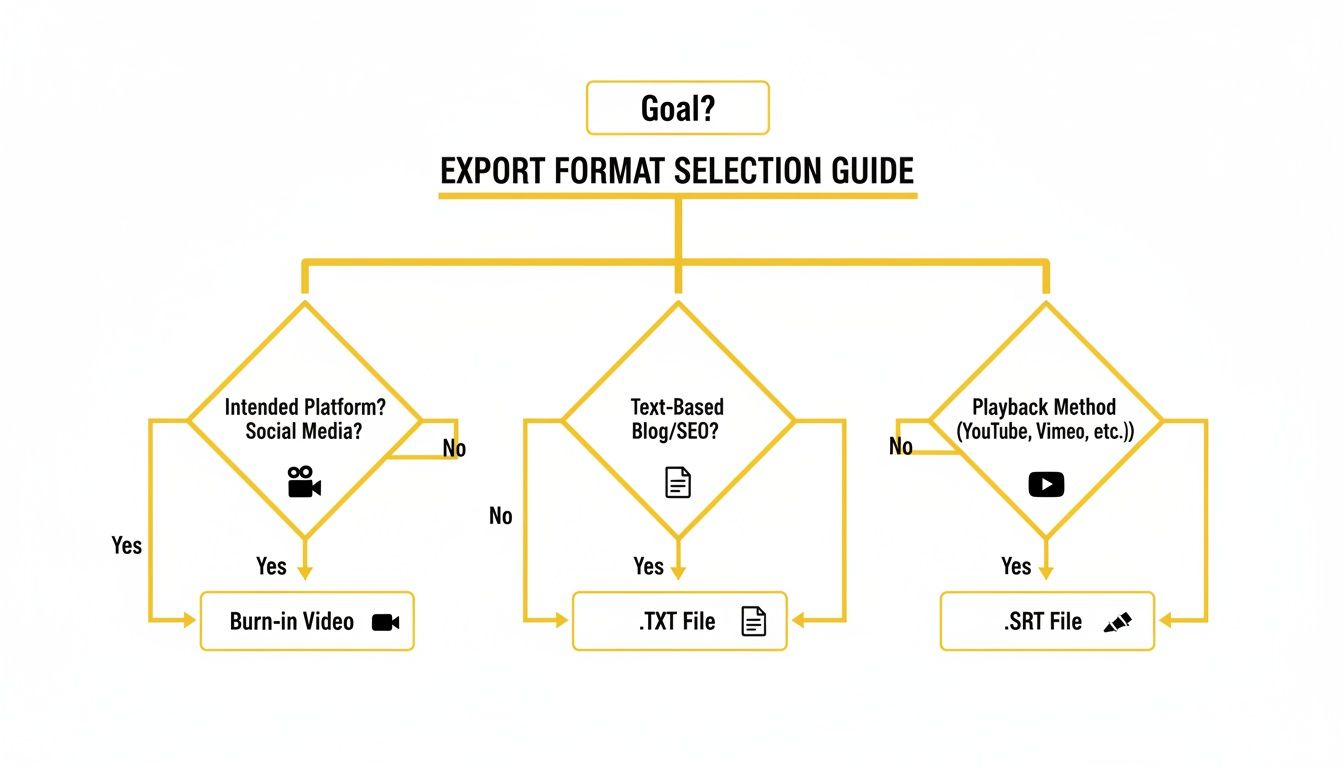
As you can see, the platform where your content will live—whether it's social media, a blog post, or a video player—is the single biggest factor in picking the right file type.
Understanding the Key File Formats
When you hit that download button, you’ll see a few different file extensions. They might look similar, but each one has a very specific job.
Here’s a quick rundown of what you need to know about the most common formats.
Choosing The Right Export Format For Your Needs
| File Format | Common Use Case | Platform Compatibility |
|---|---|---|
| .SRT (SubRip Subtitle) | The industry standard for subtitles and closed captions. | YouTube, Facebook, Vimeo, most video editing software (Premiere Pro, Final Cut). |
| .VTT (WebVTT) | Designed for modern web video players. Supports more styling options. | HTML5 video players, some online course platforms. |
| .TXT (Plain Text) | A simple text file with no timestamps, just the dialogue. | Blogs, show notes, articles, social media posts, content repurposing. |
Making the right choice here saves a ton of headaches down the line. A plain **.TXT** file, for instance, is perfect for drafting an article. But if you realize later that you need timestamps for that text, you’d have to go back and re-export.
It's much easier to go from a timed format (like SRT) to a plain text file than the other way around. If you ever find yourself with a plain script that needs timing, we've got a helpful guide on how to convert a TXT file to SRT format.
Once your transcript is ready, you can generate captions for any visual media. For some practical tips on this, check out a guide on how to add captions. By selecting the correct format from the get-go, you ensure all your hard work pays off wherever you share your content.
A Few Common Questions We Get
When you're turning YouTube videos into text, a few questions always pop up. Here are some quick answers to help you get the best results.
Just How Accurate Is AI Transcription for YouTube Videos?
You'd be surprised. Modern AI tools like TranslateMom can hit over 95% accuracy right out of the gate, especially with clear audio. The AI does all the tedious work, giving you a solid draft in just a few minutes.
Of course, no AI is perfect. A few things can trip it up:
- Audio Quality: If there's a lot of background noise or the mic is terrible, the AI might struggle.
- Speaker Clarity: Thick accents, super-fast talkers, or people talking over each other can make things tricky.
- Niche Jargon: Highly technical or specialized terms can sometimes get mixed up.
This is exactly why having a good editor is so important. The AI gets you 95% of the way there, and the Studio Workspace lets you quickly polish up the last 5% for a perfect transcript.
Can I Transcribe a YouTube Video That Isn't in English?
Absolutely. We built TranslateMom for a global community, so it handles dozens of languages.
When you kick off a new task, you just tell the system what language is being spoken in the video by setting the Source Language. It will then generate an accurate transcript in that original language.
From there, you can even pick a Target Language to translate the subtitles. It's a game-changer for reaching a whole new international audience.
What's the Difference Between SRT and VTT Files?
When you convert a YouTube video to text, you'll mostly run into two file types: SRT and VTT. They look similar, but they're for different jobs.
- SRT (SubRip Text): This is the old faithful. It’s pretty much the universal standard and works everywhere—YouTube, Facebook, Vimeo, and editing software like Premiere Pro. For most people, SRT is the file you want.
- VTT (WebVTT): This is the newer kid on the block, designed for modern web video players (HTML5). It lets you do fancier things with styling, like changing colours and fonts. It's perfect if you're embedding a video directly on your own website and want more control.
My advice? Stick with SRT for maximum compatibility, especially on social media. Use VTT only when you need custom styling for a video on your own site.
Is It Legal to Transcribe Someone Else's YouTube Video?
This is a really important one. If you're transcribing a video for your own personal use—like for study notes or research—you're generally in the clear under fair use or fair dealing rules in places like Canada.
But if you plan to republish that content in any way, things change. Posting the transcript on your blog or using the subtitled video publicly requires permission from the original creator.
Don't skip this step. Republishing someone else's work without their okay is a copyright issue. Always be respectful of other creators' work.
Ready to see what your video content can really do? With TranslateMom, you can turn any YouTube video into an accurate, editable transcript in minutes. Start your first project for free and discover how easy it is to make your content more accessible, searchable, and shareable.