While the best way to deal with background noise is to stop it at the source, let's be real—post-production cleanup is a fact of life for most creators. Luckily, the tools we have today make it shockingly easy to get rid of distracting hums, echoes, and other random sounds, giving your final video that crisp, professional audio that keeps people watching.
Why Clear Audio Is No Longer Optional
Honestly, nothing tanks a great video faster than bad audio. A few years back, viewers might have put up with a bit of wind noise or a low-level hum. Not anymore. Today, clean sound isn't just a nice-to-have; it's a baseline expectation. Your visuals can be incredible, but if your audience has to strain to understand you, they're gone.

This isn't just about what viewers prefer; it has a real impact on how your content performs. Annoying sounds from traffic, air conditioners, or even a subtle hiss from your equipment can kill your audience retention. It just feels amateur, and that can do some serious damage to your brand's credibility.
The Technical Mess of Noisy Audio
Beyond just how people perceive your video, noisy audio throws a wrench into the technical side of things, especially if you're trying to reach a global audience. The accuracy of all those amazing automated tools for transcription, subtitles, and AI dubbing is completely dependent on clean source audio.
- Transcription Nightmares: Background noise completely throws off AI transcription services, spitting out text that makes no sense. This leaves you stuck manually fixing subtitles for hours instead of just a few minutes. If you want to dive deeper into why this matters, check out the meaning of closed captions and their role in making content accessible.
- AI Dubbing Problems: For AI dubbing to work its magic, the software needs a clean vocal track to analyze speech patterns and generate a natural-sounding voice in another language. Noise messes with this process, leaving you with robotic or poorly synced audio.
- Accessibility Issues: Viewers who are hard of hearing depend on both clear audio and accurate captions. When noise muddles the dialogue, you’re basically shutting out a whole segment of your potential audience.
A New Professional Benchmark
The demand for high-quality audio has gotten so serious that it’s now a formal requirement in many professional circles. For example, producers creating public-sector and corporate training videos in California are now held to specific, measurable audio quality standards.
This has pushed them to adopt AI-powered noise-removal tools across the board, leading to a massive 40–60% reduction in background-noise complaints in their recorded training videos. As these California video production trends show, clean audio has become a key performance indicator.
The takeaway is simple: clean audio isn't a bonus feature anymore. It's a core part of any successful video, directly impacting engagement, brand perception, and your ability to use powerful tools to take your content global. The good news? Getting that professional sound is easier than it's ever been.
Choosing Your Noise Removal Toolkit
Before you can get rid of that distracting hum or gust of wind, you need to pick the right tool for the job. The world of audio cleanup software is pretty big, but your choices really boil down to three main categories. Picking the right one just depends on your budget, how much time you want to spend learning, and just how bad your noise problem is.
The good news? You don't need a Hollywood-level budget to get professional results. The real secret is matching the tool to your workflow, especially if your end goal is prepping a video for a localization tool like TranslateMom. For accurate AI transcription and dubbing, clean audio isn't just nice to have—it's essential.
Built-in Effects in Video Editors
Most professional video editing software—think Adobe Premiere Pro, DaVinci Resolve, or Final Cut Pro—comes with some basic audio repair tools already baked in. If you're already cutting your video in one of these programs, this is the easiest place to start.
These built-in effects are perfect for simple, consistent noises. I'm talking about things like:
- A steady air conditioner hum
- A persistent electronic hiss from your microphone
- Low-level ambient room tone
The biggest win here is speed. You can clean up your audio on the same timeline you're editing your video, no messy exporting and re-importing required. But be warned, these tools can be a bit of a blunt instrument. If you push them too hard, you’ll get that robotic, "underwater" sound that makes dialogue feel completely unnatural.
Dedicated Audio Editing Software
For way more control and precision, your next step up is a dedicated audio editor. The most popular free option by a long shot is Audacity, a powerhouse open-source tool that’s been a go-to for podcasters and creators for years. For professional work, you might look at tools like Adobe Audition or iZotope RX.
These programs give you a much more surgical approach. Instead of a single "denoise" slider, they let you capture a "noise print"—basically, a sample of just the background noise from a silent part of your recording. The software then uses this print to hunt down and remove only those specific frequencies from your entire track. It’s an incredibly effective method for constant background sounds and gives you a ton of control over the final product.
My Take: Using a dedicated audio editor adds an extra step to your workflow (exporting, cleaning, then re-importing), but the massive jump in quality for tricky audio is almost always worth the effort.
Specialized AI-Powered Tools
This is the newest and, honestly, the most impressive category: AI-driven noise removal apps and plugins. These tools are built for one specific purpose: to intelligently separate human speech from everything else. Unlike traditional denoisers that need a clean sample of the noise, AI tools can identify and eliminate complex, changing sounds like street traffic, café chatter, or unpredictable wind.
They just listen to the audio, figure out what's a voice and what isn't, and process it with amazing clarity. This makes them absolute lifesavers for salvaging footage that, just a few years ago, would have been completely unusable.
The demand for these tools is exploding. In fact, the background-noise removal tool market is projected to hit $5.5 billion by 2025. A lot of that growth is driven by the sky-high standards of media and tech companies, especially in places like California, which make up a huge chunk of software spending. If you want to dive into the numbers, you can explore detailed industry research from Data Insights Market.
Comparing Audio Cleanup Tools
So, which one should you actually use? It can be tough to decide, so I’ve put together a quick comparison to help you find the best fit for your project.
| Tool Type | Best For | Pros | Cons |
|---|---|---|---|
| Video Editor Effects | Quick fixes for simple, constant noise (e.g., fan hum). | Fast and convenient; no extra software needed. | Limited control; can create unnatural audio artifacts if overused. |
| Dedicated Audio Software | Moderate to severe constant noise that requires precision. | High degree of control; excellent for static sounds. | Steeper learning curve; requires exporting/importing audio. |
| AI Denoiser Apps | Complex, variable noise (e.g., traffic, crowds, wind). | Incredibly effective on difficult audio; simple to use. | Often requires a subscription; can be resource-intensive. |
At the end of the day, the best tool is the one that solves your problem without giving you a headache. For a lot of creators, the built-in effects in their video editor are more than enough. But for those bigger projects, especially ones headed for high-quality subtitles and dubbing, investing a little time in a dedicated audio editor or an AI tool will pay off big time, giving you that pristine audio needed for flawless results.
A Practical Workflow for Removing Background Noise
Knowing which tool to use is half the battle. The other half is knowing how to use it without turning your audio into a muffled, robotic mess. A solid workflow isn't about fancy software; it’s about having a repeatable process you can apply to anything from a simple video editor to a dedicated audio suite.
The goal is always the same: kill the distracting noise while keeping the dialogue crisp and natural.
This really boils down to three phases: first, you identify the problem sound, then you apply a targeted fix, and finally, you fine-tune everything so it sounds human. Getting this right before you even think about subtitles or dubbing is a game-changer.
This diagram lays out how to pick your weapon of choice, from basic editor tools to specialized AI apps, depending on how bad your noise problem is.
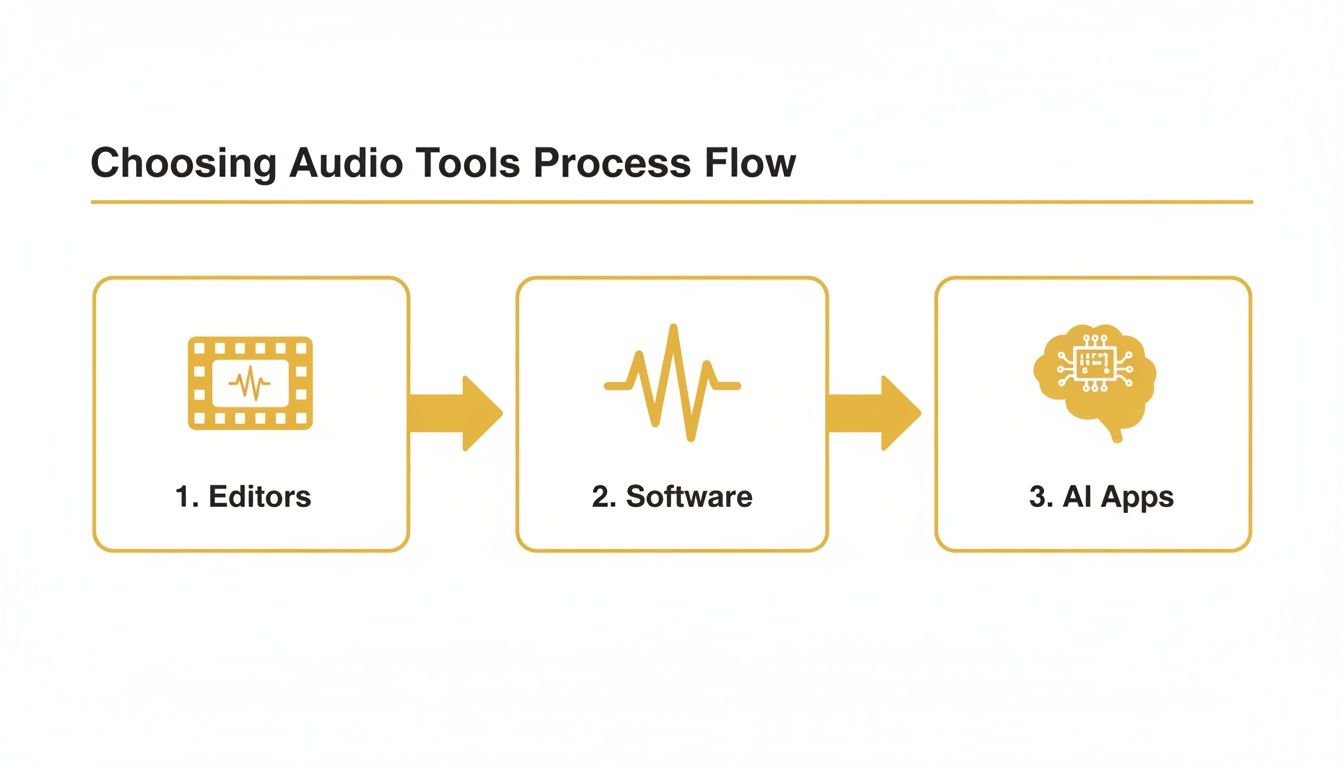
It’s a simple progression: the trickier the audio, the more you need to move from your video editor’s built-in tools to something more powerful.
Finding and Sampling the Noise
Your first move is giving your software a clean sample of the exact noise you want to get rid of. This is what we call a "noise print" or "noise profile." Most traditional tools work by learning the specific frequency of that hum or hiss and then surgically removing it from the entire track.
Here’s how you do it right:
- Find a "silent" moment: Hunt through your raw footage for a few seconds where nobody is talking, but the background noise is there. That's your golden ticket. The best spots are usually right at the beginning or end of a clip.
- Isolate that sample: In your editor, select only that chunk of audio. This might be the hum from an air conditioner, the whir of a fan, or the hiss from a cheap mic.
- Capture the print: Find the "Noise Reduction" effect in your software and look for a button that says something like "Learn," "Capture Noise Print," or "Get Noise Profile." You’re essentially telling the software, "Hey, this is the sound I hate. Go get it."
A good noise print is everything. If your sample accidentally includes even a whisper of speech, the software might start chopping up your dialogue, leaving it sounding garbled and weird.
Understanding the Key Reduction Settings
Once you’ve captured the noise print, you’ll see a couple of sliders. The names change from program to program, but they almost always control two main things: how much noise gets removed and how sensitive the tool is.
- Reduction (dB) or Amount (%): This is the "how much" dial. It’s tempting to crank this to 100%, but don’t. That’s the quickest way to get that dreaded underwater, robotic sound. I’ve found that a more subtle reduction, somewhere between 12 and 20 dB, usually gives the most natural results.
- Sensitivity or Threshold: This setting tells the tool how closely a sound needs to match your noise print before it gets cut. A lower sensitivity is safer because it will only go after sounds that are a near-perfect match. Crank it up, and the tool gets more aggressive, which can sometimes hurt your dialogue.
My advice? Start with a lower reduction amount and listen back as you adjust. You're trying to make the noise less distracting, not achieve total, unnatural silence.
Different Noises, Different Tactics
Your strategy has to change based on what you’re up against. A constant, steady hum is way easier to fix than a random, sudden noise.
For example, that air conditioner hum is a perfect candidate for the noise print method because its frequency never changes. But what about a random dog bark or a car horn? A noise print is useless for those. For those one-off sounds, you'll either have to manually cut them out or use a smarter AI denoiser that can intelligently separate speech from random interruptions. If you want to go deeper on this, there's a detailed guide on how to edit a podcast that covers similar audio cleanup workflows.
Prepping Your Clean Audio for Translation
Once your audio is clean, you’re ready for the next step: localization. A pristine source track is critical for getting accurate subtitles and dubs from a tool like TranslateMom. When you upload a video with clear dialogue, our transcription engine can do its job without getting confused by background static.
The process in TranslateMom is straightforward. From the New Task screen, you can either drag and drop your cleaned video file or import it directly from a YouTube link. Then, you simply select your Source Language, choose a Target Language, and pick your service—Transcription, Translation, or Dubbing. This direct link between clean audio and accurate AI is a big deal. Taking the time to get your audio right ensures your subtitles are on point and your AI-dubbed tracks sound professional. On that note, if you want to learn more about optimizing your files, we’ve got a guide on how to reduce MP4 file size without losing quality.
Using AI for the Really Tough Audio Problems
Sometimes, the old-school noise print trick just doesn't cut it. What do you do with complex, unpredictable sounds? Think of the background chatter in a busy coffee shop, random street traffic, or gusty wind during an outdoor shoot. For that kind of mess, you need a smarter solution.
This is where modern AI denoisers completely change the game.
Unlike older tools that need a "clean" sample of the noise, AI algorithms come at it from a different angle. They've been trained on thousands of hours of audio, learning to tell the difference between human speech and literally everything else. This lets them intelligently separate your dialogue from the noise, keeping the voice clear and natural with shocking accuracy.
Why AI Is a Lifesaver for "Unusable" Audio
Just a few years ago, a video with serious background noise was often a lost cause. You either had to accept the distracting sounds or deal with the headache and cost of a reshoot. AI-powered background noise removal from video now makes it possible to salvage audio that would have ended up on the cutting room floor.
We’ve all been there:
- The Outdoor Interview: You nail a fantastic interview, but the wind keeps roaring into the mic and a siren blares past midway through. Traditional tools would choke on that.
- The Coffee Shop Vlog: The ambient clatter of dishes and murmur of conversations makes your voice a struggle to hear.
- The Live Event Recording: You're filming a speaker at a conference, but the crowd noise is just overwhelming.
In every one of these scenarios, an AI denoiser can find the main speaker's voice and push all those distractions way into the background. It turns a potential disaster into a professional-sounding asset, saving you a ton of time and money.
How AI Helps with Dubbing and Subtitling
The payoff from AI cleanup goes way beyond just making a video sound better. For anyone creating content for a global audience, the quality of your source audio is everything. Clean audio is the foundation for accurate and natural-sounding translations and dubs.
When you start with a clean audio track, you get dramatically better results:
- Near-Perfect Transcription: An AI transcription engine can hit over 99% accuracy on clear dialogue. This means your subtitles are nearly perfect right away. In TranslateMom, you can then use the Studio editor to make minor tweaks by clicking on any text line, adjusting timing with the audio waveform, and even using the AI tab to rewrite or fix formatting.
- Natural-Sounding AI Dubbing: For AI dubbing, the system analyzes the speaker's unique vocal qualities to create a believable voice clone in another language. Noisy audio messes up this process, leading to robotic or badly synced dubs. Clean audio ensures the final voiceover sounds authentic.
A clean audio track is the single most important thing for getting high-quality automated subtitles and dubs. A few minutes spent on AI noise removal upfront will save you hours of fixing things later.
Getting Started with AI Denoising Tools
Many modern video and audio editors now have AI-powered noise reduction built right in. Look for a simple toggle or a one-slider effect often called "Voice Isolation," "Speech Enhancement," or "AI Denoise."
The process couldn't be easier: just apply the effect to your audio clip and let the algorithm work its magic. You might get a strength or sensitivity control to dial it in, but the hard work happens automatically. For more advanced tasks, you can also look at dedicated plugins from specialists like Auralume AI, who focus entirely on this tech.
By using AI for your audio cleanup, you’re not just fixing a problem—you’re setting your content up for success. You’re making sure it’s ready for a global audience, is fully accessible, and has that professional polish viewers expect.
The Best Way to Handle Background Noise Is Prevention
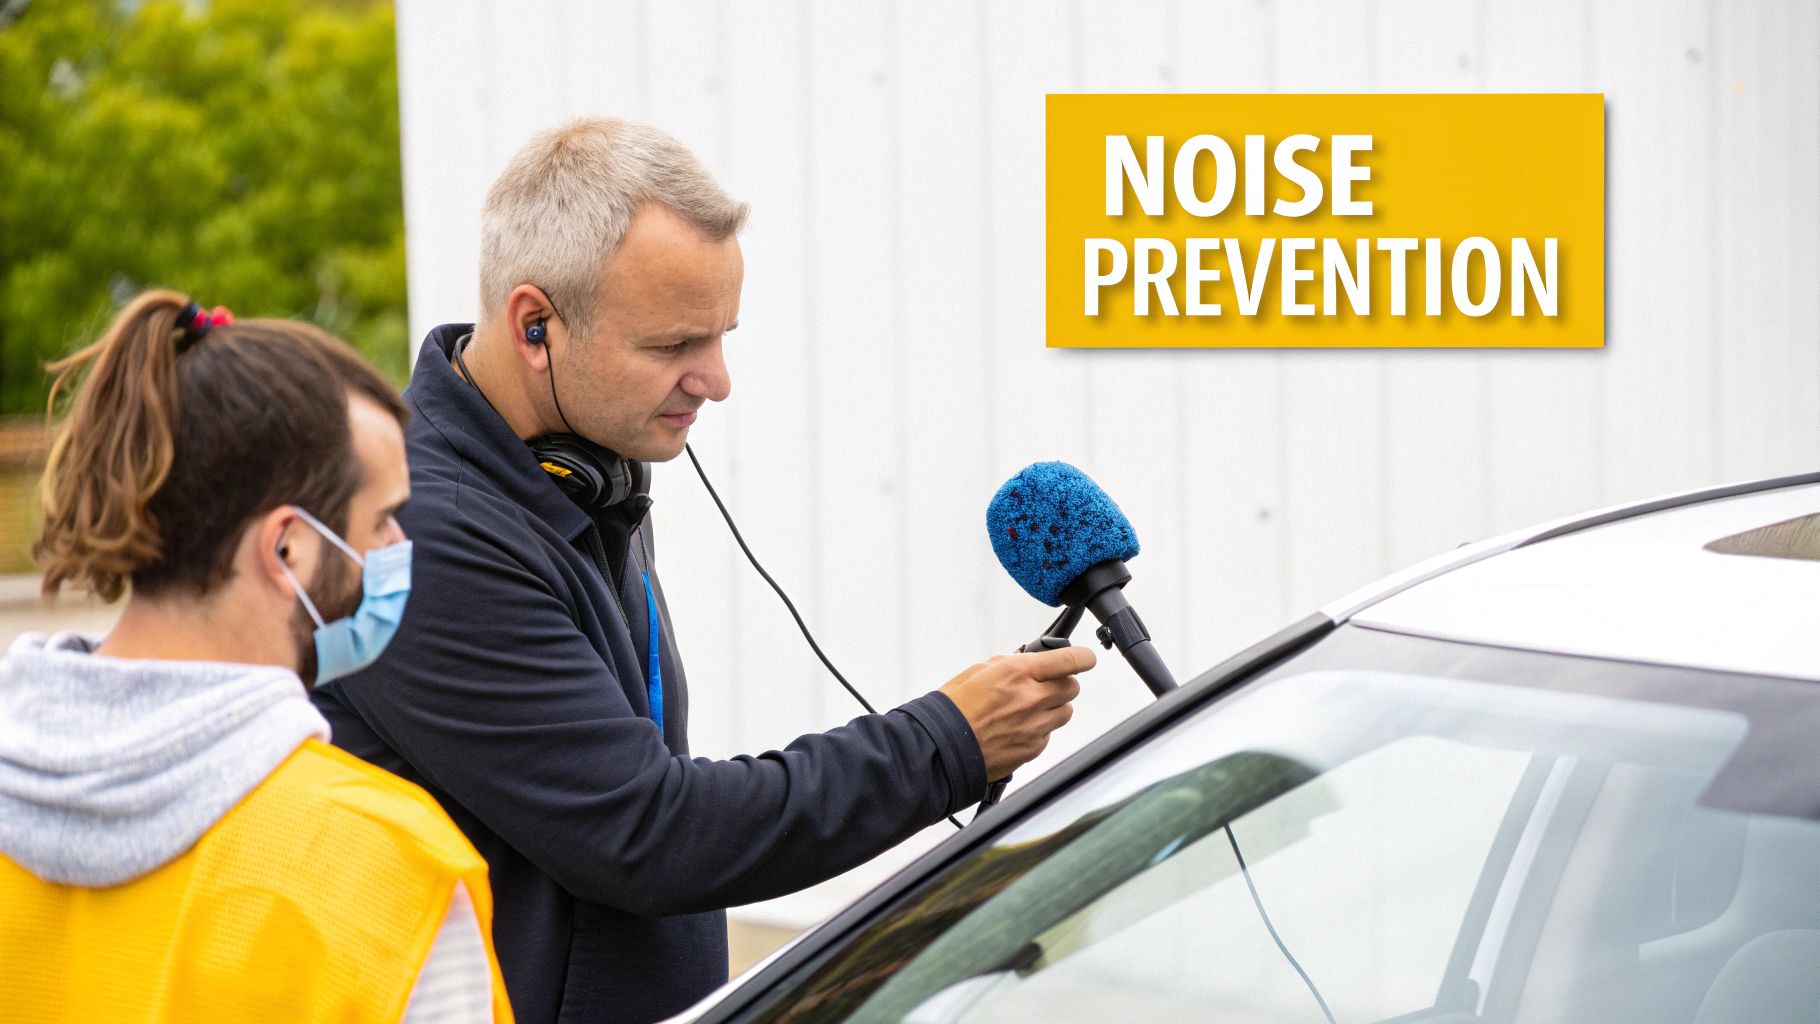 Look, AI denoisers and fancy software are amazing tools, but I'll let you in on a little secret: the absolute best way to get clean audio happens long before you ever hit record. It’s all about prevention.
Honestly, every minute you spend prepping your recording space pays you back tenfold in the edit. You’ll save yourself hours of frustrating work and avoid that baked-in, muffled sound that even the smartest AI can’t fully scrub away.
Scout Your Location with Your Ears
The first thing I always do is a "sound scout." Our brains are pros at ignoring constant drones and hums, but trust me, your microphone will hear everything.
Before you even think about setting up gear, just stand in the room for a minute and listen. Really listen. What do you hear? The hum of a fridge in the kitchen? The air conditioner that’s about to fire up? That low rumble of traffic outside the window?
Every single sound you can find and kill at the source is a headache you've just avoided in post-production. Unplug that mini-fridge. Turn off the HVAC system while you shoot. Close the windows. It seems simple, but these little things make a world of difference.
Choose the Right Microphone for the Job
Not all mics are created equal, and grabbing the right one is your first line of defence against unwanted noise.
- Lavalier Mics (Lavs): These are the little clip-on mics you see on news anchors. They’re perfect for interviews because they sit so close to the speaker's mouth, capturing their voice clearly and ignoring most of the room's ambient noise.
- Shotgun Mics: These mics are super directional. Think of them like a laser pointer for sound—they pick up what they're aimed at and reject noise from the sides and back. This makes them great for isolating a voice when you can't get a mic right up close.
- Condenser Mics: If you're doing a voiceover in a quiet studio, these are fantastic. They capture rich, detailed audio, but that sensitivity is a double-edged sword. In an untreated room, they'll pick up every pin drop, so use them in a controlled space.
You don't always need expensive gear, either. Even your smartphone can do a surprisingly good job. Learning how to record high-quality audio on an iPhone is a great place to start for creators who need clean sound on the go.
Simple DIY Sound Treatment
Forget building a professional studio. Your goal is just to tame the echo and reverb that happens when sound bounces off hard surfaces like walls and floors. Soft stuff is your best friend here.
You can get great results with things you probably already have lying around.
- Use Blankets and Pillows: Drape some heavy blankets over doorways or toss them on the floor just out of shot. I've even built a little "pillow fort" around a microphone to soak up reflections. It works!
- Record in a Furnished Room: An empty room is an echo chamber. A room with a carpet, a sofa, curtains, and bookshelves will naturally sound warmer and less "boxy" because all those objects break up and absorb sound waves.
- Mind the Mic Placement: Try not to stick your mic right in the centre of the room or too close to a wall. These spots can be hotbeds for weird sound reflections that make your audio sound hollow.
Taking these steps from the get-go ensures your audio is as pure as possible. This doesn't just make your videos sound more professional; it gives a clean, clear source for tools like TranslateMom, which means you get far more accurate transcriptions and better-sounding AI dubs.
A Few Common Questions We Hear
Even with the best workflow, a few questions always pop up when you're deep in an audio cleanup session. Let's clear up some of the most common ones.
Can I Actually Get Rid of Background Noise for Free?
You absolutely can. You’d be surprised how much you can clean up—and sometimes completely remove—unwanted noise using powerful free software like Audacity. The go-to method is to capture a “noise profile” from a few seconds of silence in your recording and then use that to filter the entire track.
This technique works wonders on constant, steady sounds. Think air conditioner hums, the buzz from your computer fan, or a low-level electrical hiss. It might struggle with unpredictable noises like street traffic or a conversation in the next room, but for most creators, it’s more than enough to get professional-sounding audio without spending a cent.
What's the Difference Between Noise Reduction and a Noise Gate?
This one trips a lot of people up, but they’re two very different tools for two different problems. I like to think of them as a cleaner and a gatekeeper.
- Noise Reduction is your cleaner. It analyzes a specific, consistent sound (like that annoying fridge hum) and subtracts those frequencies from your entire track—both while you're talking and in the quiet parts.
- A Noise Gate is your gatekeeper. It’s basically an automated mute button. It shuts off your audio completely whenever the sound drops below a certain level. This is perfect for zapping any lingering, low-level hiss in the pauses between your sentences.
For the cleanest possible audio, you’ll often end up using both. Run the noise reduction first to clean up the overall sound, then apply a noise gate to make your silences truly silent.
How Much Does Clean Audio Really Matter for Subtitles and AI Dubbing?
Honestly, it’s everything. For any automated localization tool, clean audio is non-negotiable.
When you feed a video with crisp, noise-free dialogue into a platform like TranslateMom, the difference is night and day. The AI transcription engine can hit accuracy rates well over 99%. That means you’re spending a few minutes proofreading, not hours fixing every single line.
For AI Dubbing, the stakes are even higher. To create a natural-sounding voice clone in another language, the AI first needs to isolate your original voice perfectly. Any background noise throws it off, leading to robotic dubs, wonky lip-sync, and even mistranslations.
When you use TranslateMom, starting with clean audio is the single most important thing you can do for great results. Once you upload your video, you’ll select your Source Language and Target Language, then pick a service like Transcription or Dubbing. A noise-free source file ensures the AI can do its job quickly and accurately, saving you a ton of editing time in the Studio Workspace.
Ready to take your content global? With TranslateMom, you can effortlessly add accurate subtitles and natural-sounding AI dubs to your videos in minutes. Start for free and see the difference clear audio makes.