At its core, a free audio to text converter is a ridiculously useful tool that takes the spoken words from your audio or video files and turns them into plain, searchable text. And you can do it without spending a dime upfront. These days, modern converters lean on AI to spit out surprisingly accurate transcriptions in minutes, making them a game-changer for anyone creating subtitles, writing blog posts, or just trying to get usable notes from a meeting or lecture.
Why Free Audio to Text Converters Are a Must-Have
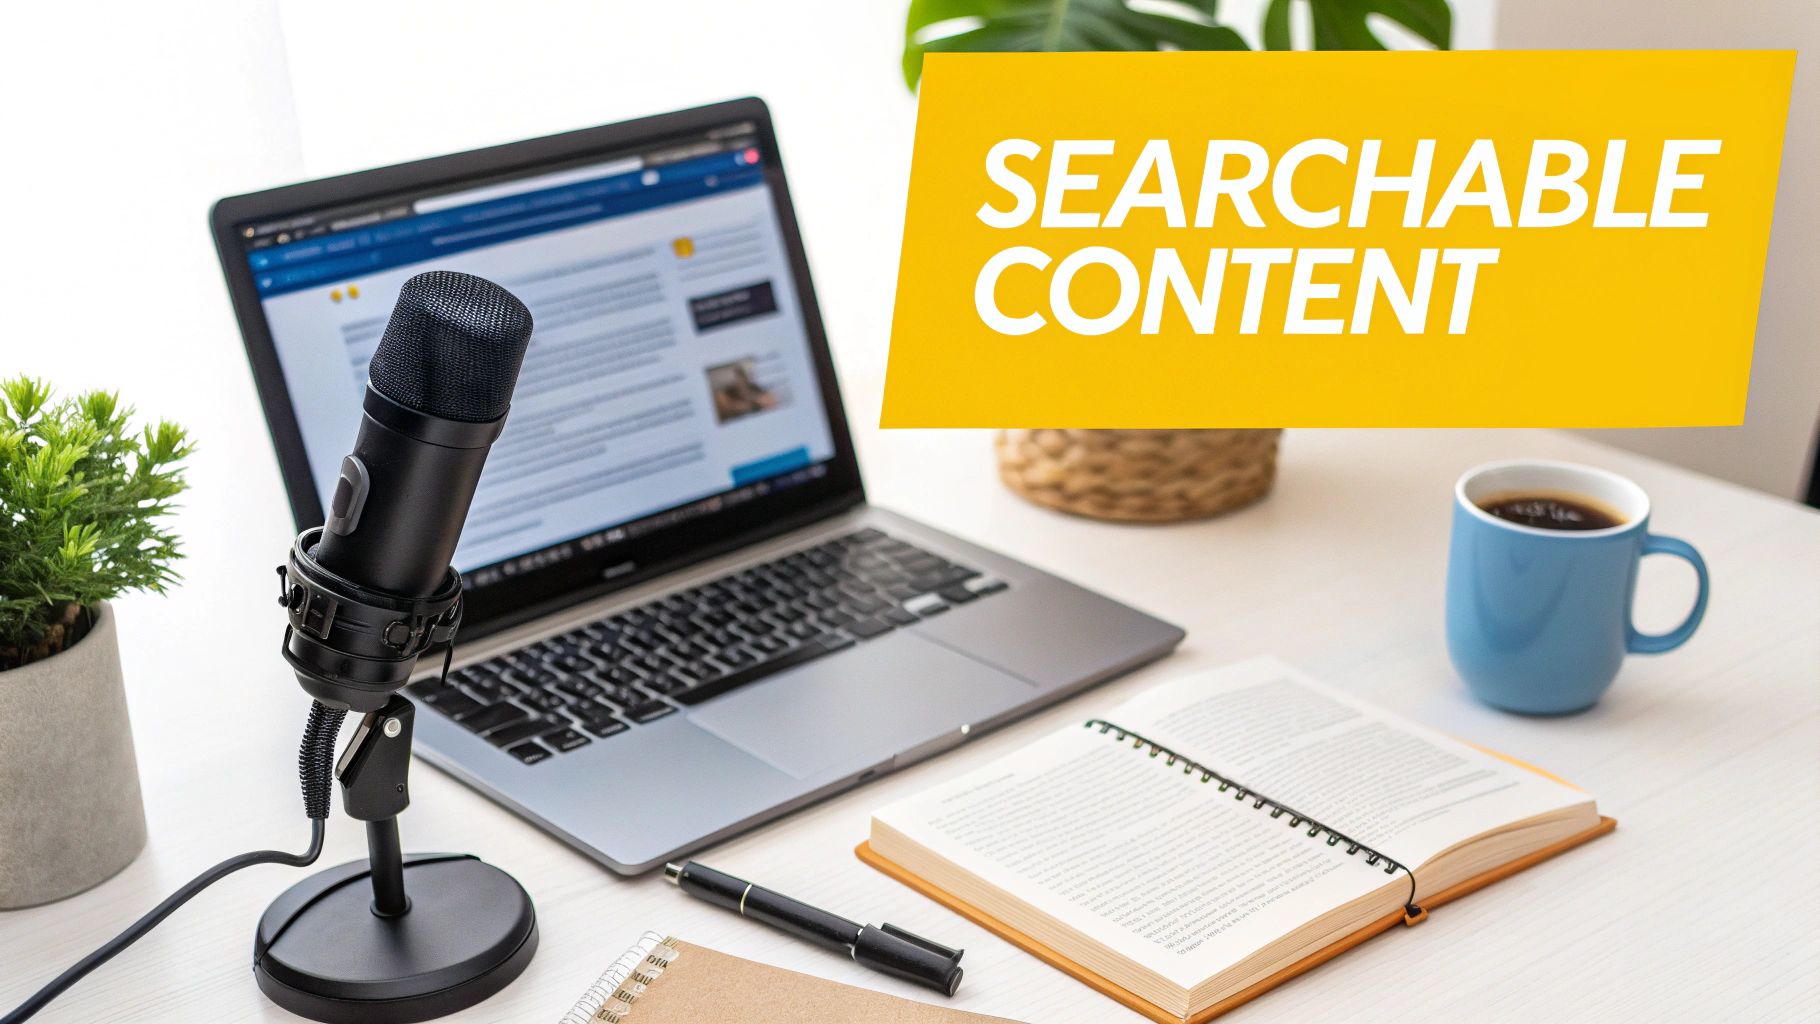
Sure, converting audio to text saves a ton of time. But that’s just scratching the surface. The real magic happens when you unlock all the strategic value that was previously trapped inside your audio files. Suddenly, your content becomes discoverable, accessible, and ready to be repurposed in countless ways. Once search engines can actually read your spoken words, your content's SEO potential shoots through the roof.
This is a massive deal for content creators. Think about it: that one-hour podcast episode you recorded can be sliced and diced into a whole library of content:
- A long-form, keyword-packed blog post.
- A dozen or more shareable quotes for social media.
- A detailed script you can adapt for your next email newsletter.
- Perfectly synced subtitles for your YouTube channel.
For anyone just dipping their toes into starting and monetizing a podcast, getting comfortable with a free audio to text converter is one of the smartest first steps you can take. It’s foundational for creating content that’s both engaging and easy for people to find.
Making Your Content Reach Further
A simple transcript instantly opens up your content to a much bigger audience. We're talking about people who are deaf or hard of hearing, non-native speakers who find it easier to read, or even just folks who prefer reading an article to listening to a podcast at their desk.
Tools like TranslateMom take this even further. They don't just stop at transcription; they offer translation and AI dubbing services, too. This means your local recording can genuinely become a global asset, connecting with audiences you never thought possible.
The market stats back this up. In California, a major hub for AI development, the U.S. Marketing Transcription Market hit a value of USD 1.14 billion and is expected to climb to USD 1.55 billion by 2032. That growth is all thanks to AI speech recognition getting so good that it can turn webinars and podcasts into text almost instantly—a core feature for browser-based tools like TranslateMom that creators now depend on.
Let's quickly break down the key advantages these free tools offer.
| Key Benefits of Using a Free Audio to Text Converter | | :--------------------------------------------------- | :------------------------------------------------------------------------------- | :---------------------------------------------------------------------------------- | | Benefit | Impact for Creators | Impact for Businesses | | Improved SEO | Makes audio content indexable by search engines, driving organic traffic. | Boosts keyword rankings for niche industry terms mentioned in webinars or meetings. | | Content Repurposing | A single audio file can become a blog post, social media clips, and newsletters. | Internal training videos can be turned into searchable knowledge base articles. | | Enhanced Accessibility | Opens content to deaf/hard-of-hearing audiences and non-native speakers. | Ensures compliance with accessibility standards (WCAG) and promotes inclusivity. | | Time Savings | Drastically cuts down on manual transcription time and costs. | Frees up employee time for higher-value tasks instead of tedious note-taking. |
Ultimately, whether you're a solo creator or part of a larger team, the ability to quickly and freely convert audio into text is a massive advantage.
How It Fits Into the Modern Workflow
Not too long ago, getting a professional-grade transcript was a slow and expensive process. You’d send your file off and wait days for a human to type it all out.
Today, platforms like TranslateMom have completely changed the game. You can just drop in a YouTube or TikTok link, click the "Transcription" service, and get a clean text file back in a matter of minutes. It’s become a seamless part of the content creation workflow.
The real power of a free audio to text converter isn't just about getting a transcript. It's about multiplying your content's value. You’re turning a single piece of audio into a flexible foundation for your entire digital marketing strategy, making sure no great idea or important keyword ever gets lost.
How to Prepare Audio for Flawless Transcription
You’ve probably heard the old saying, 'garbage in, garbage out' – and nowhere is it more true than with AI transcription. Before you even think about uploading a file to a free audio to text converter, taking a few minutes to prep your audio can genuinely save you hours of painful editing later.
The biggest accuracy killer? Background noise. An AI just can't easily tell the difference between a speaker's voice and a humming air conditioner, a distant siren, or café chatter. The absolute best thing you can do is find a quiet space to record.
If a silent room isn't an option, your next best move is to get the microphone as close to the speaker's mouth as you can. This one simple trick dramatically boosts their voice compared to the background noise, giving the AI a much cleaner signal to analyze. If you're often recording on the move, our guide on improving iPhone audio quality has some great tips.
Dealing with Multiple Speakers
Things get a little trickier when you have more than one person in the recording. If you’re recording a podcast or interview, please, don't just stick a single microphone in the middle of the room. This almost always leaves one person sounding loud and clear while everyone else is faint and muffled.
The ideal setup is giving each speaker their own microphone. This creates a clean, isolated audio source for every single person.
- Record to Separate Tracks: If your recording software can do it, record each mic onto its own audio track. This is the gold standard, giving you maximum control and leading to the most accurate transcripts.
- Encourage Clear Turn-Taking: Remind your speakers not to talk over one another. Overlapping speech is one of the toughest puzzles for any transcription AI to solve.
Think of your audio file like a blueprint. A clean, well-organized blueprint with sharp lines lets the AI build a perfect transcript. A messy one forces it to guess, and that’s where mistakes happen.
Choosing the Right Audio Format
Finally, let's talk about the file format itself. Most converters are pretty flexible, but your choice can affect the final quality.
| Format | Best For | Why It Matters |
|---|---|---|
| WAV | Maximum Quality | This is uncompressed audio, meaning it keeps all the original data. Go with WAV if accuracy is your absolute top priority and you don't mind a larger file. |
| MP3 | Convenience | This is compressed audio, resulting in a much smaller file that’s easier to upload and share. It’s the perfect choice for most online situations. |
For most people, a high-quality MP3 strikes the perfect balance between file size and clarity. But remember, the key is always to start with the best possible source recording—no file format can fix a poorly captured conversation. A little effort upfront makes all the difference.
Alright, you've prepped your audio file and it’s ready for the big show. Now for the fun part: actually turning those sound waves into text. A good tool makes this feel less like a technical chore and more like the start of a creative project.
We'll use TranslateMom as our example here, since it’s a great browser-based free audio to text converter that shows how straightforward this can be.
Everything kicks off on the New Task screen—this is basically mission control for any new project you start. Getting your audio or video file into the system is dead simple, and you've got a couple of ways to do it.
Getting Your Media into the System
The most direct route is the good old File Upload. You can literally just drag and drop your prepared audio or video file right into the browser window. Easy.
Here's a little pro tip for keyboard shortcut fans: just tap F on this screen. It pops open the file picker instantly, so you can find your file without even touching your mouse.
Or, if your content is already living online, the Link Import feature is a genuine time-saver. Just paste a URL from places like YouTube, Twitter (X), TikTok, or Instagram, and the app will pull in the media for you automatically. No downloading required.
This infographic sums up the prep work we talked about earlier, reminding you why a clean source file is your best friend.
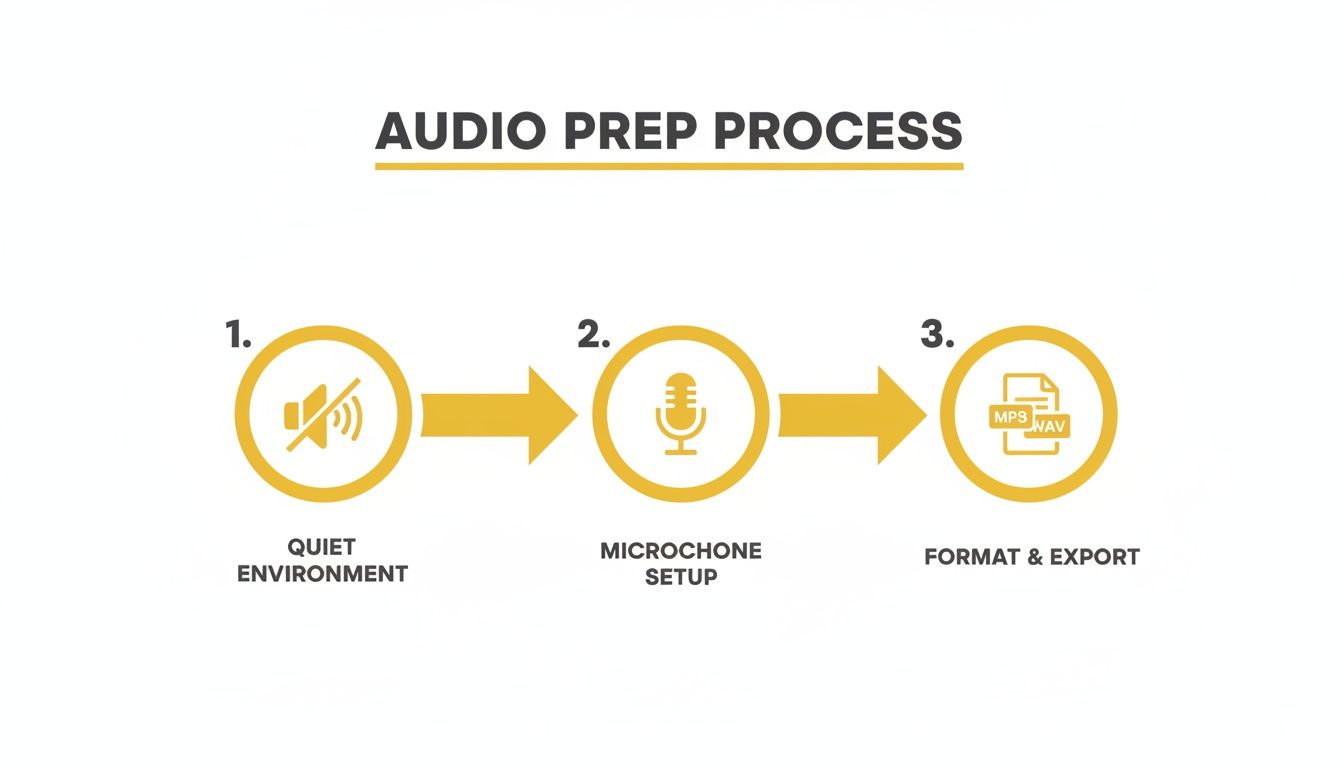
As you can see, a clean, well-recorded source file is the number one thing you can do to get a high-quality transcript.
Setting Up Your Transcription Job
Once your file is in, you’ll be asked to choose your settings. This is where you tell the AI exactly what you need it to do. The options are clear and direct, so you get the right output on the first go.
You’ll just need to set three things:
- Source Language: Pick the language spoken in your file. Getting this right is obviously crucial for accuracy.
- Target Language: Since we're just making a transcript, this will be the same as your source language.
- Choose a Service: Select Transcription. This tells the system you just want the original audio converted into text, plain and simple.
This simple setup is built on the back of some seriously impressive tech. The speech-to-text market is booming—the North American market alone was valued at USD 3,813.5 million and is expected to hit USD 8,569.4 million by 2030. For creators like us, that means we get powerful tools that can generate subtitles 75% faster and save a ton of money. If you're a data nerd, you can dig into the market research behind these numbers to see the full picture.
After you confirm your settings, the system gets to work. The AI listens to the audio, figures out the words, and spits out a draft transcript. This usually only takes a few moments.
From there, you’ll land in the editor to fine-tune the text. This is where your human touch comes in to perfect what the AI started, which we'll dive into next.
Refining Your Transcript with a Human Touch
Let's be real: no matter how good the AI is, the first pass from a free audio to text converter is just that—a first pass. It’s a fantastic starting point. But even with 95% accuracy, you'll still find little quirks like misspelled names, garbled industry jargon, or misplaced punctuation.
This is where you come in. Your expertise is what turns that raw text into a polished, professional document.
Editing isn't just about catching typos. It’s about making sure the transcript reads clearly and, more importantly, that the timing is spot-on for whatever you're creating, whether that's subtitles for a video or a transcript for a blog post. This is exactly where a dedicated editor, like the Studio Workspace in TranslateMom, makes a world of difference.
A great editor puts everything you need in one place. You get the video player, the text editor, and styling tools all in one seamless interface. The whole idea is to make the clean-up process quick, intuitive, and accurate.
Getting Around the Studio Workspace
A powerful editor is at the core of any good post-transcription workflow. In a tool like TranslateMom, this space is designed to make you fast. You’ll usually see a specialized video player on one side and a scrolling list of every single subtitle line on the other.
Here’s a small feature that’s a huge time-saver: when you click on a text line to make a correction, the video player often pauses automatically. It sounds simple, but it means you can focus on typing without fumbling for the play/pause button.
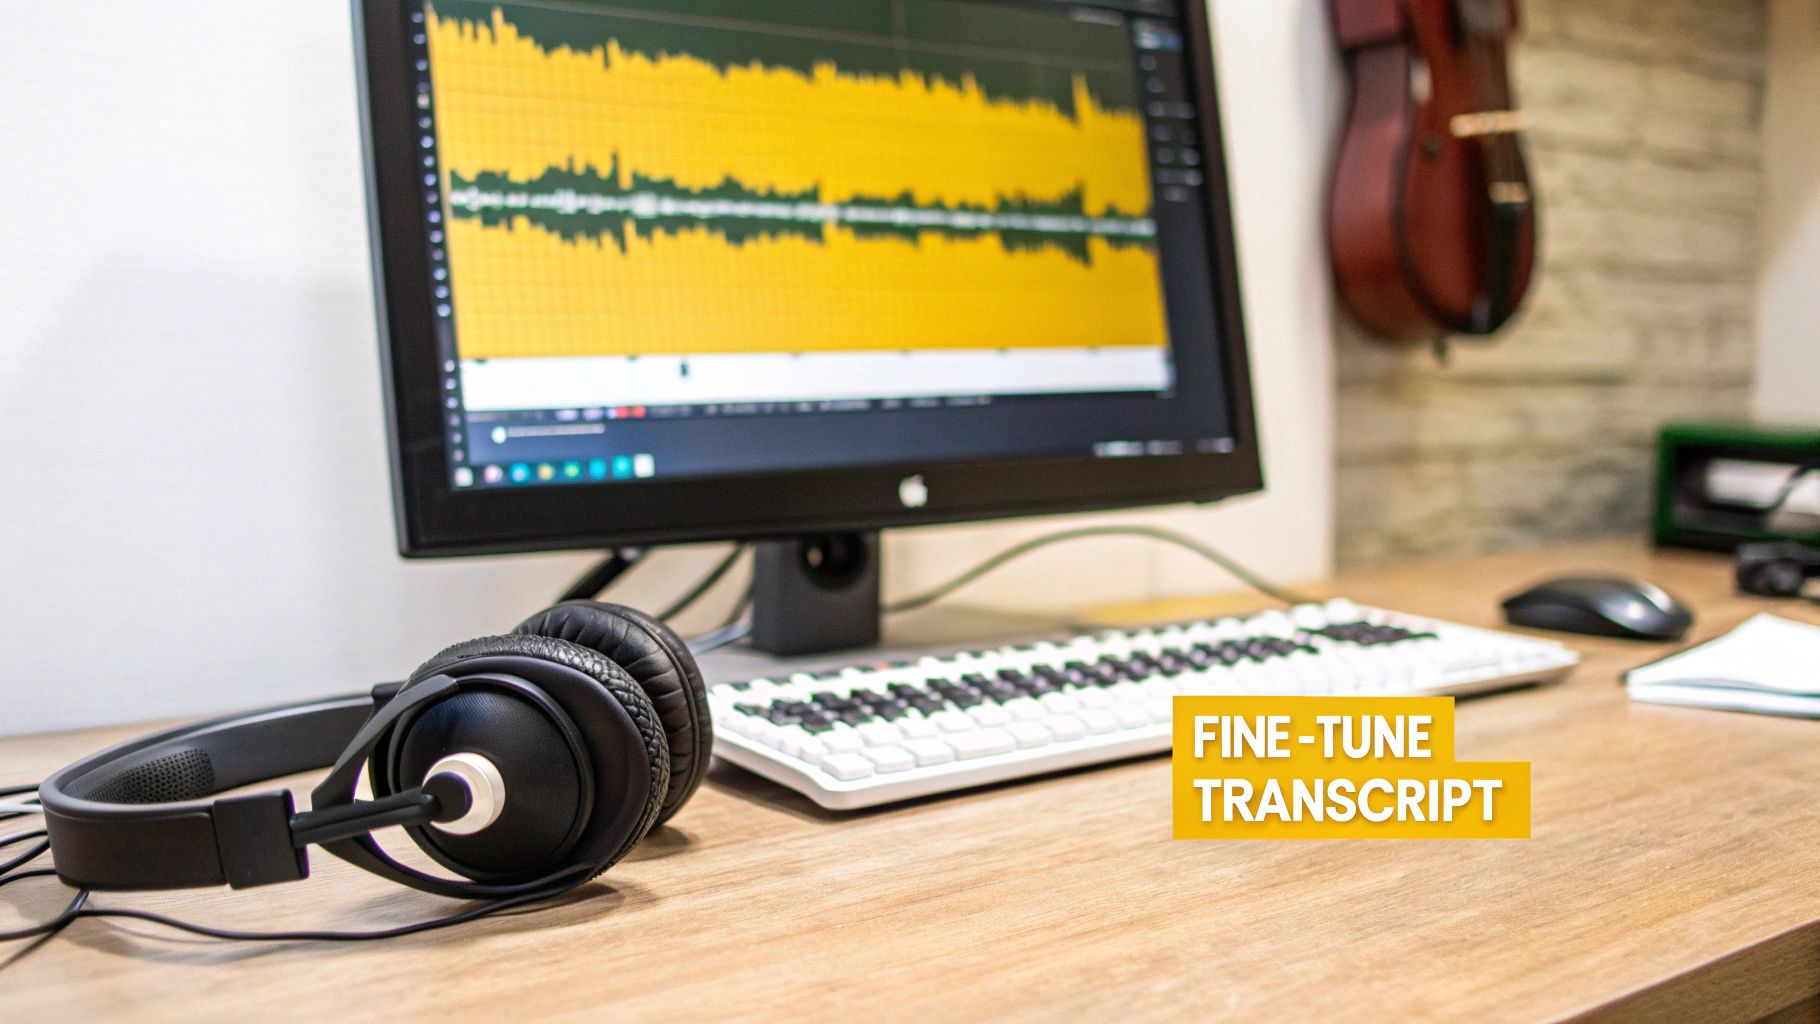
The most powerful part of a professional editor isn't just the text box; it's the visual audio waveform. This graph of the sound lets you see speech patterns, pauses, and silence, giving you a visual map to perfectly sync your captions.
Nailing the Timing with the Waveform
Nothing screams "unedited transcript" like bad timing. You've seen it before: captions that pop up way too early or hang around long after someone has finished talking. The visual waveform fixes this completely.
You can literally see where a person's speech starts and stops. By simply dragging the start and end markers of a caption to line up with the waveform, you get perfectly synchronized subtitles. Trust me, editing visually like this is way faster and more accurate than just trying to time things by ear.
For instance, you can easily spot awkward pauses or "dead air" between sentences. Just tighten up your captions around those spots, and suddenly your video feels much more polished and engaging for your audience.
Speed Things Up with Shortcuts
Want to edit even faster? Get comfortable with keyboard shortcuts. Memorizing just a few common commands can slash your editing time and keep you in the zone.
Most pro-level editors share a few key shortcuts:
- Spacebar: The classic play/pause. You'll use this constantly.
- Arrow Keys: Jump between subtitle lines without ever touching your mouse.
- Dedicated Timing Keys: Some platforms, like TranslateMom, have special shortcuts like
[and]to reorder subtitle rows or+and-to quickly adjust font size.
When you combine the visual cues from the waveform with the speed of keyboard shortcuts, you can whip an AI-generated transcript into shape with incredible speed and accuracy. This human touch is the final, essential step to creating content you can truly be proud of.
Putting Your Transcript to Work: Exporting and Repurposing
You’ve done the hard work of cleaning up your transcript. Now it’s time for the payoff. The final step is getting that text out of the free audio to text converter and into the world where it can start working for you.
Choosing the right export format is everything. It’s the bridge between all your transcription effort and the real-world results you’re after, whether that’s making a video more accessible or spinning a podcast episode into a killer blog post. What you plan to do next dictates the file you need.
Choosing the Right Export Format
Most solid transcription tools, including the free plan on TranslateMom, give you a few different ways to export your work. Getting to know them will save you a ton of headaches down the road.
Before we dive in, here’s a quick cheat sheet to help you pick the right format for your project.
Choosing the Right Export Format
| Format | Best For | Key Features |
|---|---|---|
| TXT | Turning audio into written content like blog posts, articles, or meeting notes. | Just the plain text. No timestamps, no formatting. Clean and simple. |
| SRT | Adding subtitles to videos on platforms like YouTube, Vimeo, or LinkedIn. | The industry standard. Includes precise start and end times for each line. |
| VTT | Web-based videos where you want more control over caption appearance. | A modern format that lets you style text colour, position, and more. |
Let's break these down a bit more.
TXT (Plain Text): This is your go-to for pure content repurposing. Think of it as the raw material. It strips away all the timing data, leaving you with just the words. It's perfect for drafting articles, creating detailed show notes, or saving a clean record of a meeting.
SRT (SubRip Subtitle): This is the king of captions. An SRT file is a simple text file that breaks your transcript into numbered chunks, each with a precise start and end timestamp. It’s the format that platforms like YouTube and LinkedIn expect when you upload captions. If you want to dig deeper, you can learn all about converting text files to the SRT format here.
VTT (Video Text Tracks): This is the newer, more flexible cousin of SRT. VTT files allow for styling options that SRTs don't, like changing text colours or positioning captions on the screen. It's becoming the favourite for modern web video players.
Think of it this way: a TXT file is your foundation for a new piece of written content, while an SRT file is your ticket to making your videos accessible and easier to find online.
Downloading vs. Burning In Your Subtitles
With a tool like TranslateMom, you’ve got two main options once your subtitles are ready.
First, you can Download Subtitles. This saves the SRT, VTT, or TXT file right to your computer. From there, you can upload it to your video on YouTube or pull it into a video editor like Premiere Pro. It gives you maximum flexibility.
The second option is Burn-in (Export Video). This is a game-changer. It permanently embeds your styled captions and even a brand logo directly onto the video itself. The platform creates a brand new video file with the text "baked in," so the captions are always visible. This is absolutely essential for social media clips on Instagram or TikTok, where most people watch with the sound off. It guarantees your message gets seen.
Exploring Advanced Features and Pro Tips
Once you've got the hang of the basic workflow in a free audio to text converter, it's time to dig into what these tools can really do. A lot of platforms pack in advanced features that can seriously elevate your content, often with just a single click.
Don't just think of it as transcription. Modern tools are more like a full-on content suite, saving you time and helping you connect with a bigger audience. Take TranslateMom, for instance. The AI tab inside the editor unlocks some incredibly useful functions.
Imagine you've just finished transcribing a long interview and need a quick summary for social media. Instead of slogging through thousands of words, you can get an AI to generate a tight summary in seconds. These tools are also great for automatically fixing formatting mistakes, adding punctuation, and even tweaking awkward sentences to make them clearer.
Unlocking Global Audiences with Bilingual Captions
One of the coolest things you can do with these advanced features is create dual-language captions. This is an absolute game-changer if you’re trying to reach an international audience or creating content for language learners.
In TranslateMom, you can flip on Dual Language Mode to stack two languages right on top of each other in the video. You could have the original English text with a Spanish translation appearing simultaneously, instantly making your content accessible to a much wider audience. Suddenly, a simple transcript becomes a powerful learning tool. For a deeper look at the top platforms offering these features, you might be interested in our guide to the best transcription tools of 2025.
The demand for this kind of tech is exploding. The AI Speech to Text Tool Market, which includes tools like free audio to text converters, was valued at USD 3.083 billion and is projected to hit an incredible USD 36.91 billion by 2035. This growth is driven hard by North American innovation, where 52% of tools are focused on transcribing content like podcasts and interviews. It's a market that's clearly on the move.
Don't just see a free audio to text converter as a way to get a text file. See it as your first step into a larger world of AI-powered content creation, where you can summarize, translate, and style your message for any audience, anywhere.
Styling and Brand Integration
Finally, the best tools give you control over how your text actually looks. Forget boring, generic subtitles—you should be able to customize the look and feel to match your brand.
The Style tab in TranslateMom’s studio, for example, lets you change the font, size, and colour. You can even add fun karaoke-style animations that highlight words as they're spoken.
And for that extra professional touch, you can use the Brand tab to upload your logo and place it as a permanent watermark on the video. It's these small details that really make your content stand out from the crowd.
Got Questions? I've Got Answers
Whenever you're trying out a new tool, especially a free one, it's smart to have a few questions. How good is it, really? Is it safe? Let's clear up some of the most common things people ask about free audio to text converters.
How Accurate Are These Things, Anyway?
This is the big one, right? The accuracy of any converter comes down to one thing: the quality of your audio.
If you feed it a crisp, clean recording with one person speaking clearly and no background chatter, you can expect some seriously impressive results—often hitting over 95% accuracy. But let's be real, most audio isn't perfect. Things like multiple people talking over each other, strong accents, or just a poorly placed microphone can bring that number down.
That's exactly why spending a bit of time preparing your audio and then doing a quick manual edit is so crucial. A few minutes of prep work upfront can honestly save you hours of fixing things later.
Is It Safe to Upload My Audio Files?
Great question. You should always be thinking about privacy.
Reputable services like TranslateMom take this seriously. They use secure, encrypted connections (that's the "HTTPS" you see in the URL) for all uploads. This means your data is scrambled and protected while it travels from your computer to their servers. All your work is automatically saved to the cloud, so you can close your tab and pick up right where you left off.
My advice? Before you upload anything to any online tool, take a quick peek at its privacy policy. It’ll tell you exactly how they handle your data. Stick with services that are upfront about their security—it’s the best way to keep your content confidential.
Can I Transcribe Audio in Different Languages?
Absolutely. Most modern tools are built for a global audience.
A solid converter like TranslateMom can easily handle dozens of different languages. When you start a "New Task," you just have to tell it the Source Language of your audio file. The AI then knows which language model to use, ensuring you get an accurate transcript. It's a game-changer if you're creating content for people all over the world.
Here’s a quick tip: It’s important to know the difference between a transcript and subtitles. A transcript is just the plain text (a .TXT file), great for blog posts or show notes. Subtitles (.SRT or .VTT files) are that same text, but broken into timed chunks that sync up perfectly with your video. A good tool will let you export both.
Ready to give it a try? With TranslateMom, you can start turning your audio into text for free, right now. Just upload your file or paste in a link to see how a professional workflow feels. You get a great editor, powerful features, and all the export options you need.
Head over to https://translate.mom to get started. You'll see just how easy it can be.