Translating a Japanese video into English is a lot more than just a word-for-word swap. You're trying to bridge two very different cultures and ways of speaking. If you just go for a direct, literal translation, you'll almost always end up with clunky, robotic dialogue that completely misses the point.
Good localization is an art. It’s about respecting what the original creator intended while making it feel completely natural for an English-speaking audience.
Why Nuance Is Everything in Japanese to English Translation
When you're trying to translate Japanese into English, you quickly run into challenges that automated tools just can't handle on their own. Japanese is a language built on context and indirectness, which is a world away from the more direct style of English. This difference is where a lot of translations fall flat.
One of the biggest hurdles is keigo—the whole complex system of honorifics and respectful language in Japanese. A basic machine translation will often just bulldoze right over it, stripping out that crucial social context. Suddenly, a character who should sound polite and formal comes across as blunt or even rude.
Then you have all the idioms and cultural references that are woven into daily life in Japan. Many of these simply don't have a direct English equivalent. You can't just translate them literally; you need to find a creative way to get the same feeling across.
Bridging the Cultural Gap
This is exactly why a hybrid workflow—mixing the speed of AI with the careful eye of a human—is becoming the only way to do this right. A tool like TranslateMom is built for this kind of work. The "Studio" workspace isn't designed to replace a human's judgment, but to give them the right tools for the job.
Inside the editor, you get features specifically made for this kind of nuanced work:
- Split View: This is a lifesaver. You can see the original Japanese text right next to your English translation as you work. This side-by-side view is critical for making sure your edits stay true to the spirit of the original.
- Waveform Editing: You can visually line up your subtitles with the speaker's actual speech patterns and pauses. It's the difference between subtitles that feel professional and integrated, and ones that feel like they were just pasted on top.
- Real-time Style Previews: Tweak fonts, colours, and effects on the fly. This helps you ensure the subtitles aren't just accurate, but also easy to read and look good on screen.
The goal isn't just to make the content understandable; it's to make it resonate. A great translation makes the jokes land, the emotional scenes hit home, and keeps the creator's original voice intact, even in a different language. For translators looking to really nail the fundamentals of Japanese grammar and kanji, resources like Japanese Graded Readers can be incredibly helpful. When you embrace a workflow that respects these details, you're not just translating—you're creating a powerful piece of localized content.
Getting Your Japanese Video Translation Project Off the Ground
A great translation from Japanese into English doesn't just happen at the end—it starts with a solid, organized setup. Getting this initial stage right is the key to avoiding a world of pain later on. For anyone using a tool like TranslateMom, this whole process is built for speed, kicking off the moment you hit the "New Task" button.
First things first, you need to get your Japanese video into the system. It's pretty straightforward. You can either upload the file directly from your computer or just import it with a link.
In TranslateMom, you start at the New Task screen. You can either drag and drop video files up to 5GB or paste a URL from a major platform like YouTube, X (what we used to call Twitter), or TikTok, and the app will handle the import for you.
Choosing Your Workflow
With your video loaded, it's time to make the most important decisions of the whole project. This is where you tell the software exactly what you need it to do.
- Source Language: Make sure this is set to Japanese. This tells the AI what language it's listening for in the audio track.
- Target Language: Set this to English. This is the language you want for your final subtitles or dubbed audio.
After that, you'll pick the specific service you need. Think of it as choosing your mission. In TranslateMom, for instance, these are distinct workflows designed for different outcomes.
This diagram gives you a quick visual of how it all works—from the original Japanese source, through the AI engine, and finally to a human-reviewed English translation that actually makes sense.
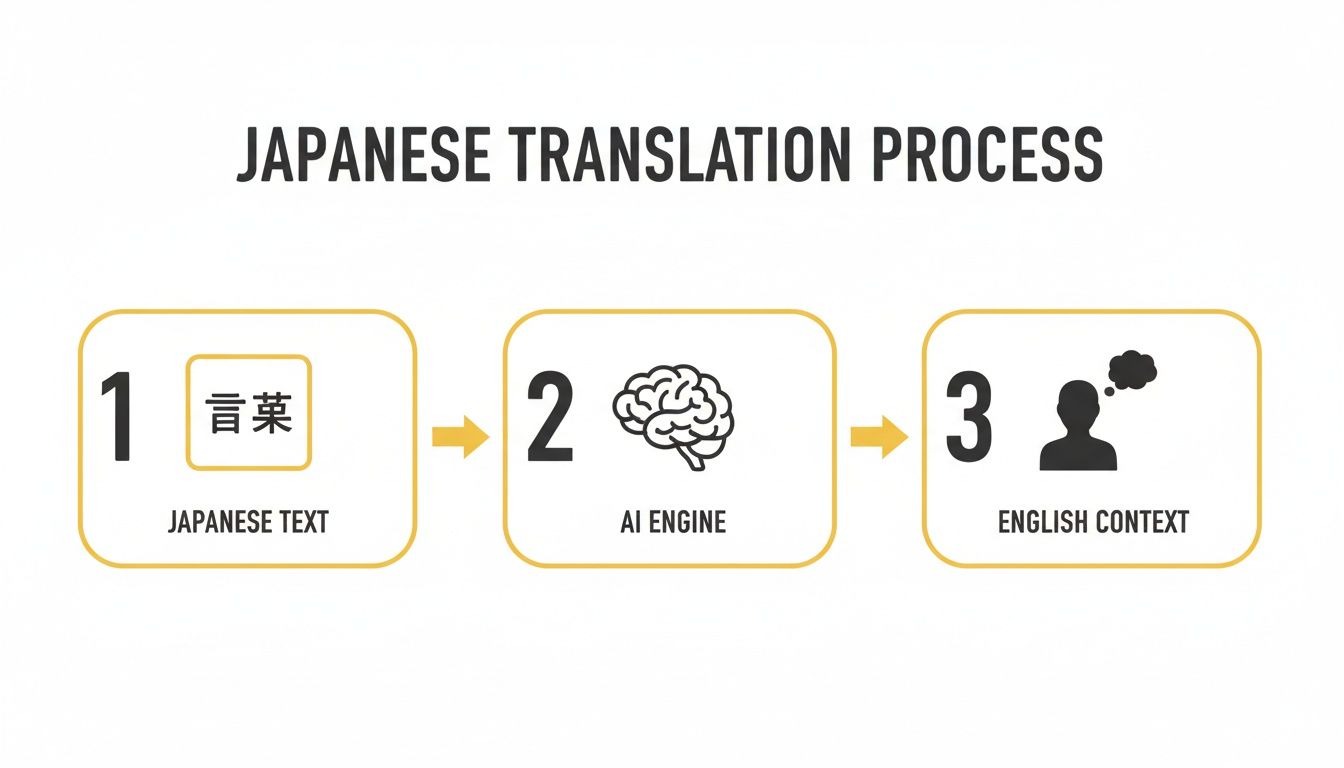
As you can see, technology is an amazing bridge, but that final touch of human context is what makes a translation feel authentic.
Understanding Your Service Options
Picking the right service is all about efficiency. You don't want to pay for more than you need, or get less than you were hoping for. Generally, you'll see three main paths:
- Transcription: Just need Japanese captions for your Japanese video? This is your go-to. It’s perfect for accessibility or if you just need a written script of the original dialogue.
- Translation: This is what most people are here for. The system first transcribes the Japanese audio, then translates that text into English subtitles. From there, you're ready to jump into the editing phase. We dive deeper into how this works in our guide to the best AI video translator.
- AI Dubbing: This is the most advanced option. It creates a brand-new audio track in English using a synthetic voice. It's a fantastic choice for creators looking to offer a completely localized experience, no subtitles required.
Choosing Your Translation Service in TranslateMom
To make it even clearer, here’s a quick comparison to help you select the right service in TranslateMom for your Japanese video project.
| Service | Best For | Final Output |
|---|---|---|
| Transcription | Adding Japanese captions to a Japanese video. | A time-coded .SRT or .VTT file in Japanese. |
| Translation | Creating English subtitles for a Japanese video. | A time-coded .SRT or .VTT file in English. |
| AI Dubbing | Replacing the Japanese audio with an English voiceover. | A new video file (.MP4) with an English audio track. |
Hopefully, this table simplifies the decision-making process so you can get started with confidence.
By the way, if your source video is online and you're having trouble getting a clean file, you might need a hand with tasks like downloading and converting videos from a URL to MP4.
Key Takeaway: The choices you make here—source language, target language, and service type—are the foundation of your entire project. A smart setup gives the AI a strong starting point, which ends up saving you a huge amount of time during the all-important editing and refinement stages.
Refining Subtitles with Precision Editing Tools
Once you’ve got an initial translation, the real work begins. That first pass, even from a top-tier AI, is just a starting point. Now it's time to roll up your sleeves and transform that raw output into something that feels natural and polished for an English-speaking audience. This is where you graduate from a basic translation japanese into english to a thoughtful localization.
This is precisely where a professional tool's "Studio Workspace" becomes your best friend. Forget trying to juggle a text editor and a separate video player. A proper studio environment brings everything together: the video, a list of all your subtitles, and timing controls, all in one clean interface. It’s built to make the whole process feel less like a chore and more like a craft.
Navigating the Studio Workspace
In a platform like TranslateMom, the editing studio is where the magic happens. The first thing you'll notice is the specialized video player, giving you a live preview of how your subtitles will actually appear. Every tweak you make—whether it's changing a word, adjusting the timing, or styling the text—shows up instantly.
Right next to the video is your subtitle editor, which is essentially a scrolling list of every single caption. Click on a line, and you can edit the text immediately. Here’s a small but powerful feature: the video automatically pauses the moment you start typing, so you can focus on getting the phrasing just right without the video running ahead of you.
This whole setup is designed for efficiency. You can breeze through the entire script, spotting and fixing issues without ever having to switch windows or apps. It’s so much smoother than trying to manage a separate video file and a .txt or .srt file.
The Power of Split View for Japanese Translation
For Japanese-to-English projects, there's one feature that’s an absolute game-changer: a Split View or Dual View mode. This nifty function displays the original Japanese transcription right alongside your English translation.
By keeping the source text visible, you create a constant feedback loop. You can instantly cross-reference your English edits against the original Japanese, ensuring you're not just translating words, but preserving the speaker's original intent, tone, and context.
This side-by-side comparison is your secret weapon for catching those subtle nuances that are so easy to miss when you're only looking at the English text. It helps you navigate the indirect phrasing and contextual quirks common in Japanese, making sure your English subtitles are both fluent and faithful. For a deeper dive, check out our guide to subtitling and translation.
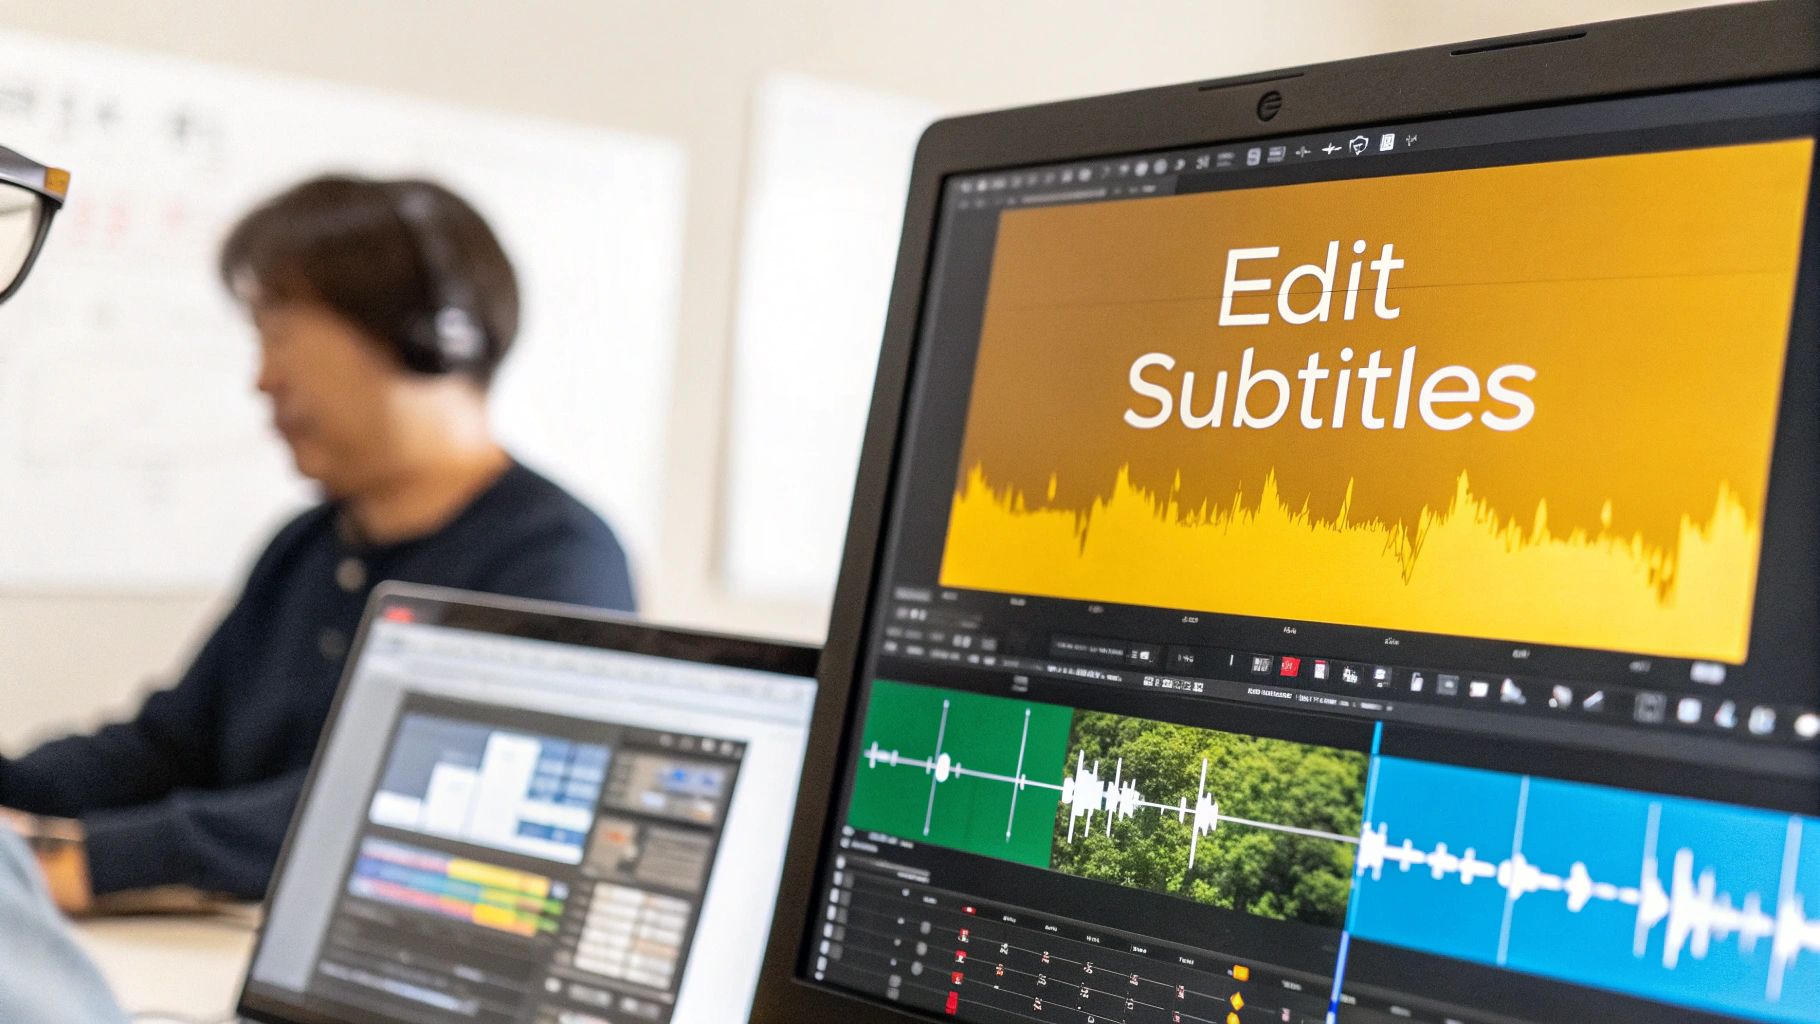
Syncing Subtitles with the Audio Waveform
A great translation can be ruined by bad timing. If subtitles pop up too early or hang around too long, it yanks the viewer right out of the experience. This is where the audio waveform becomes your most important visual guide.
The waveform gives you a picture of the video's sound, with clear peaks where someone is speaking and valleys during silent moments. Instead of just guessing at timestamps, you can get incredibly precise:
- Drag the start point of a subtitle to line up perfectly with the moment the speaker’s voice begins.
- Drag the end point to match the natural pause after they finish their sentence.
This visual approach is way more intuitive and accurate than manually typing in timecodes. It lets you create subtitles that feel completely in sync with the dialogue, which seriously boosts readability and gives your final product a professional edge. It's this level of control that takes a translation from good to truly great.
Styling and Branding Your Translated Videos
Getting the translation from Japanese to English right is huge, but it's really only half the job. How you present those translations on-screen can be the difference between a scroll-past and a viral hit, especially on platforms like TikTok and Instagram.
Think of it this way: great visuals get your message seen, understood, and—most importantly—remembered as yours.

This is where subtitle styling stops being an afterthought and becomes part of your localization strategy. With a tool like TranslateMom, you can ditch the boring default text and get creative right inside the Studio Workspace.
Making Your Subtitles Pop
The Style tab is your command centre for all things visual. You can tweak just about every element of your subtitles to match your brand’s look or the specific vibe of your video.
Here’s what I usually focus on:
- Font and Size: Pick a font that’s super clear and legible, even on a tiny phone screen. Pro tip: use the
+or-keys on your keyboard to quickly cycle through sizes and see what works best. - Colour and Contrast: This is critical. You need your text to stand out against the video. A semi-transparent background box behind the text is my go-to trick for instantly boosting readability.
- Shadows and Outlines: A subtle drop shadow or a crisp outline can make the text lift off the screen, keeping it clear even over the busiest backgrounds.
Best of all, you see every change happen in real-time on the video player. No more exporting five different versions just to see which one looks right. You nail the look in seconds.
Grabbing Attention with Karaoke Captions
Let’s be honest, on Reels or Shorts, static subtitles are easy to ignore. This is where Karaoke-style captions are an absolute game-changer. You know the ones—where each word lights up as it's spoken. It’s an incredibly powerful way to keep eyes locked on your content.
Inside TranslateMom’s Style tab, you can apply these dynamic animations with a single click. The app’s smart sync technology does all the hard work, timing the highlights to the audio for you. Even if you go back and tweak the translation, the animation stays perfectly aligned. It turns passive subtitles into an active, engaging part of the show.
And to top it off, you can easily stamp your brand on every video. Just hop over to the Brand tab, upload your logo, and drag it wherever you want. It keeps your content looking professional and instantly recognizable, no matter where it gets shared.
The Real Cost of Professional Translation
Let's get real about the numbers. High-quality translation from Japanese into English has always been a pretty serious investment, usually something only companies with big budgets could even consider. When you hire a professional translator, you're not just paying for their time; you're paying for years of deep linguistic training, cultural fluency, and specialized skills. The price tag reflects that.
For a content creator, a small business, or an indie producer, those costs can slam the door shut on reaching a global audience. It forces a tough choice: expand into new markets or stick to the budget? This financial squeeze is exactly why so many creators are now looking for smarter, tech-driven ways to get it done.
Benchmarking Professional Translator Salaries
To really get a feel for the economics, it helps to look at some real-world data. The demand for skilled Japanese-to-English translators is red-hot, especially in tech-heavy areas, which pushes salaries way up. For example, a Japanese translator in California earns around $52,650 a year on average. But head over to a tech hub like San Jose, and that number jumps to a massive $92,044—that's 97% higher than the U.S. average. You can dig into the numbers yourself in this ZipRecruiter analysis.
When a single translator's salary can creep close to six figures, you can see why hiring a full-time localization expert just isn't in the cards for most people. That's not a knock on translators—they're worth it. It’s just an economic reality that shows why we need more flexible options.
This financial reality really puts the value of modern tools into perspective. Platforms that mix the speed of AI with a human editor in the loop offer a fantastic alternative. They open up access to professional-grade localization, letting creators get incredible results without the crushing overhead of traditional hiring. It's all about making a global reach an achievable goal, not a luxury.
How AI-Powered Tools Change the Game
This is where a tool like TranslateMom carves out a new path. Instead of getting locked into high fixed costs like salaries or steep per-word freelance rates, you can use a much more flexible, credit-based model. This completely flips the script on the ROI for any localization project.
Think about the workflow:
- Fast AI First-Pass: An AI model does the heavy lifting, handling the initial transcription and translation in minutes. This is work that would take a human translator hours, or even days.
- You Add the Polish: Then, you or a team member can jump into the intuitive Studio editor to fine-tune the text. You're focusing your creative energy on nuance and cultural context, not starting from a blank page.
- Scale Without Going Broke: You only pay for the processing time you actually use. This means you can localize a single 30-second clip or your entire content library without wrecking your budget.
With plans built for different needs, including lifetime options, the financial barrier to entry basically disappears. You can check out the different pricing tiers to see how this model makes professional-level localization something anyone can do. It’s a huge shift from a high-priced service to an affordable, in-house capability.
Getting Your Final Localized Video Out There
You've put in the work to get a top-notch translation from Japanese into English. Now it's time for the final, crucial step: getting your video ready for the world. How you do this really comes down to where the video is going. Are you aiming for a simple, all-in-one file for social media, or do you need more professional options for a video editing workflow?
The most straightforward way to finish the job is to burn-in your subtitles. This literally bakes your styled captions, cool karaoke effects, and any logos you've added directly into the video file, giving you a fresh MP4. It’s the perfect one-and-done solution when you’re posting to platforms like YouTube, Instagram, or TikTok.
Inside a tool like TranslateMom, this is as simple as hitting Export Video. The app does all the heavy lifting on its servers and sends you back a polished video that looks exactly like what you saw in the Studio player. This is a great way to guarantee your subtitles look perfect on every single device, since they're now part of the video itself.
Grabbing Subtitles for Professional Workflows
Sometimes, a burned-in video just isn't flexible enough. If you’re a video editor working in something like Premiere Pro or Final Cut, or you’re publishing on a platform that requires separate caption files for accessibility, you'll want to download the subtitles on their own.
This approach gives you industry-standard files that work just about everywhere:
- SRT (SubRip Text): This is the classic, the one everyone supports. It's the most common subtitle format out there.
- VTT (WebVTT): A more modern format built for the web, which gives you more advanced styling options.
- TXT (Plain Text): Just the raw dialogue. Super useful for creating a script or other documents from your video.
Downloading the subtitle file separately is all about maintaining control in post-production. It lets you tweak the timing inside your own editing software and is essential for platforms that allow viewers to turn captions on or off, which is a huge plus for user experience.
In the end, picking the right export option is what makes sure all your careful translation work actually reaches your audience in the best possible way for your specific plan.
Common Questions About Japanese to English Translation
When you're trying to translate Japanese into English, a few questions always seem to pop up, especially when you're trying to get things done quickly without sacrificing quality. Here are some quick answers to the ones I hear most often from creators.
Can AI Really Handle Japanese Nuances Like Keigo?
Honestly, not on its own. AI is great for a first pass, but it often flattens out the politeness levels (keigo) or completely misses the cultural subtext. It just doesn't have that human intuition.
That’s why a human-in-the-loop workflow is non-negotiable for serious projects. An AI tool like TranslateMom can give you the initial transcription and translation, but the real magic happens in the Studio Workspace. You can use the Split View to see the AI's English output right next to the original Japanese. This makes it so much easier to jump in and manually tweak the tone, making it more formal or casual depending on who’s speaking. It’s this hybrid approach that really nails the original intent.
What’s the Best Subtitle Style for Social Media?
On platforms like TikTok and Instagram, boring, static subtitles are a death sentence for engagement. People just scroll right past them.
The most effective style by far is Karaoke captions, where the words light up as they’re spoken. It’s dynamic, it holds attention, and it keeps viewers locked in. Inside TranslateMom, you can add this effect with a single click in the Style tab. The app handles the timing for you, syncing the highlights to the audio automatically. It’s a simple trick that creates incredibly eye-catching captions perfect for any short-form video.
Should I Burn-in Subtitles or Use a Separate File?
This really depends on where your video is going. There's no single right answer, just the right choice for your specific platform.
- Burn-in (Export Video): This is where the subtitles are permanently "stamped" onto your video file. It’s my go-to choice for social media because you have total control. Your captions will look exactly how you designed them, no matter what device or app someone is using.
- Download Subtitles (SRT/VTT): This gives you a separate text file that you can use elsewhere. It’s perfect if you're a professional editor working in a program like Premiere Pro, or if you're uploading to a platform where viewers might want to turn captions on or off themselves.
TranslateMom gives you both options, so you can easily pick the right format for every single project without any hassle.
Ready to take on your next video localization project with a bit more confidence? Give TranslateMom a try with a free trial and see for yourself how simple it can be to create professional, accurate, and beautifully styled translations. You can check out all the features at https://translate.mom.