Turning your video into a transcript is one of the biggest levers you can pull to grow your channel. It’s a game-changer for getting found on search, making your content accessible to everyone, and even taking it global. By simply converting spoken words to text, you make your entire video searchable—not just the title and description.
Why Bother With Video Transcription?
Thinking of a video transcript as just a text file is missing the big picture. It’s not just documentation; it's a tool that unlocks massive opportunities for your content. For creators on platforms like YouTube, transcription isn’t just a nice-to-have, it’s a core part of a smart growth strategy.
Get More Views With Better SEO
Here's the deal: search engines are incredible at reading text, but they can't actually "watch" your video to figure out what it's about. When you add a transcript, you're literally handing Google and other search engines a word-for-word script.
- More Keywords, More Traffic: Suddenly, every single word you said in your video becomes a keyword that someone can search for. Talked about a specific product or a niche topic? People searching for those exact terms now have a much better chance of finding you.
- Show You're an Authority: A detailed transcript tells search algorithms that your content is deep and valuable. This can help you rank higher for the topics you cover, establishing you as a go-to source.
It’s a simple move that transforms your video from a black box into a text-rich asset that search engines absolutely love.
Make Your Content Welcoming to Everyone
A huge chunk of your potential audience might have hearing impairments or be watching your videos in a place where they can't turn the sound on (like on the bus or in a quiet office). For them, a transcript isn't a convenience—it's what makes your content watchable.
A transcript ensures your message reaches everyone, regardless of their hearing ability. It also serves a surprisingly large group of people who just prefer to read along or skim the text instead of watching the whole thing.
Plus, it's a huge help for non-native speakers or anyone who finds it easier to read than to follow along with fast-paced speech. It's about being inclusive, plain and simple.
Open the Door to a Global Audience
An accurate transcript in your video's original language is the first crucial step to reaching viewers around the world. Once you have that text file, you can easily:
- Translate it into dozens of other languages to create subtitles.
- Use it as a script for AI-powered dubbing.
The demand for this is exploding. The global transcription market was valued at $3,042 million and is expected to hit $7,866 million by 2032. This isn't a fluke; it's a direct result of creators realizing how powerful transcription is for global growth. You can dig into the numbers yourself over at credenceresearch.com.
Clearly, converting video to text is no longer some niche task. It's a fundamental part of any serious content strategy today.
Choosing Your Transcription Workflow: AI vs Human
When it comes to turning your video into a transcript, you're basically choosing between speed and perfection. Do you need it done in minutes, or can you wait for a human touch? The right answer really depends on four things: how fast you need it, how accurate it has to be, your budget, and what kind of video you're working with.
If you’re a creator pumping out daily vlogs or a constant stream of social media clips, the speed of AI is a game-changer. An automated tool can spit out a full transcript for a 10-minute video in just a few minutes—sometimes even faster than the video itself. That kind of turnaround is a lifesaver when you need to publish and move on.
But AI isn't a silver bullet for every situation.
When AI Transcription Shines
Automated transcription tools absolutely crush it when your audio is clear and there's not a lot of background noise. Think of these scenarios:
- Single-speaker videos: Perfect for talking-head videos, tutorials, or product reviews where one person is speaking clearly into a mic.
- Social media content: For quick clips on TikTok or Instagram, speed is everything. A few minor errors are usually no big deal.
- Getting a first draft: AI is fantastic for generating a quick, rough transcript that you can polish up yourself.
This is where browser-based tools are a huge win. With a professional-grade platform like TranslateMom, you can just paste a YouTube or TikTok link, select the Transcription service, and you'll have a draft ready to edit almost instantly in its Studio environment.
This flowchart really breaks down why you're transcribing in the first place, helping you match your workflow to your end goal.
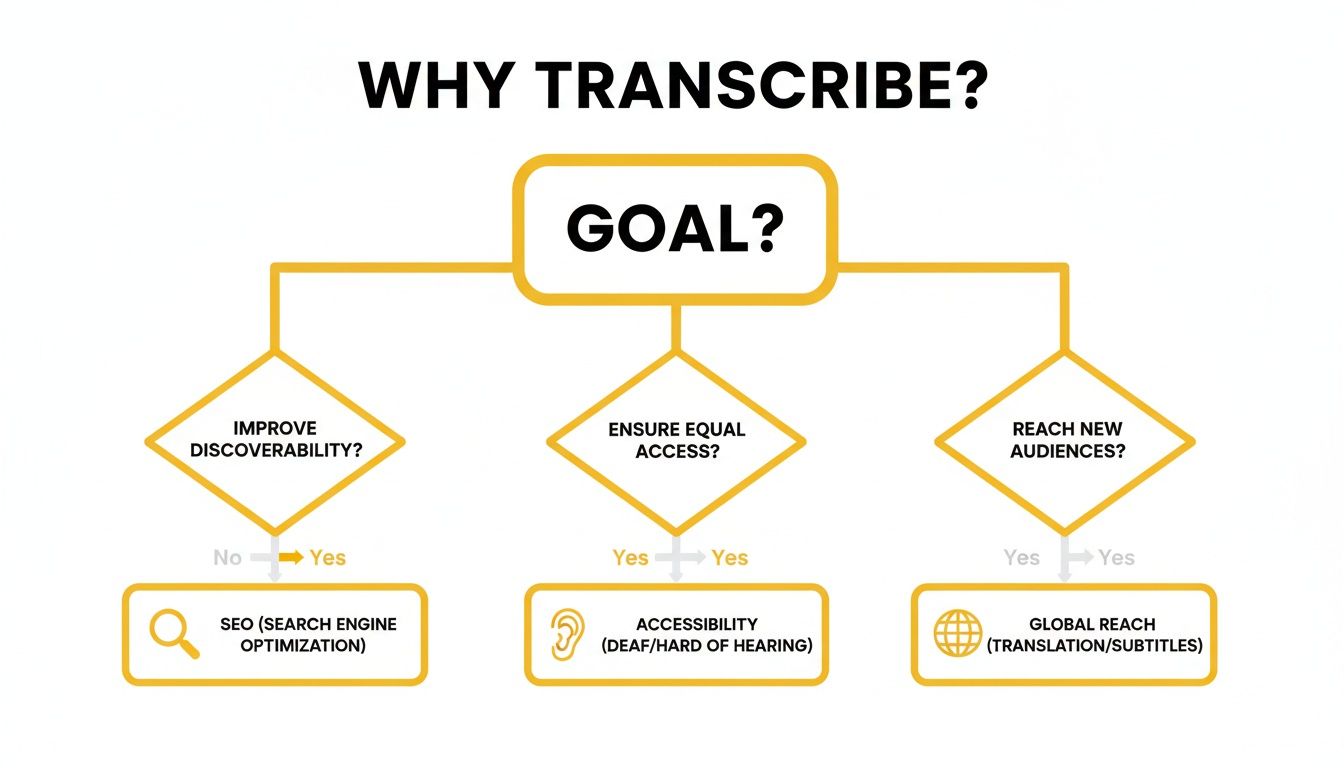
As you can see, whether you’re chasing SEO, making your content accessible, or trying to go global, transcription is where it all starts.
When Human Precision is Non-Negotiable
As smart as AI has gotten, it can still get tripped up by messy audio. That's when you need the nuanced understanding of a human transcriber.
A person is almost always the better choice for:
- Poor audio quality: If your recording is full of background noise, echoes, or speakers who are too quiet, a human ear can often pick out words an algorithm would mangle.
- Multiple overlapping speakers: In a chaotic group discussion or a fast-paced interview, a person can accurately separate who is saying what.
- Technical or niche jargon: For things like medical lectures or legal depositions, an expert human transcriber will nail the specialized terms that might fly right over an AI's head.
The demand for this level of quality is booming. The North American AI transcription market was recently valued at $1.58 billion, and the region accounts for over 35.2% of the global market share. It’s clear that accurate transcription is a big deal for businesses, schools, and creators across Canada and the US. You can dig into more of these stats over at market.us.
AI vs Human Transcription At a Glance
To make the choice clearer, here’s a quick comparison of the two approaches.
| Factor | AI Transcription (e.g., TranslateMom) | Human Transcription |
|---|---|---|
| Speed | Extremely fast (minutes) | Slow (hours to days) |
| Cost | Very low, often pennies per minute | Significantly higher per minute |
| Accuracy | Good to excellent (85-98%) on clear audio | Very high (99%+) even with difficult audio |
| Best For | Clean audio, social media, first drafts, quick turnarounds | Noisy audio, multiple speakers, technical content, legal/medical use |
Ultimately, AI gets you most of the way there for a fraction of the cost, while human services provide that final layer of polish for when accuracy is paramount.
The Hybrid Approach: The Best of Both Worlds
Here’s a little secret: you don't have to pick just one. One of the smartest, most cost-effective strategies is a hybrid approach.
Start by running your video through an AI tool to get an instant, cheap transcript. Then, all you have to do is give it a final human review to fix any mistakes, add speaker labels, and clean up the punctuation.
This method gives you the raw speed of AI combined with the critical thinking of a human editor. You get a super-accurate transcript without the hefty price tag or long wait times of a fully manual service.
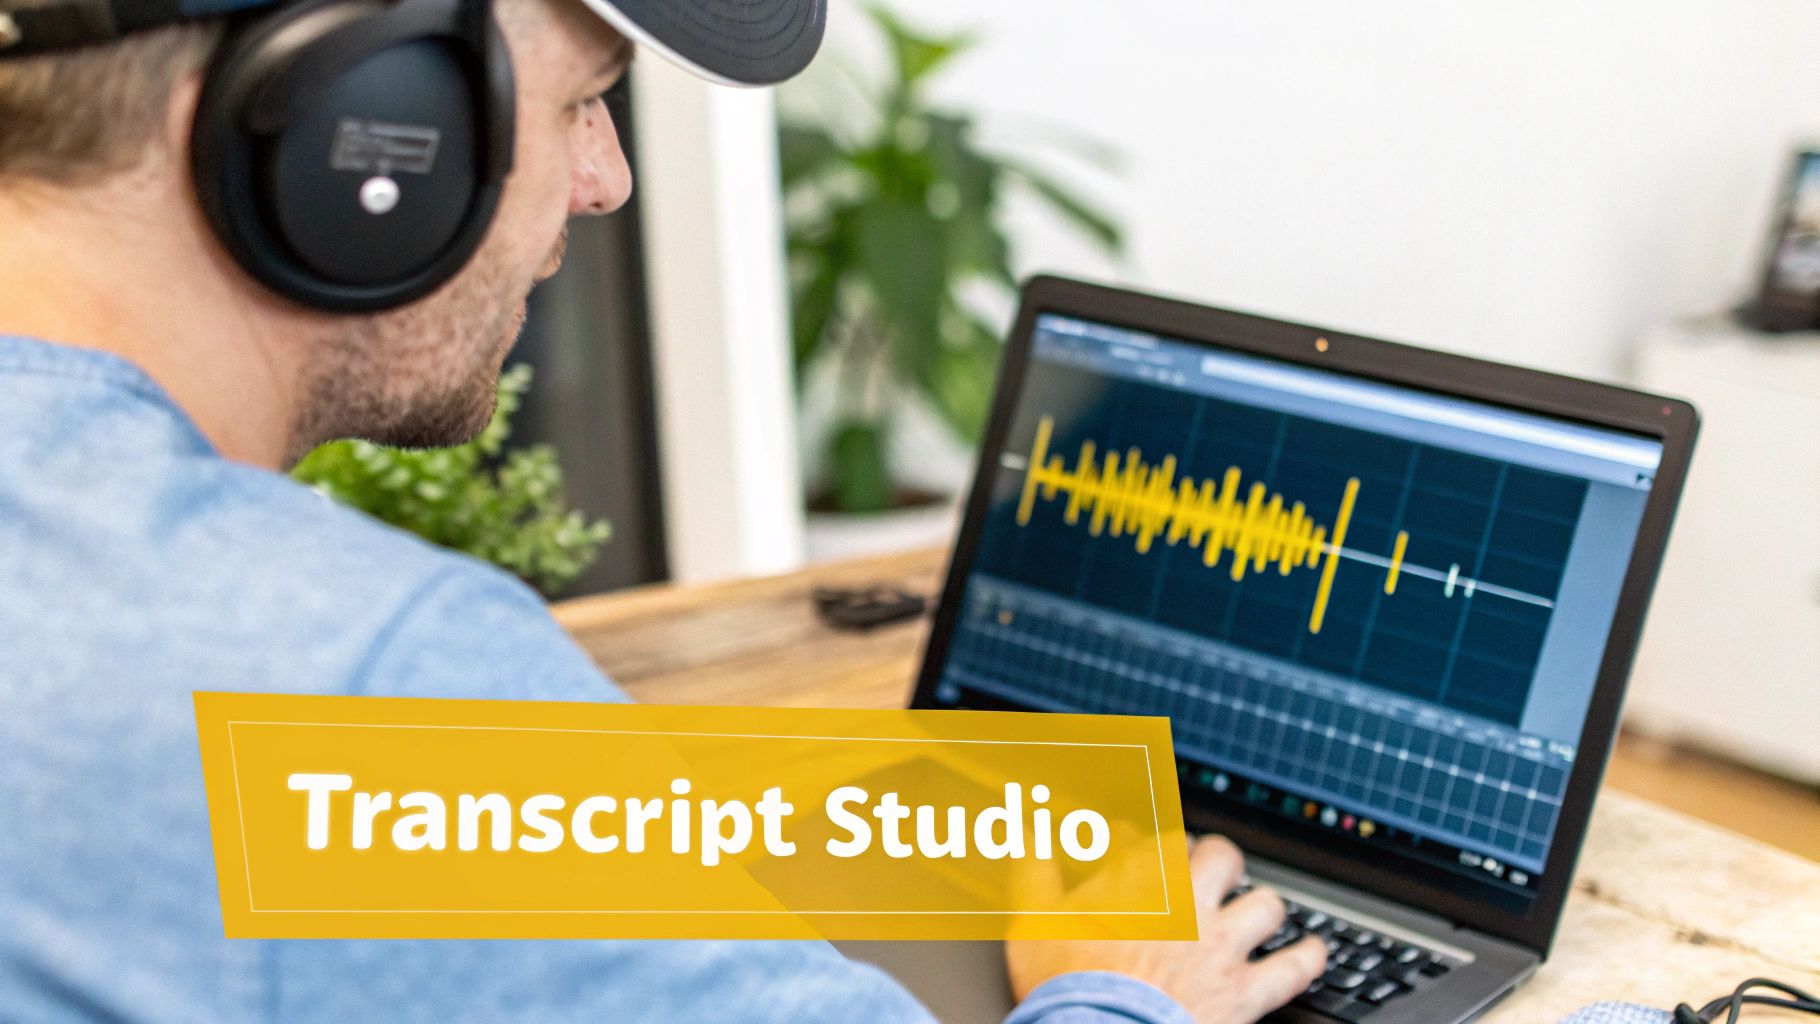
This workflow is exactly what tools with good editors are built for. For example, after TranslateMom generates the initial text, you can jump into its Studio Workspace, click any line, and tweak the words and timings while watching the audio waveform. It makes the whole process incredibly smooth.
If you want to explore more options, check out our guide on the best transcription tools for 2025.
Your Guide to Generating a Transcript with TranslateMom
Getting a high-quality transcript from your video doesn't have to be a multi-day chore that costs a fortune. With the right browser-based tool, you can go from a raw video file to a polished, accurate text document in just a few minutes. I'll walk you through the entire process using TranslateMom, showing you how to handle everything from the initial upload to the final edits that make a transcript look truly professional.
The whole process is designed to be super intuitive, breaking down what could be a complex job into simple, easy-to-manage steps. It all starts at the New Task screen—your command centre for getting media into the platform.
Getting Your Video into the System
First things first, you need to get your video file imported. TranslateMom gives you a couple of straightforward ways to do this, designed to fit different creator workflows.
- Direct File Upload: If you've got the video file saved on your computer, you can just drag and drop it right into the browser. The system is built to handle big files (up to 5GB) without a problem. Big fan of keyboard shortcuts? Just hit
Fon this screen, and it’ll pop open your computer's file picker instantly. - Link Import: Is your content already live somewhere? Skip the whole download-and-upload dance. You can just paste a URL from YouTube, Twitter (X), TikTok, or Instagram, and the app will pull the video in for you. This is a huge time-saver if you're publishing content regularly.
Once your media is selected, you'll move on to the setup phase to define what you want the tool to do. It's a quick but critical step.
Here’s a look at the clean, simple interface for starting a new transcription task in TranslateMom.
This screen shows you the two main options for getting your video into the system—either a direct upload or pasting a link from a major social platform.
Configuring Your Transcription Task
After the video is in, you’ll be asked to pick your settings. If all you need is a transcript of the original audio, the setup couldn't be easier:
- Select Source Language: Let the AI know what language is being spoken in the video. This is key to getting the most accurate transcript possible.
- Choose the Transcription Service: Since you want a text version of the original audio, you'll select the Transcription service. This tells the tool to simply transcribe the audio in the source language, not translate it.
With those settings locked in, the AI takes over. In just a few minutes, you’ll land in the Studio Workspace. This is where the magic happens and where you'll spend most of your time fine-tuning the text.
Mastering the Studio Workspace
The Studio is where an automated transcript is transformed into a polished, professional document. It's a purpose-built editor that merges a video player, text editor, and styling controls all into one screen.
The workspace is smartly split into three main areas:
- The Special Player (Left/Centre): This is more than just a standard video player. It's a custom engine that renders your subtitles in real-time, so you can see exactly how they’ll look with any styling you apply.
- The Subtitle Editor (Right/Bottom): This is your scrolling list of every single line of text from your video. You can click any line to edit it, and the video will automatically pause so you can focus.
- The Studio Tabs (Sidebar): This panel is your control hub for everything from text appearance to more advanced AI functions. The Style tab lets you customize fonts, colors, and even add karaoke-style animations.
Editing and Refining Your Transcript
The first AI-generated draft is usually surprisingly accurate, but a quick human review is what separates a good transcript from a great one. The Studio is designed to make this process incredibly fast.
To fix any mistakes, just click on a text line in the Subtitle Editor and start typing. But the real power is in the timing tools. You'll see an audio waveform right next to the text, which gives you a visual map of the spoken words. You can drag the start and end points of any subtitle line to perfectly match the speaker's timing, getting rid of awkward pauses and making sure the text appears exactly when it should.
One of the first things people tell me is that they can't believe how fast they can review and correct an entire transcript. The combo of an auto-pausing player and a visual waveform turns what used to be a tedious chore into something quick and almost game-like.
For interviews or any video with multiple speakers, clarity is everything. While the AI is good at breaking up the text, you'll want to manually add speaker labels (like "Interviewer:" or "John:") at the beginning of the right lines. It's a small touch that makes the final transcript so much easier to read and understand.
You can learn more about all the features and how they can improve your content workflow by exploring the TranslateMom platform. With just a few quick editing passes, your automated transcript is transformed into a clean, accurate, and powerful piece of content.
How To Polish Your Transcript For Maximum Impact
An automated transcript will get you about 95% of the way there, which is a fantastic start. But that last 5%? That’s where the magic happens. This is where you add the human touch that turns a good transcript into a great one. It's more than just fixing a few typos; it's about making sure your text is clear, accurate, and genuinely easy for your audience to read.
This final polish is more important than ever. The online audio and video transcription market is booming—it's currently sitting at about $4 billion and growing by 15% every year. Video transcription alone makes up roughly $1.5 billion of that pie. This surge is driven by creators on platforms like YouTube and TikTok who need to get their message out to a global audience with accurate subtitles. You can dig into more of these market insights over at archivemarketresearch.com.
Correcting Names and Technical Terms
The very first thing I do when I get an AI transcript back is scan for words that automated systems notoriously get wrong. Even the most advanced AI can trip up on specifics.
- Proper Nouns: Did it spell your guest's name right? What about company names or specific places you mentioned? These are easy fixes that make a huge difference.
- Technical Jargon: If you're deep in a niche topic, you’ll want to double-check any industry-specific terms, acronyms, or weird product model numbers. AI often hears these phonetically and makes its best guess.
- Regional Accents: I've seen strong accents throw a wrench into the works, leading to some pretty funny (but wrong) interpretations. Give those sections a close listen and correct them by hand.
Inside the TranslateMom Studio Workspace, this is a piece of cake. You just click on any text line in the editor, and the video pauses instantly. This lets you focus on nailing the text without fumbling with the video player.
Choosing Your Transcription Style
Not all transcripts serve the same purpose. The style you aim for really depends on what you're trying to accomplish with the text.
Clean Verbatim: This is what most people want and what I almost always recommend. You edit out all the little filler words ("um," "uh," "you know"), false starts, and verbal tics. The goal is to get a clean, polished text that captures the speaker's meaning without all the conversational noise. Strict Verbatim: This is the opposite—it captures every single sound. Stutters, repetitions, coughs, you name it. This is really only necessary for things like legal depositions or academic research where every single utterance matters.
For 99% of creators, clean verbatim is the way to go. It makes your content look professional while still sounding authentic.
Adding Timestamps and Speaker Labels
To make your transcript truly user-friendly, especially for longer interviews or podcasts, you'll want to add timestamps and speaker labels.
- Timestamps: These little markers (like
[00:01:23]) connect the text to a specific moment in the video. This is a game-changer for viewers who want to jump straight to a section they're interested in. - Speaker Labels: If you have more than one person talking, clearly labeling who is speaking (e.g., "Jane:" or "Interviewer:") is absolutely essential for readability.
When you're working in the TranslateMom editor, the timing for each caption is already set. If you export as an SRT or VTT file, those timestamps are included automatically. For a plain text file, you can just add them in manually for key moments.
Using AI for Summaries and Key Insights
Once you've polished your transcript, don't just let it sit there! It's a goldmine of repurposable content. Inside the AI tab in TranslateMom’s Studio, you can highlight a chunk of your transcript and put AI to work for you.
You can ask it to:
- Summarize the content: Instantly create a tight summary for your YouTube description, show notes, or an email newsletter.
- Extract pull-quotes: Tell it to find the most powerful sentences. Boom—you’ve got ready-made quotes for your social media graphics.
- Rewrite for clarity: If a section feels a bit long-winded, the AI can help you rephrase it to be more concise and punchy.
Putting Your Transcript To Work: Exporting and Repurposing

So, you've got a clean, edited transcript. What now? This is where the real magic happens. Your transcript is more than just a record of your video; it's a launchpad for a ton of new content. The trick is knowing how to export it correctly and put it to work.
Inside a tool like TranslateMom, you’ve got a couple of main choices. You can Download Subtitles as files (like SRT or VTT) to use on other platforms, or you can choose to Export Video with the captions permanently "burned in." What’s best really comes down to your end goal.
Choosing The Right Export Format
Getting your captions to show up properly means picking the right file type for the job. Different platforms have different needs, so understanding the lingo is key to avoiding headaches later on.
A huge win for turning video into text is how easy it makes it to create other content. For instance, you can convert video to blog posts and tap into a whole new audience that prefers to read rather than watch.
To make things simple, here’s a quick rundown of the common file formats you'll run into and what they're actually used for.
Common Transcript File Formats And Their Uses
| Format | Primary Use Case | Platform Compatibility |
|---|---|---|
| SRT (.srt) | The go-to standard for video captions, containing simple text with timestamps. | YouTube, Vimeo, Facebook, LinkedIn, most video players |
| VTT (.vtt) | A more modern choice that lets you add styling like bold, italics, and different colours. | HTML5 video players, some modern social platforms |
| TXT (.txt) | Just plain text with no timestamps. Perfect for repurposing your content. | Blog posts, articles, newsletters, show notes |
| ASS (.ass) | An advanced format for complex styling, positioning, and animations. | Popular for anime fansubbing and creative video projects |
For most of us, SRT is the workhorse. It’s what you’ll use 99% of the time for uploading closed captions to places like YouTube. If you just need the text for a blog post, TXT is your best bet. And if you're curious about the technical side, we've got a guide on how to convert a plain TXT file into a time-coded SRT: https://www.translate.mom/blog/txt-to-srt.
From Transcript To Blog Post
One of the smartest ways to get more mileage out of your video is to turn the transcript into a full-blown blog post. This move doubles your content output with zero extra recording time and gives your SEO a serious boost.
Your polished transcript is the perfect starting point. From there, you just need to flesh it out a bit:
- Add headings and subheadings to break up the wall of text and make it easy to scan.
- Drop in some visuals, like screenshots from the video or relevant stock photos.
- Expand on your main points. This is your chance to add more detail, examples, or data you couldn't fit into the video.
Don't forget, a lot of people would rather scan a transcript than sit through a whole video, especially if they're in a hurry. A blog post serves that audience directly.
Mining Your Transcript For Social Media Gold
Your transcript is also an absolute goldmine for social media content. Stop staring at a blank screen trying to think of what to post. Just pull ideas straight from the text.
Go through your transcript and look for:
- Punchy quotes: Grab the most powerful one-liners and turn them into simple, shareable graphics for Instagram or X (formerly Twitter).
- Key takeaways: List out the main points in a bulleted list for a quick LinkedIn post or as a script for a short TikTok.
- Good questions: Pull a thought-provoking question you asked in the video and use it to kick off a discussion on Facebook.
This approach keeps your social media feed full of valuable content that’s perfectly aligned with your videos, creating a much stronger and more cohesive brand presence.
Common Questions About Video Transcription
Getting started with video transcription can feel like a bit of a maze. You've got questions, and I've got answers. Let's tackle some of the most common things creators wonder about when turning their video dialogue into text.
How Long Does It Take To Get A Transcript From A Video?
This is the big one, and the answer is simple: it all comes down to whether you go with AI or a human. The time difference isn't just a few hours—it can be days.
An AI tool like TranslateMom is built for pure speed. I've seen it chew through a 10-minute video and spit out a full transcript in just two or three minutes. Seriously. It's often done before you've had a chance to grab a coffee. You just drop in a link or file, pick 'Transcription', and the AI is off to the races.
Now, if you go the old-school route with a human transcription service, you'll need to be patient. Even for a short clip, you’re looking at a wait time of a few hours to several business days. It all depends on how clean your audio is, the video length, and how much you're willing to pay to jump the queue.
Can I Transcribe A Video With Multiple Speakers Or Background Noise?
Absolutely, but this is where you'll see the difference between good and great results. Modern AI is getting scarily good at this, but it’s not magic.
If you have a few people talking, today’s AI can usually tell them apart. But if they start talking over each other or their voices are super similar, the accuracy can take a hit. For the best AI results, clean audio with one person speaking at a time is still the gold standard.
Background noise is the real villain of transcription, for both AI and human ears. A loud cafe, traffic, or a music track cranked way too high can make it tough for any system to hear the dialogue clearly. A human might have a slight edge in a chaotic audio situation, but the real pro-tip is to get the cleanest recording possible from the start.
What Is The Difference Between A Transcript and Captions?
People mix these up all the time, but they’re two totally different things with different jobs. Getting this right is key.
A transcript is the raw text of everything spoken in your video. Think of it as a script or an article. Its main job is to help with SEO (so Google can read your video's content) and to let you easily repurpose your video into a blog post or show notes.
Captions (or subtitles) are the timed text you see on the screen while the video plays. They're synced perfectly to the audio. Their purpose is all about accessibility for viewers who are deaf or hard-of-hearing and for the huge number of people who watch videos with the sound off on social media.
Your workflow usually starts with the transcript. From there, you create the time-coded caption files (like SRT or VTT). Tools like TranslateMom make this a breeze by generating those timed segments right away, so you can export a transcript or captions without any extra work.
How Much Does It Cost To Convert A Video To A Transcript?
The price range is huge, and it all boils down to AI versus human.
AI transcription is your most affordable bet, by a long shot. Platforms like TranslateMom often use a credit system that works out to just a few cents per minute. This makes it a no-brainer for creators pumping out lots of content who need a fast, budget-friendly solution.
Human services are a premium product. You’re looking at $1 to $3 per minute of audio, and that price goes up if you need it done fast, if the audio is messy, or if it's for a specialized field like medicine or law.
For most creators, the combination of speed, cost, and high accuracy you get from AI is the perfect sweet spot for a video-to-transcript workflow.
Ready to turn your videos into powerful, searchable text? With TranslateMom, you can get an accurate, editable transcript in minutes. Try your first project for free and see just how easy it is. Get Your Free Transcript Today.