You've poured hours into creating amazing YouTube videos. But what if I told you that the video itself is just the starting point? Turning that video's audio into text is one of the smartest things you can do to get more mileage out of your content.
We're talking about creating a written transcript—a script of everything said in your video. This simple step can be a massive unlock for your SEO, social media content, blog posts, and a whole lot more.
Why Bother Transcribing Your YouTube Videos?
I get it. In a world obsessed with video, focusing on plain old text might feel a bit backward. But trust me, converting your YouTube videos to text is a powerhouse strategy. It makes your content work so much harder for you, opening up new ways to grow your audience that video alone just can't touch.

Give Google Something to Read (Hello, SEO!)
Here’s the deal: search engines like Google are incredible at reading and indexing text. What they can't do is "watch" your video to figure out what it's about.
When you add a transcript, you’re basically handing Google a keyword-rich script on a silver platter. Suddenly, your video isn't just findable on YouTube; it's discoverable through regular web searches. Every single word you spoke becomes a potential search term that can lead someone new straight to you.
Make Your Content Accessible to Everyone
Did you know a massive chunk of online videos are watched on mute? Whether someone's on a noisy train, in a quiet office, or is deaf or hard of hearing, transcripts and captions make your content accessible.
This isn't just about ticking a box for inclusivity—it’s about dramatically expanding your potential audience.
By making your videos easy to consume for everyone, regardless of their situation or ability, you're creating a more welcoming experience. That's how you build a loyal community.
The Ultimate Content Repurposing Hack
One great video can be the seed for a dozen different pieces of content. Once you have a transcript, the possibilities are endless. You can easily:
- Spin it into a blog post: Flesh out the key points from your video into a detailed article.
- Create social media gold: Pull out punchy quotes, surprising stats, or actionable tips for X, Instagram, or LinkedIn.
- Draft an email newsletter: Give your subscribers a quick summary of your latest video.
- Build an infographic: Use the transcript as the blueprint for a killer visual.
The amount of content being created is staggering. Think about this: over 500 hours of video are uploaded to YouTube every single minute. According to stats from Teleprompter.com, that’s about 720,000 hours of new stuff every day. In a sea that vast, making your content work smarter, not harder, is the only way to stand out.
The Quick & Free Method: YouTube's Built-In Transcript
Before you even think about specialized software, the fastest way to get a YouTube video into text is often hiding in plain sight. Almost every video on the platform has an auto-generated transcript, making it a free and instant option when you just need a rough draft without any hassle.
Finding it is super easy. Just look below the video player, click the three-dot menu (...), and select "Show transcript." A new panel will pop right up next to the video, laying out the entire script with timestamps. It’s a surprisingly powerful little feature for getting a basic text version of pretty much any public video.
Getting the Clean Text
The default transcript view includes timestamps on every single line. While that's great for jumping around the video, it's a real pain if you just want to read the text. Thankfully, getting rid of them is just a click away.
- Toggle Timestamps: In that same transcript window, click the three-dot menu again and choose "Toggle timestamps." Poof! They're gone, leaving you with clean, readable text.
- Copy and Paste: Now you can just highlight everything, copy it, and paste it straight into a document for editing.
Learning how to download captions from YouTube video directly is often the quickest path. It’s perfect for grabbing a few quotes or quickly summarizing a video. For a more detailed walkthrough, check out our guide on how to get YouTube transcripts.
Just a heads-up: YouTube's auto-captions are a starting point, not a finished product. You'll almost always find punctuation mistakes, words the AI misheard, and absolutely no labels for different speakers.
This built-in tool is fantastic for its speed and simplicity. But if you’re doing anything that requires professional accuracy—like creating official subtitles, translating content, or publishing a polished blog post—you’ll definitely need to either clean it up yourself or use a more advanced tool.
Achieving Professional Accuracy with AI Tools
While YouTube's built-in tool is a decent starting point for a quick text grab, it really falls short when accuracy is non-negotiable. I've spent countless hours fixing punctuation, correcting misheard words, and trying to figure out who’s speaking. It can turn a simple task into a major editing headache.
This is exactly where dedicated AI-powered tools come in. They provide a professional workflow designed to get you a precise, polished transcript with far more control and less frustration.
For anyone serious about quality, platforms like TranslateMom are built to overcome the limitations of those basic auto-captions. You're not just getting a simple text dump; you’re getting a full studio environment to refine every single detail. The best part? The process is incredibly simple to get started.
From the New Task screen, you can just paste a YouTube URL directly into the Link Import field. That’s it. It pulls the video right into the system without you having to download a thing.
From URL to Editable Transcript in Seconds
Once your video is imported, the setup is quick and painless. The tool just needs a few key details to guide the AI:
- Source Language: Just tell the tool what language is being spoken in the video.
- Target Language: If you just need a transcript, this will be the same as your source language.
- Choose a Service: To get captions in the original language, you'll select Transcription.
After you confirm those settings, the AI gets to work. In just a few moments, you’ll have a highly accurate transcript ready to review in the editor—it's a massive leap in quality from standard auto-generated captions. You can even check out a full breakdown of the best transcription tools for 2025 to see how different platforms stack up.
Fine-Tuning Inside the Studio Workspace
This is where professional tools really prove their worth. Instead of staring at a static block of text, you get an interactive editing environment called the Studio Workspace. This entire interface is built for precision and speed, letting you perfect your transcript without wasting time.
The workspace is usually split between a video player and a subtitle editor. In TranslateMom, every line of text is clickable. When you select a line to edit, the video automatically pauses, which is a fantastic feature. It lets you focus on your corrections without constantly fumbling to hit pause and rewind.
The real power, in my opinion, comes from the visual aids. A synchronized audio Waveform lets you actually see the spoken words. This makes it incredibly easy to drag the start and end points of a caption to match the audio perfectly. That kind of visual alignment is the secret to creating professional, tightly-timed subtitles.
This visual process flow shows the basic steps for getting a transcript on YouTube itself, which is often the first step before you bring it into a more advanced tool for the real work.
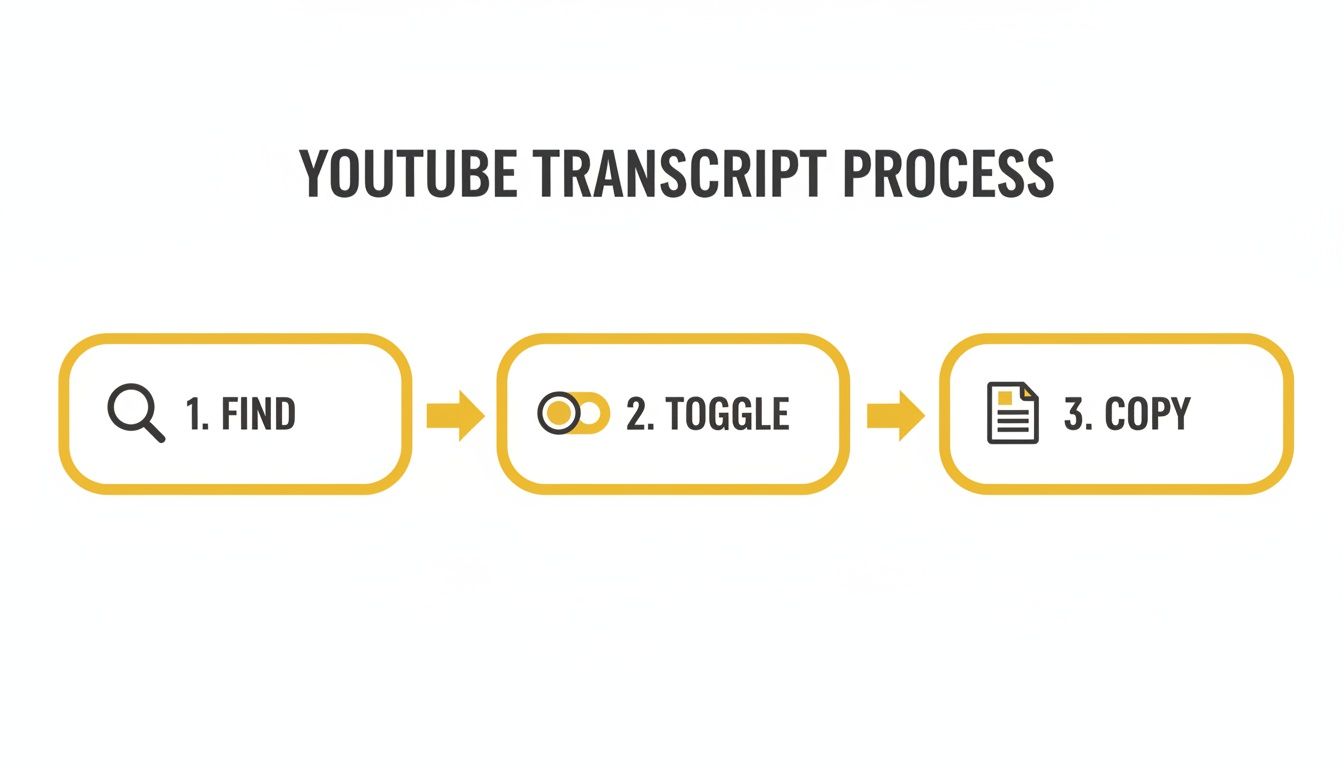
As the infographic shows, the native YouTube process is all about finding, toggling, and copying. Professional tools, on the other hand, are focused on the crucial next steps: editing, timing, and styling.
Advanced Editing and Quality Control
Beyond just correcting text, professional tools offer features for much deeper quality control. For instance, if you're working on a translation, the Split View in TranslateMom is a lifesaver. It displays the original source text right next to your translated text, line by line, so you can be sure your translation stays contextually accurate.
Another major advantage is the ability to customize the look of your text directly in the editor. Inside the Style tab, you can adjust everything from the font and colour to adding a background for better readability. For content creators, the Brand tab is a game-changer—it even lets you upload and position a logo right onto the video frame.
This all-in-one approach saves a ton of time compared to juggling separate apps for transcription, editing, and video branding.
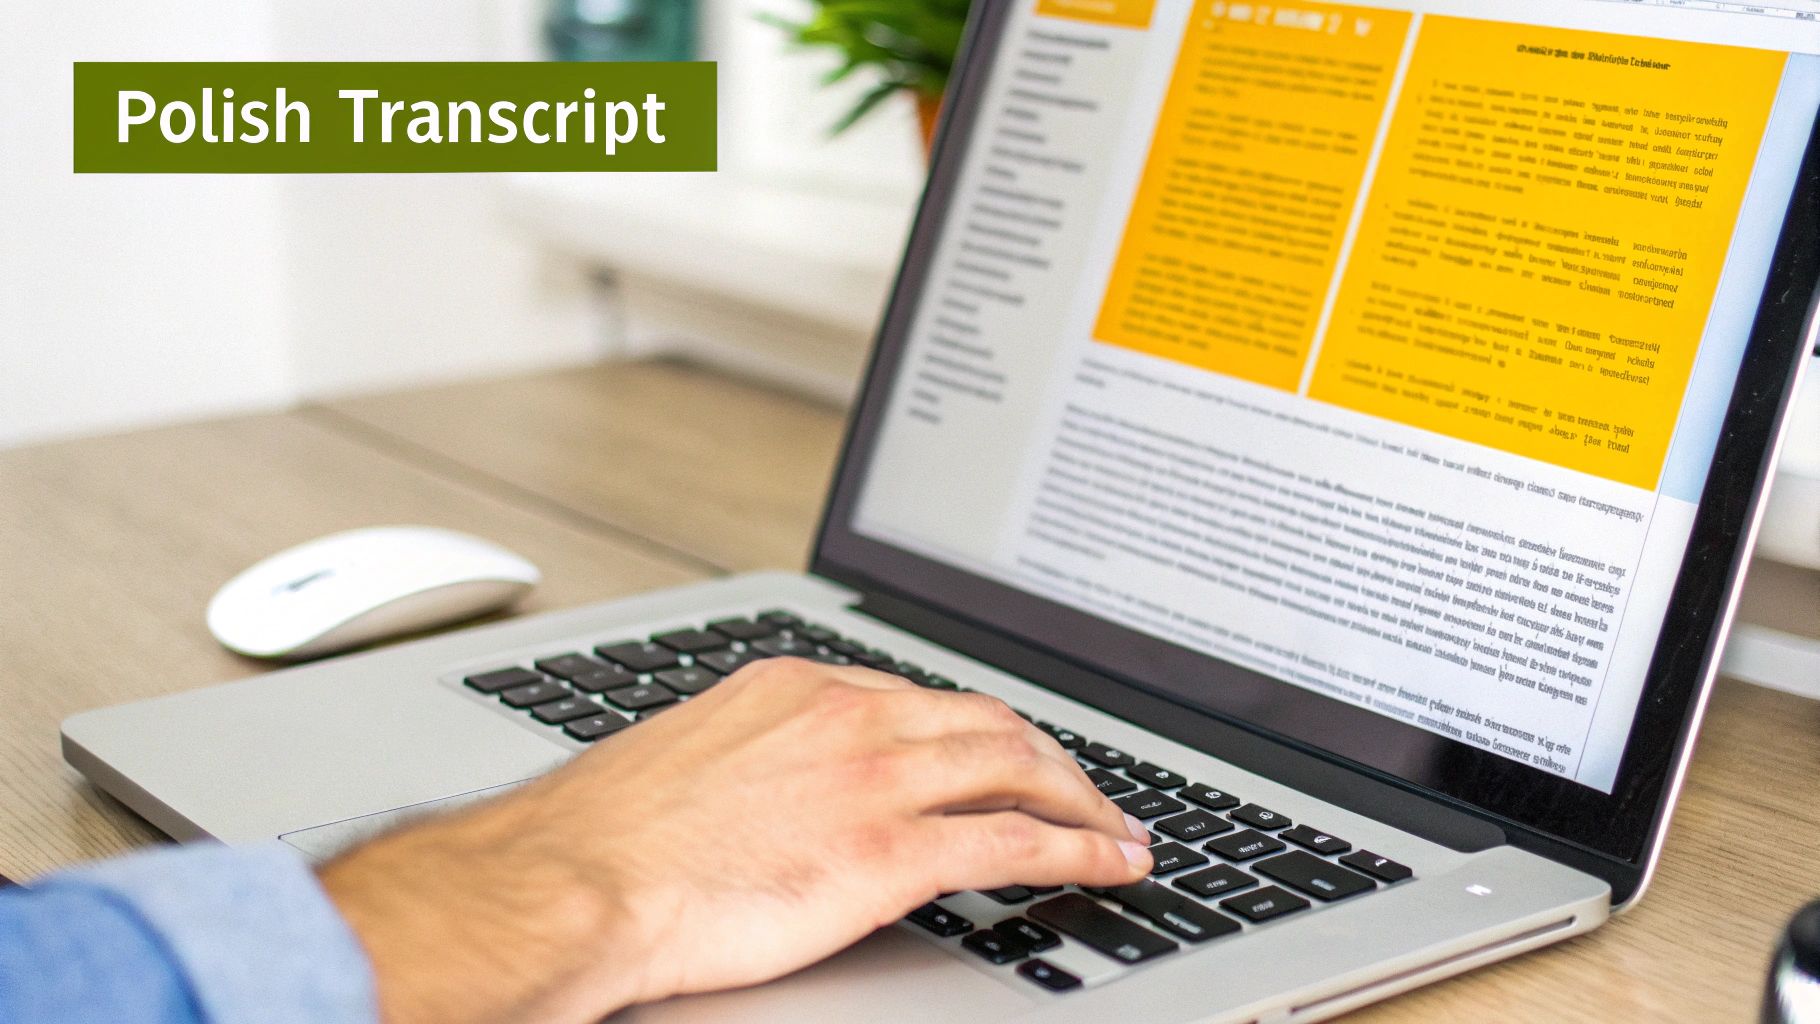
How to Polish Your Transcript for Readability
An AI-generated transcript is a brilliant first draft, but it's that final human touch that turns it from raw text into a polished, professional document. Think of the AI as doing the heavy lifting; your job is to come in and add the nuance and clarity that makes the text truly useful.
This editing step is where you make sure the words from your YouTube videos are not just accurate, but also easy and even pleasant to read.
The first pass is usually a quick cleanup. AI can get tripped up by unique names, company-specific acronyms, or niche industry jargon. A quick scan to correct these terms is a simple way to maintain your credibility.
Next, focus on punctuation and flow. AI often drops commas and periods based on pauses in speech, not grammar rules. Fixing these makes the text feel less like a robot wrote it and more like a well-crafted article. While you're at it, hunt down and remove filler words—the "ums," "ahs," and "you knows"—for a much cleaner final product.
Customizing for Clarity and Brand Consistency
Beyond just editing the text, you need to think about how the transcript looks, especially if you’re burning the subtitles directly onto your video. This is a huge deal for mobile viewers.
With mobile devices accounting for 63% of all YouTube watch time worldwide, a mobile-first approach isn't optional anymore. For creators, that means subtitles must be large, clear, and easy to read on a small screen. If you want to dive deeper into these trends, awisee.com has some great insights.
This is where a tool like TranslateMom really shines. The Style tab is basically your command centre for making your captions look great. Here’s what you can do:
- Adjust Fonts and Colours: Pick a font family, size, and colour that perfectly matches your brand’s look and feel.
- Improve Readability: Add an outline, shadow, or a semi-transparent background to your text. This small tweak ensures your captions pop against any busy video background.
- Animate Captions: Use karaoke-style animations to highlight words as they're spoken. It's an incredibly popular and engaging technique for social media clips.
A well-styled caption isn't just about conveying information. It reinforces your brand's visual identity and makes the whole viewing experience feel more professional and put-together. It’s a simple step that can seriously boost viewer retention.
Structuring for Easy Reading
Finally, let’s talk structure. Nobody wants to read a giant, intimidating wall of text. It’s your job to break up those dense blocks into shorter, bite-sized paragraphs that are easy to scan.
If your video has more than one speaker, adding speaker labels is absolutely essential. Clearly marking who is speaking (e.g., Host: and Guest:) gets rid of any confusion and makes conversations a breeze to follow. This one formatting change can transform a messy transcript into a clear, engaging dialogue.
To help you stay on track, I've put together a quick checklist. Run through these points after your AI generates the first draft to make sure nothing gets missed.
Quick Editing Checklist for Perfect Transcripts
Use this checklist after generating your initial transcript to ensure it's accurate, readable, and professional.
| Checklist Item | Why It Matters | Tool/Feature in TranslateMom |
|---|---|---|
| Proofread for typos & grammar | Builds credibility and ensures the message is clear. | Interactive Editor |
| Correct names, jargon, & acronyms | AI can mishear specialized terms; correction is key for accuracy. | Find and Replace |
| Remove filler words (um, ah, like) | Creates a cleaner, more professional reading experience. | Manual editing in the Interactive Editor |
| Adjust punctuation for flow | Makes the text read naturally, not like a machine-generated script. | Interactive Editor |
| Add speaker labels | Crucial for clarity in interviews or multi-speaker videos. | Manual formatting in the Interactive Editor |
| Break up long paragraphs | Improves scannability and prevents reader fatigue. | Manual formatting in the Interactive Editor |
| Check visual style (font, colour) | Ensures captions are on-brand and readable on all devices. | Style tab controls for font, size, and colour |
| Ensure readability on video | Captions must stand out against various backgrounds. | Style tab controls for background and shadow |
Following this checklist will take your transcript from a rough draft to a polished, professional piece of content that’s ready to be shared with the world.
Exporting and Repurposing Your Transcript
Okay, you've done the hard work and your transcript is polished and ready to go. Now what? This isn't just about downloading a file; it's about turning that text into a powerhouse asset. The format you choose next completely depends on your goal, whether that’s adding perfect captions to your original YouTube video or spinning it into something brand new.

Think of this as choosing the right tool for the job. Platforms like TranslateMom give you a couple of different paths for exporting, each built for a specific purpose.
Choosing Your Export Format
Your first choice is usually to Download Subtitles. This gives you a simple text file packed with your captions and, crucially, their timing data. Getting to know the main file types is key to making your content work smarter, not harder.
- .SRT (SubRip Text): This is the gold standard for video captions. If you want to upload closed captions back to YouTube, you'll need an SRT file. It’s a clean, simple format that lists out each caption with its start and end time.
- .VTT (Video Text Tracks): Think of VTT as a more modern version of SRT. It's designed for web video players and lets you do more with styling and positioning. It's the go-to for embedding captions directly on your website.
- .TXT (Plain Text): This format is exactly what it sounds like. It strips out all the timestamps and just gives you the raw script. It’s perfect when you need clean text to repurpose into other content.
Understanding the difference saves you headaches later. For instance, if you export a TXT file and then decide you need captions, you'll have to add the timestamps back in. If you find yourself in that spot, learning how to convert a TXT file to an SRT file is a skill that will definitely come in handy.
From Subtitles to Standalone Content
Your second big option is to Burn-in (Export Video). Instead of getting a separate file, this process creates a whole new MP4 video. Your captions are permanently "burned" right onto the video frames themselves.
This is an absolute game-changer for social media. Platforms like Instagram and TikTok aren't built for separate caption files. A burned-in video means your captions show up for everyone, every single time—even when they’re watching with the sound off.
With your files exported, the real fun begins. This is where you can see how what content repurposing entails and start turning a single YouTube video into a full-blown content strategy.
Here’s how that looks in the real world:
- The SEO Boost: Take that SRT file you exported and upload it back to your original YouTube video. This gives search engines a perfect transcript to crawl, helping your video rank for all sorts of relevant keywords.
- The Blog Post Draft: Pop open your TXT file. You've got the foundation for a fantastic article right there. Just flesh out the main points, add some headings, and embed the original video. Boom—a new piece of content.
- The Social Media Clip: Use the Burn-in feature to whip up short, punchy clips with eye-catching captions. These are tailor-made for grabbing attention on Instagram Reels, TikTok, or X (formerly Twitter).
Reaching Global Audiences with Translation
Why stop at just one language? Once you've got a clean, polished transcript of your YouTube video, you’ve basically built the launchpad for reaching a global audience. This is where your content's potential really explodes, and thankfully, modern tools make it surprisingly easy.
The appetite for content in different languages is enormous. YouTube has a staggering 2.53 billion monthly active users around the world. If you're only creating content in English, you're leaving a massive audience on the table. You can dig into more stats on YouTube's massive global reach at thesocialshepherd.com.
Seamless Translation with a Click
The good news is that with a high-quality transcript, most of the hard work is already behind you.
Inside a tool like TranslateMom, the next step is as simple as picking a destination. Once you've perfected your original transcript in the Studio Workspace, you just select a Target Language and then choose the Translation service.
The AI takes your accurate source text and generates a whole new set of subtitles in the language you picked. All the timing and context you perfected are carried over, so the translated captions look just as professional as your original ones.
Taking it a Step Further with AI Dubbing
Translated subtitles are great, but for a truly immersive experience, you can't beat AI Dubbing. This isn't just about text on a screen; it generates a brand new audio track for your video in another language.
Instead of just reading along, your international viewers can actually hear your message in a natural-sounding voice in their native tongue. It makes your content feel like it was made just for them, which can do wonders for engagement and accessibility. This is how you break into entirely new markets and see your view count climb.
Pro Tip: For viewers who are learning a new language, look for a Dual Language Mode. This feature stacks the original and translated subtitles together, one on top of the other. It's a fantastic way for people to compare languages in real-time and adds a huge educational layer to your content.
Whether you're adding Spanish subtitles, dubbing a tutorial into Japanese, or creating bilingual learning material, translation is your ticket to the world stage. It turns a single-language video into an asset that can connect with viewers anywhere.
A Few Common Questions
When you start turning YouTube videos into text, a few questions always pop up. Let's clear up some of the most common ones so you can get started with confidence.
Can I Transcribe Any YouTube Video?
Pretty much, yes. For almost any public video on YouTube, you can grab the auto-generated transcript right from the platform itself.
If you have private or unlisted videos you need to work with, that's where a dedicated tool comes in handy. You'll need something that lets you upload the video file directly or use a shareable link. With a tool like TranslateMom, for example, you just paste the public YouTube URL into the Link Import field and it pulls the video right in. Super simple.
Just How Good Are These AI Transcription Tools?
Modern AI tools are seriously impressive. We're talking 95% accuracy or even higher, especially when the audio quality is decent. They're worlds better than the basic auto-captions you see on YouTube, which often mess up punctuation, technical terms, or figuring out who's talking.
The real game-changer with a professional tool is the editing capability. In TranslateMom's Studio Workspace, you can click on any word to fix it on the fly. The visual waveform even helps you nail the timing, which is crucial for professional-quality subtitles.
What’s the Difference Between Subtitles and a Transcript?
Great question. Think of it like this:
A transcript is the raw text of everything said in the video. It's just a block of words, usually without time codes, perfect for turning into a blog post or show notes.
Subtitles (or captions) are different. They are broken into short, time-coded phrases designed to appear on the screen in sync with the audio. They’re essential for accessibility and are usually saved in special formats like SRT or VTT. A tool like TranslateMom actually creates the subtitles first, and you can then easily export them as a plain TXT file if all you need is the transcript.
Can I Translate My Video into Other Languages?
Absolutely! Once you have a clean, accurate transcript in the original language, translating it is the perfect next step to reach a much bigger audience.
After you've polished your original text in TranslateMom, you can use the Translate (Redo) feature to generate subtitles in over 100 different languages. You can even take it a step further and use the Dubbing service to create a whole new AI-generated audio track in another language.
Ready to turn your videos into powerful text assets with professional accuracy? Get started with TranslateMom and experience the easiest way to transcribe, translate, and dub your content. Explore the tools at https://www.translate.mom.