
Cómo calificar setups de trading de C a A+
2 min Machine translated
2 min Machine translated
Si no puedes calificar tu setup antes de entrar, haces operaciones que nunca debieron funcionar.
Te mostraré cómo califico cada setup de C a A+ antes de arriesgar un solo dólar.
Paso uno: Después de identificar una posible operación, cuento mis confirmaciones.
El modelo de confirmación tiene cuatro: barrido de liquidez, brecha de valor razonable de temporalidad superior entrega, inversión de una brecha de valor razonable en una temporalidad inferior y un cambio en el estado de entrega.
Cada setup se califica según cuántas de ellas estén presentes.
Cuatro confirmaciones son un setup A. Es mi especialidad.
Tres confirmaciones son un B. Puedo tomar un B, pero sé que el riesgo es mayor y reduzco el tamaño.
Dos confirmaciones o menos son una C. No las toco jamás. Paso tres: Un A+ tiene las cuatro confirmaciones. confirmaciones más un filtro adicional, divergencia SMT, barrido interno o confluencia de zona OTE.
Cuando veo eso además de las cuatro confirmaciones, sé que la configuración es lo más limpia posible.
La mayoría de los traders no califican nada.
Ven algo que parece una configuración y entran.
Así acabas tomando operaciones de grado C toda la semana y preguntándote por qué tu tasa de aciertos está estancada. A+ son las cuatro confirmaciones más un extra.
A son cuatro, B son tres, C son dos o menos.
Así se ve. Esta configuración tiene un barrido, entrega de marco temporal superior, inversión en un marco temporal inferior, y un cambio en el estado de entrega.
Eso es una A. Entro, stop en el máximo del swing, apuntando a la liquidez opuesta.
Ahora, esta es una C de la misma semana.
Barrido e inversión, pero sin entrega en una temporalidad mayor sin cambios en el estado.
Mercado lateral, directo a una pérdida. He creado una guía gratuita para calificar configuraciones que te muestra exactamente cómo calificar cada operación.
Comenta "rating" y te la enviaré de forma gratuita.
End of transcript · 320 words · machine translated
If you can't grade your setup before you enter, you're taking trades that were never meant to work. I'm gonna show you how I grade every setup from C to A+ before I risk a single dollar.
Step one: After I identify a potential trade, I count my confirmations.
The confirmation model has four: liquidity sweep, higher timeframe fair value gap delivery, inversion of a fair value gap on a lower timeframe, and a change in the state of delivery.
Every setup gets graded based on how many of those are present.
Step two: Four confirmations is an A setup.
That's my bread and butter. Three confirmations is a B. I can take a B, but I know the risk is higher, and I size down.
Two confirmations or fewer is a C. I don't touch it, ever.
Step three: An A+ is all four confirmations plus a bonus filter, SMT divergence, internal sweep, or an OTE zone confluence.
When I see those on top of the four confirmations, I know the setup is as clean as it gets.
Most traders don't grade anything. They see something that looks like a setup, and they enter.
That's how you end up taking C-graded trades all week and wondering why your win rate is stuck. A+ is all four confirmations plus a bonus.
A is four, B is three, C is two or less. Here's how it looks.
This setup has a sweep, higher timeframe delivery, inversion on the lower timeframe, and a change in the state of delivery.
That's an A. I enter, stop at the swing high, targeting opposing liquidity.
Now, here's a C from the same week. Sweep and an inversion, but no higher timeframe delivery and no change in the state.
Chop, straight into a loss. I built a free setup grading guide that shows you exactly how to score every trade.
Comment "rating," and I'll send it to you for free.
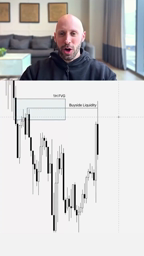 1:12 Estrategia de trading: las cuatro confirmaciones del modelo
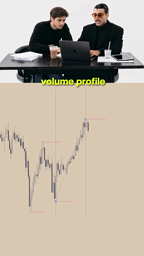 1:54 Cómo usar el perfil de volumen y el POC para entrar en operaciones
 4:47 Candidato musulmán al Senado rechaza a los Hermanos Musulmanes y defiende la Constitución
 2:41 Hombre se niega a identificarse durante investigación policial
 1:46 Afirmaciones sobre la COVID-19, los biolaboratorios ucranianos y la guerra
 1:42 Issa Casajuha se disculpa por comentarios en un mitin en UTSA
 2:52 Un votante de Trump sueña con enfrentarlo por sus promesas incumplidas
 1:12 Manuel Ferrara, consejos de intimidad y rodajes para adultos en Japón
 1:26 Abdul El-Sayed cuestiona a periodista de Sky News por no votar en Michigan
 1:51 Polonia: críticas a Tusk por el Tribunal Constitucional, el euro y las fronteras
 5:43 Elecciones en Brasil: Lula, Bolsonaro y las probabilidades en mercados predictivos
 7:02 Las afirmaciones del Dr. Caldwell sobre el cáncer, la dieta alcalina y la vitamina C
 iPhone app Translate videos on your iPhone Paste a TikTok, Instagram or X link, add subtitles in your language and save the video to Photos.

TranslateMom transcribes and translates videos from X, TikTok, YouTube and Instagram. Paste a link and you get a page like this one, in your language.