Getting rid of background noise isn't just a matter of hitting a single button. It's about figuring out what kind of noise you're dealing with, using the right filters or AI tools for the job, and prepping that clean audio for whatever comes next. It’s the difference between distracting hiss, hum, and chatter and a crisp, professional final product.
Why Crystal-Clear Audio Is Non-Negotiable

Clean audio isn't just some technical checkbox—it's the very foundation of professional content. Think about it. Whether you're recording a podcast, producing a corporate video, or localizing a project for a global audience, clear sound is what keeps people locked in. If your audio is muddy or distracting, your message gets lost, and your audience tunes out. It doesn't matter how great your content is.
The culprits are usually invisible but painfully audible: a persistent hiss from your equipment, an electrical hum from bad wiring, or just the ambient chatter of the room you're in. The good news is that modern tools have made noise removal far more accessible, turning a once-tedious task into a standard part of any high-value production workflow.
From Hollywood to Your Home Studio
The techniques we use to remove background noise from audio have been refined for decades, especially in professional production circles. For instance, California's Motion Picture and Sound Recording Industries, a sector valued at a massive $59.4 billion, have been pioneering these methods for years.
Today, over 80% of post-production workflows in those studios rely on specialized noise removal software that can slash unwanted sounds by up to 40 dB. You can dig into more of this economic data on the FRED Economic Data website.
This guide will walk you through everything you need to diagnose and fix these common audio headaches. My goal is to help you transform your raw recordings into polished, professional assets so your message is always heard loud and clear.
By learning to identify different types of noise and picking the right tool, you can clean up your tracks with confidence. This is a game-changer, especially when you're preparing audio for more advanced steps like AI-powered transcription and dubbing. Clean audio is always the first, most important step.
Identifying the Noise Invading Your Audio
Before you can even think about removing background noise, you have to play detective. Seriously. Just jumping in with a generic noise filter is a recipe for disaster—it often leaves your audio sounding thin, watery, or just plain weird.
The first step is always to put on a good pair of headphones, listen carefully, and figure out exactly what you're up against. Think of it like a doctor diagnosing an illness. A steady air conditioner hum needs a completely different treatment than a sudden dog bark. Getting this part right is what separates amateur audio from a clean, professional sound.
The Most Common Audio Culprits
Most of the unwanted gunk in your recordings falls into a few usual categories. Once you train your ear to recognize their sonic signatures, you can zero in on the right fix instantly. It's about shifting your mindset from "this audio is noisy" to "this has a 60 Hz hum and some preamp hiss."
Here are the main offenders you'll run into:
- Hiss: That classic, high-frequency "shhhh" sound. It usually comes from the electronics in your gear, like a microphone preamp that's been cranked up a little too high.
- Hum and Buzz: This is that low, tonal drone that sits at a specific pitch. It’s almost always caused by electrical grounding issues, and you'll hear it as a 50 Hz or 60 Hz hum, depending on where you are in the world. A buzz is its nastier cousin, sounding harsher and often packed with extra harmonic frequencies.
- Rumble: A super low-frequency sound, like distant thunder or vibrations from a truck driving by. It's often caused by someone bumping the mic stand, wind hitting the microphone, or even just footsteps on a creaky floor.
- Broadband Noise: This is the messy stuff. It's a wide-spectrum sound that covers a ton of frequencies all at once. Think of general room ambience, crowd chatter, wind, or rain. It’s inconsistent by nature, which makes it much trickier to remove cleanly.
Visualizing Your Noise with a Spectrogram
Sometimes, your ears can play tricks on you. That's where a spectrogram comes in handy. This tool, found in most decent audio editors, gives you a visual map of your sound, showing you the frequencies over time. It lets you see the noise.
A persistent electrical hum, for instance, shows up as a bright, solid horizontal line at the bottom of the spectrogram. A sudden clap or door slam will look like a vertical splash of colour across all frequencies. This visual evidence helps you confirm what you're hearing and makes surgically removing the problem a whole lot easier.
By combining what you hear with what you see, you can make a much more accurate diagnosis. This approach prevents you from over-processing your audio and helps preserve the natural quality of the voice.
This diagnostic step is absolutely critical when you're preparing audio for localization. A clean source track is everything for a tool like TranslateMom, because the AI needs to hear the speech clearly to create an accurate transcript.
If the AI has to fight through a layer of hiss and hum, you’ll end up with wonky subtitles and dubs, forcing you to spend way more time cleaning things up later in the Studio Workspace. Trust me, a few minutes spent identifying the noise upfront will save you hours of headaches down the line.
Here's a quick cheat sheet to help you identify what you're hearing and decide on the best plan of attack.
Common Audio Noise Types and Effective Fixes
Use this quick reference guide to identify background noises, understand their likely sources, and choose the most effective removal technique.
| Noise Type | Common Causes | Best Removal Method |
|---|---|---|
| Hiss | High gain on preamps, noisy cables, analog tape | De-hiss plugin, noise reduction effect with a noise print |
| Hum/Buzz | Poor electrical grounding, faulty equipment | Notch filter (EQ) at 50/60 Hz, specialized de-hum plugin |
| Rumble | Mic handling, wind, floor vibrations | High-pass filter (low-cut EQ) to roll off low frequencies |
| Broadband Noise | Wind, crowds, air conditioning, room echo | AI-based noise removers, spectral editing for isolated sounds |
Keep this table handy. The more you practice listening and identifying these sounds, the faster you'll get at cleaning up your audio like a pro.
Getting Hands-On: Manual Noise Reduction in Your DAW
While one-click AI tools are great in a pinch, sometimes you need to get surgical. Diving into your Digital Audio Workstation (DAW) gives you direct, granular control, letting you carefully remove unwanted sounds without wrecking the original recording. This hands-on approach is your best bet for tackling those consistent, predictable noises.
Think of it like being a sculptor instead of just hitting a "clean" button. With a DAW like Audacity, Adobe Audition, or DaVinci Resolve, you can listen, identify, and fix noise with a level of detail that automated tools just can't match. It takes a bit more patience, but the professional results are well worth the effort.
This three-step process—listen, identify, fix—is the core workflow for any manual audio cleanup job.
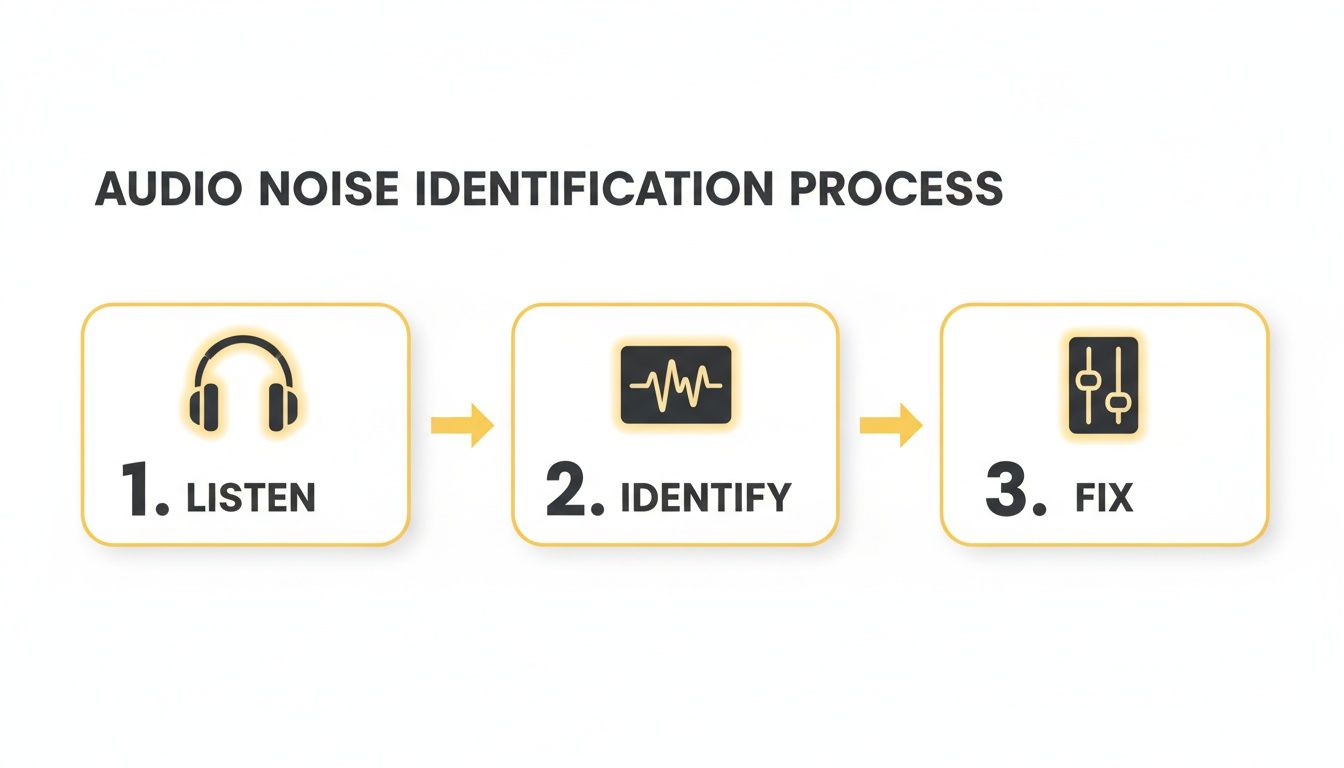
This visual guide breaks down that essential manual process. It really hammers home the need to diagnose the problem with your ears and eyes before you even think about applying a fix.
Capturing a Noise Print
One of the most powerful classic techniques to remove background noise from audio is using what's called a "noise print." This method is incredibly effective for steady, constant background sounds—think air conditioners, computer fans, or the electronic hiss from a preamp. The logic is simple: you teach the software exactly what the "noise" sounds like, and it subtracts that sound from the entire track.
To make this work, you need a few seconds of only the noise. This is exactly why it’s a great habit to record about five seconds of "room tone" before you start speaking.
Find that clean segment of noise in your audio file, highlight it, and use your DAW’s noise reduction tool to "capture" or "learn" the noise profile. Once the software has this sonic fingerprint, you can apply the reduction to the rest of your audio. Always start with gentle settings. If you go too hard, you’ll get a weird, tinny, robotic sound. Listen back carefully and adjust until the noise is gone but the voice still sounds natural.
A good noise print is the foundation of clean audio. By isolating just the unwanted sound, you give the software a precise target, leading to a much more natural-sounding result than a generic filter could ever achieve.
Surgical Precision with Spectral Editing
But what about sounds that aren't constant? A random cough, a phone notification, a car horn—a noise print won’t touch those. This is where spectral editing becomes your secret weapon. It’s a visual approach that lets you see your audio as a spectrogram, which is basically a graph of frequencies over time.
In this view, different sounds create distinct visual shapes. A bird chirp might look like a little swooping arc, while a chair squeak could be a sharp vertical line. Your DAW's spectral editor lets you use tools, almost like in Photoshop, to select these specific sonic events and either erase them completely or just lower their volume until you can't hear them anymore.
This is the most surgical way to clean up audio. Instead of slapping a broad filter across the whole track, you're meticulously plucking out individual imperfections. It's an incredibly powerful technique for polishing dialogue and making sure nothing distracts from the main event.
Taming Frequencies with a Parametric EQ
Sometimes, the issue isn't a random sound but a persistent, annoying frequency. Electrical hum, which usually sits at a very specific 50 Hz or 60 Hz, is the classic example. A parametric equalizer (EQ) is the perfect tool for this job.
Unlike a simple bass/treble knob, a parametric EQ gives you pinpoint control over three key things for any frequency you target:
- Frequency: You can select the exact frequency that's causing the problem (e.g., 60 Hz).
- Gain: You can cut (or boost) the volume of just that frequency.
- Q (Bandwidth): You can control how narrow or wide that cut is. For a hum, you want a very narrow "Q" to create a "notch" filter that only removes the problem frequency, leaving everything around it untouched.
By creating a sharp notch filter, you can effectively scoop out the hum without messing with the warmth and body of the speaker's voice. This technique is also fantastic for taming harsh sibilance ("s" sounds) or reducing boomy room resonances. Once you get the hang of these manual methods, you'll have a complete toolkit to tackle almost any audio issue that comes your way.
AI Audio Cleanup: The Fast and Easy Way
While getting hands-on with manual tools gives you ultimate control, AI has completely changed the game for audio cleanup. These intelligent tools offer a much faster, and often better, way to remove background noise from audio, especially when you’re up against unpredictable sounds.
Traditional methods need a clean sample of "room tone" to work their magic. AI doesn't. These algorithms are trained on countless hours of audio, learning to tell the difference between a human voice and, well, everything else—traffic, music, people chatting in a cafe, you name it.
This makes AI a lifesaver for recordings done on the fly, like interviews or vlogs shot in noisy places where getting a clean noise sample is impossible.
The Magic of One-Click Cleaning
The best part about using AI is how quick and simple it is. A task that once required a trained ear and careful editing can now be done with a single click.
Most AI denoisers give you a simple slider or a few basic options. No complex settings to fiddle with. This makes professional-level audio cleanup accessible to everyone, not just audio engineers.
AI-powered denoising shines exactly where manual methods fall short. It’s built to handle dynamic, changing noise, making it perfect for content recorded in the real world.
This same tech is now being used in all sorts of applications. For example, it’s a key component in modern AI-driven call center solutions, where crystal-clear audio is non-negotiable for good customer service.
Don't Let the AI Go Overboard
As powerful as these tools are, they aren't perfect. If you push the processing too hard, you can end up with weird digital artifacts. The audio might sound watery, robotic, or have a strange metallic sheen to it.
The golden rule here is simple: less is more.
- Start Small: Always begin with the lowest setting. Nudge it up slowly until the noise is gone, but the voice still sounds natural.
- Listen Carefully: Put on a good pair of headphones. You’re listening for two things: the reduction in noise and any negative impact on the voice itself.
- A/B Test: Flip back and forth between the original and the processed audio. Is it actually an improvement, or just different?
The goal is to find that perfect balance where the background noise fades away without damaging the main vocal track.
AI's Role in High-Stakes Audio
The power to isolate a clear signal from a noisy background has huge implications. In California's industrial sector, for instance, noise control is a massive industry, projected to be worth over USD 600 million by 2027.
Workplace safety regulations from Cal/OSHA demand noise reductions of 20-30 dBA in loud factory settings to protect workers' hearing. It’s a powerful reminder of just how effective this technology can be.
Making AI Part of Your Workflow
If you're creating content for a global audience, clean audio isn't just nice to have—it's essential. This is especially true when using a tool like TranslateMom.
Running your audio through an AI denoiser before you upload can make a world of difference. The AI that handles transcription and translation needs clean audio to work accurately. A clear signal means fewer errors in your subtitles and dubs, saving you tons of time on manual corrections later. For example, inside TranslateMom's Studio Workspace, there's an "AI" tab where you can ask the tool to fix formatting or rewrite captions, but its effectiveness relies entirely on a good initial transcript. You'll see a huge improvement in the final product, especially for tasks like when you translate English to French with sound.
Think of it as a crucial prep step. By adding AI audio cleanup to your checklist, you're setting your entire project up for a smoother ride, from start to finish.
Preparing Clean Audio for Video Localization
When you're pushing content out to a global audience, clean audio is everything. It’s the foundation. This is especially true when you're using AI platforms for your subtitles and dubbing.
Think about it: any background noise left in your original track just snowballs. It creates a whole mess of problems down the line, leading to wonky transcriptions and translations that you’ll have to spend hours fixing by hand.
The AI is trying its best to just hear the words being spoken. If it has to fight against a humming fridge, passing cars, or even the click-clack of a keyboard, it's bound to get things wrong. A clean audio file is the single biggest thing you can do to get great results right from the start.
The Pre-Processing Workflow for Perfect Results
This is non-negotiable: you absolutely must remove background noise from audio before you upload anything for localization. Making this a standard pre-processing step will radically improve your final output and, trust me, save you a ton of time.
The workflow itself is simple. Before you even think about translating, run your video’s audio through your go-to noise reduction tool. It doesn't matter if it's a deep dive in a DAW or a quick one-click AI solution. Export that cleaned-up audio, and then you're ready for the next stage.
Using Clean Audio in TranslateMom
Plugging this step into a platform like TranslateMom is a breeze and makes a huge difference. The whole idea is to give its AI the cleanest signal possible to nail the accuracy for transcription, translation, and AI dubbing.
Here’s how you’d put this into practice:
- Clean Your Audio First: Use any of the techniques in this guide to get a squeaky-clean audio file from your video.
- Start a New Task: Head to the New Task screen in the app. You can upload your video file directly (or press
Ffor the file picker) or paste a link from YouTube, X (Twitter), TikTok, or Instagram. - Configure the Service: Once uploaded, select your Source Language and Target Language. Then, choose whether you need Transcription (captions in the original language), Translation (subtitles in a new language), or Dubbing (an AI-generated audio track).
By feeding it a clean source file, you're basically giving the AI an open-book test. Your subtitles will have far fewer mistakes, and the AI-generated dubs will sound more natural with much better timing.
This simple pre-processing step is your biggest time-saver. A few minutes spent cleaning the audio upfront prevents hours of frustrating manual edits in the Studio Workspace, where you would otherwise be correcting transcription errors caused by noise.
This all but guarantees your final product looks and sounds professional for your global audience. For a few more pointers, our guide on background noise removal from video has some extra tips specifically for video content. Honestly, taking a moment to prep your audio shows a commitment to quality that your international viewers will definitely notice.
How to Prevent Noise at the Recording Source
The best trick to remove background noise from audio? Stop it from ever getting recorded. Seriously, every minute you spend sorting out your recording setup will save you ten minutes of painful editing later. This is the real secret to getting that consistently clean, professional sound.
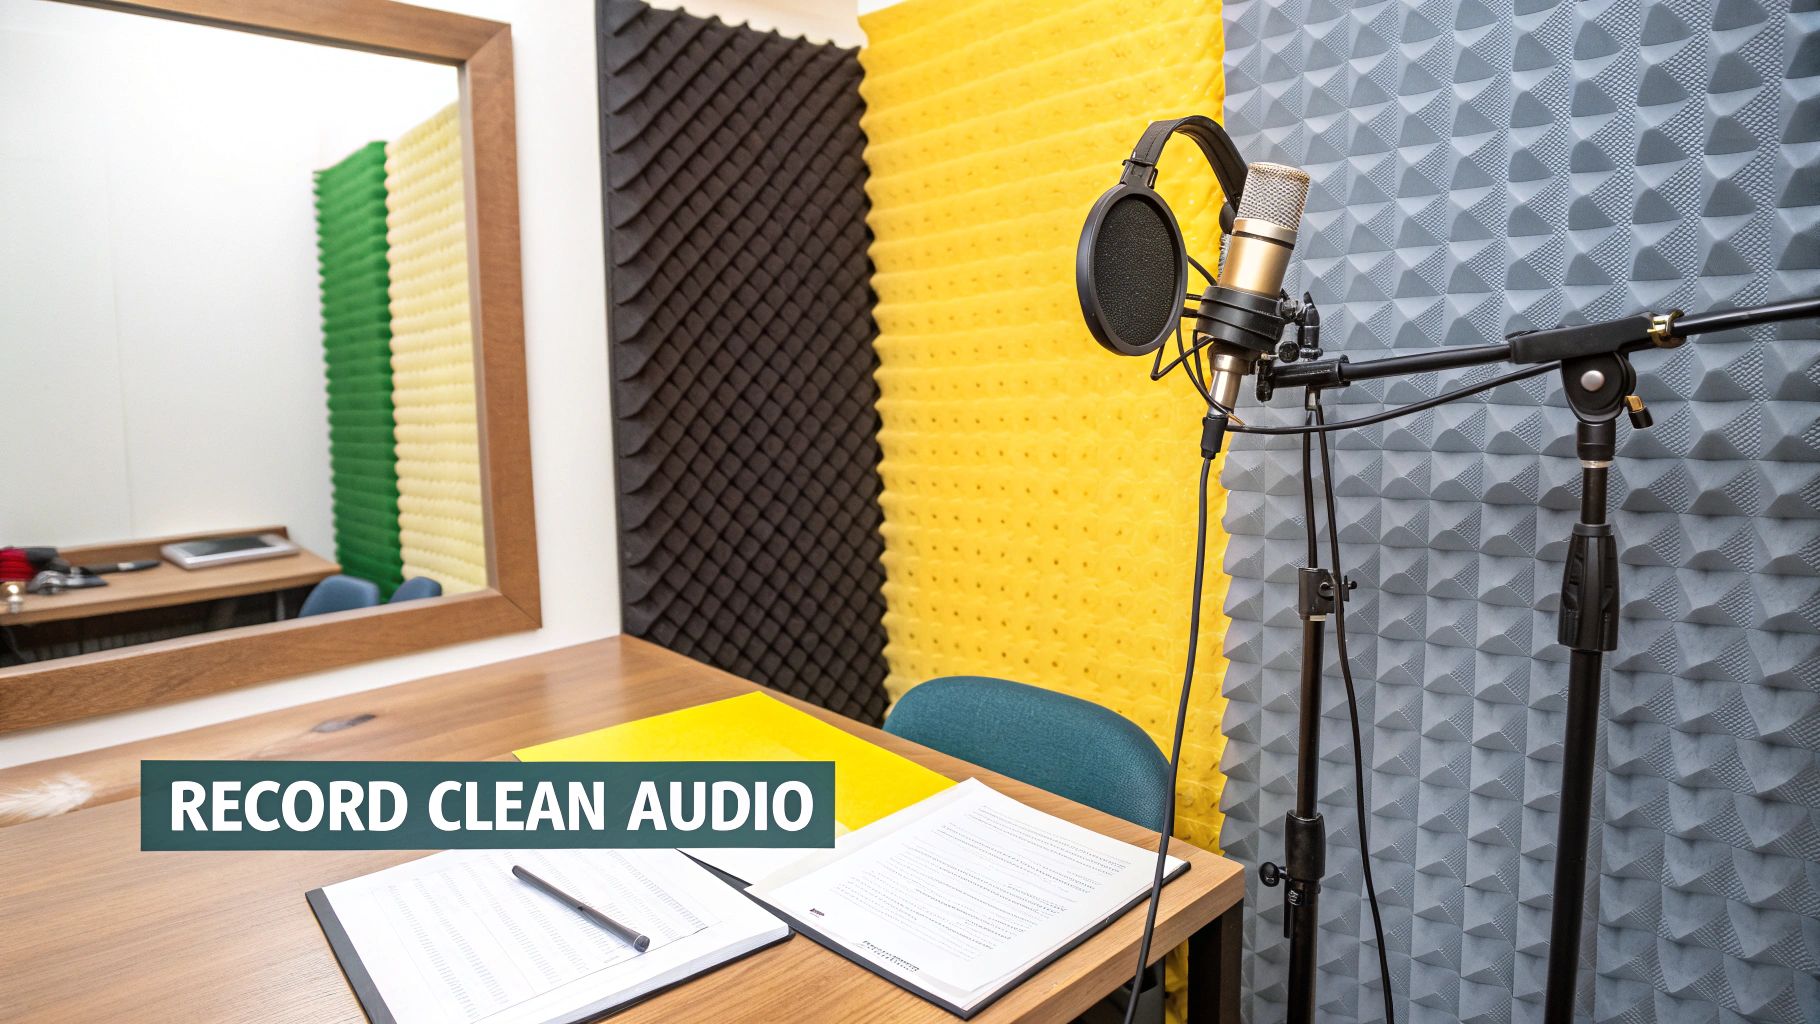
Your recording space is the first and most important battleground. Sound waves love to bounce off hard, flat surfaces like windows, bare walls, and hardwood floors. This creates that awful echo and reverb you’re trying to avoid. You don't need to build a pro studio, but a few simple tweaks can make a massive difference.
Look for ways to bring soft materials into the room to deaden the sound. Throw down a thick rug, hang some heavy curtains, or even toss a few cushions in the corners. If you want to get a bit more serious, affordable acoustic foam panels are fantastic for absorbing those reflections and making your room sound less like a hollow box.
Choosing and Placing Your Microphone
The microphone you use and where you stick it are just as crucial as the room itself. Not all mics are built the same, and the right one for you depends entirely on your recording environment.
- Dynamic Microphones: These are your best friends in untreated rooms. They're less sensitive and designed to pick up whatever is directly in front of them, which means they naturally ignore a lot of background noise. For most home recording situations, this is exactly what you want.
- Condenser Microphones: These mics are incredibly sensitive and will capture every tiny detail in the room. That's amazing if you're in a perfectly sound-treated studio, but it also means they'll pick up your air conditioner, the clock ticking on the wall, and the traffic outside.
Once you have your mic, get close to it. A good starting point is about six to eight inches away from your mouth. This makes your voice the loudest thing the mic hears, minimizing the ambient noise of the room. The closer you are, the less you have to turn up the gain, which also cuts down on that annoying electronic hiss.
Setting Correct Recording Levels
Getting your gain staging right is the final piece of the pre-recording puzzle. If you set your recording level too low, you'll have to crank the volume in post-production, which also cranks up the underlying noise. Set it too high, and your audio will "clip" and distort—a problem that's pretty much impossible to fix.
The sweet spot? Aim for your audio levels to peak somewhere between -12dB and -6dB on your meter. This gives you plenty of headroom to avoid distortion while keeping your voice loud and clear above any equipment noise.
This whole idea of controlling sound at the source isn't just for content creators. Think about multi-family housing in California, where strict building codes demand high levels of soundproofing. Meeting those standards has been shown to cut down on tenant noise complaints by as much as 30%. It’s proof that a little prevention goes a long way.
These principles hold true whether you're using a high-end setup or just your smartphone. If you're just starting out, have a look at our guide on how to record high-quality audio on an iPhone to put these tips into practice.
A Few Common Questions About Audio Cleanup
Even with the best tools, you’ll probably run into a few common questions when you start to remove background noise from audio. Here are some quick, practical answers I've put together to help you sort things out and get your workflow dialled in.
Can I Completely Remove Noise Without Affecting Vocals?
It’s the million-dollar question, isn't it? While modern tools are shockingly good, getting 100% noise removal with zero impact on the voice is pretty rare. If you get too aggressive, you can end up with weird digital artifacts that make the speaker sound thin or "watery."
The real goal is balance. You want to push the background noise down until it’s not distracting, not necessarily hunt down and destroy every last molecule of it. My advice? Always start with gentle settings and slowly dial them up, listening closely for any unnatural shifts in the voice.
What’s the Best Free Software for Noise Removal?
If you're looking for a free tool that genuinely punches above its weight, Audacity is the answer. It's been a go-to for years for a reason and has some surprisingly powerful features built right in.
Its main "Noise Reduction" effect is perfect for constant sounds like hiss or hum. You just grab a "noise print" from a silent bit of your recording, and Audacity uses that fingerprint to clean up the rest. It also has a great equaliser for surgically removing specific frequencies, like a pesky 60 Hz electrical hum.
Should I Use Manual Tools or AI for Noise Reduction?
Honestly, the best approach really depends on the kind of noise you're fighting.
For consistent, steady sounds—think an air conditioner, a fan, or preamp hiss—manual tools give you incredible control. Capturing a noise print tells the software exactly what to look for and remove. But for complex, unpredictable noise like street traffic, crowd chatter, or background music, AI tools are almost always faster and more effective. They’re just better at intelligently separating speech from the chaos.
How Does Clean Audio Help With Video Translation Tools?
Clean audio isn't just a nice-to-have for localization—it's absolutely critical. When you get rid of background noise before you upload your file, the AI doing the transcription can understand the original speech far more accurately. This has a massive downstream effect on quality.
Take a tool like TranslateMom. When you feed it a clean source file, the AI generates much better subtitles and dubs from the get-go. This means you'll spend way less time in the Studio Workspace manually fixing errors. Inside the editor, you can click on any subtitle line to correct text, adjust start/end times using a visual waveform, and even switch to a "Split View" to compare your translation against the original text. Starting with clean audio makes this entire process faster and more accurate.
Ready to take your clean audio to a global audience? With TranslateMom, you can effortlessly subtitle, translate, and dub your videos into over 100 languages. Give your pristine audio the high-quality localization it deserves. Start for free at TranslateMom.
