Welcome to the new era of content creation. It's a place where all you need to make a really compelling video is a script. Script to video AI is the technology making this happen, turning your written words into engaging visuals, complete with AI voices and animation. This isn't just a gimmick; it's a genuine game-changer for marketers, teachers, and anyone who needs to create great video without the usual hassle and high costs.
The Rise of Script to Video AI

Let's face it: everyone wants more video content, but making it the old-fashioned way is slow, expensive, and usually requires a whole team of specialists. This is exactly the gap script to video AI was built to fill. By taking over the most time-consuming parts of the process, these tools let just about anyone step into the role of a video producer.
So, how does it actually work? In a nutshell, the AI reads your script, figures out the main ideas, and then pulls in relevant visuals from a massive library of stock videos, images, or even generates new scenes from scratch. At the same time, a text-to-speech engine crafts a surprisingly natural-sounding voiceover and lines it up perfectly with what's happening on screen.
A Fundamental Shift in Content Production
What this really does is open up video creation to everyone. Small businesses, solo creators, and even big marketing departments can now produce professional-looking videos without the traditional barriers.
The advantages are pretty hard to ignore:
- Speed and Efficiency: You can get a solid first draft of a video done in minutes, not weeks.
- Cost-Effectiveness: Say goodbye to massive bills for filming, actors, and editing suites. The savings are huge.
- Scalability: Need to pump out a bunch of videos for different social platforms or audiences? Now you can, without needing to hire a bigger team.
Here in Canada, the adoption of this tech is really taking off. Market analysts expect the AI video generator market to grow at a compound annual rate of 32.78% between 2025 and 2030, hitting a projected value of USD 2.34 billion. That’s a clear sign that Canadian businesses are leaning heavily into AI-powered solutions. You can dig into the numbers yourself and learn more about the growth of AI video generators on marketsandmarkets.com.
Beyond Basic Automation
As you get comfortable with this workflow, you'll see it's about more than just automating tasks. It's about a new kind of creative partnership. These tools handle the technical grunt work, freeing you up to focus on what really matters: your story and your message.
To get the most out of your efforts, it's worth exploring the ecosystem of tools that can complement your video creation. Checking out the best AI tools for content creators can give you a better sense of how everything fits together in a modern production strategy. With this foundation, you're ready to jump into the practical steps and turn your own script into a finished video.
Getting your script right is the single most important step in creating a great AI video. Think of your script as the blueprint; if the foundation is weak, the final structure will be shaky, no matter how sophisticated your script to video AI tool is.
A poorly prepared script often leads to a disjointed, confusing mess. But a well-structured one? That's what gives the AI clear instructions to build something coherent and engaging. It’s the difference between a smooth ride and getting completely lost.
Writing for the AI, Not Just for the Page
AI voices have come a long way, but they still take everything you write literally. This means you have to write for the ear—specifically, an AI ear.
The trick is to keep your sentences short and to the point. Long, winding sentences with lots of clauses can easily trip up the AI's timing and inflection, making the whole thing sound robotic and unnatural.
My go-to rule: Always read your script out loud. If a phrase feels awkward or clumsy for you to say, you can bet the AI voice is going to mangle it. This simple gut check catches so many issues before they ever get to the generation stage. If you're starting with existing audio, making sure it's clean is just as crucial. Our guide on how to record audio on your iPhone has some great tips for capturing clear source material.
Embedding Directions for Better Control
This is where you can really start steering the AI. By embedding simple instructions directly into your script, you gain a surprising amount of creative control over the final video's tone, pacing, and visuals. It turns a basic text file into a detailed production brief.
Here are a few practical ways to do this:
Set the Emotional Tone: Use brackets to tell the AI how a line should sound. For example, writing
[Excitedly]before a sentence will prompt a more energetic, upbeat delivery.Build in Pauses: An ellipsis (...) is your best friend. It signals a natural pause, which is critical for preventing the narration from sounding rushed. It gives your audience a moment to breathe and absorb what you're saying.
Call Out Your Visuals: Don't leave imagery to chance. You can get specific by adding a visual prompt, like
[Visual: A close-up of a person typing on a laptop]. This gives the AI a direct, unambiguous instruction for what to show on screen.
Making these small adjustments to your script formatting can have a huge impact on how well the AI interprets your creative vision. It’s all about providing clear, explicit cues.
Script Formatting for AI Interpretation
The table below shows a side-by-side comparison of standard scriptwriting versus an AI-optimized approach. You'll see how tiny tweaks can make a world of difference.
| Element | Standard Script Example | AI-Optimized Script Example | Reasoning for AI |
|---|---|---|---|
| Dialogue | It is important to remember that the process is not difficult. | "[Calmly] Remember... the process is actually quite simple." | Brackets guide emotional tone, and ellipses add a natural pause for emphasis. |
| Visuals | Show a computer screen. | "[Visual: A vibrant dashboard with data charts and graphs]" | Provides a specific and descriptive visual cue, leading to more relevant imagery. |
| Pacing | First do this, then do that, and finally do this other thing. | "First, complete this step. [Pause] Next, move on to this one. [Pause] Finally, finish with this." | Breaking up instructions with explicit pause commands creates better pacing and clarity. |
As you can see, the AI-optimized examples are far more prescriptive. They leave less room for ambiguity, which is exactly what you want when you're guiding a machine to create compelling content.
From Script to First Draft in Minutes
This is where the magic really starts to happen. You’ve done the hard work of crafting and timing your script, and now it’s time to hand it over to the AI and watch it come to life. The biggest win with script to video AI is speed—it lets you automate content creation with AI and get a solid first draft put together in a matter of minutes, not hours or days.
Once you upload your script, the platform’s AI will immediately start breaking it down. It reads your text, figures out where the natural scene breaks are, and starts pulling relevant visuals from massive stock libraries or its own generative models to match your words. At the same time, it’s generating the voiceover, doing its best to capture the tone and pace you outlined in your script notes.
Let's be real: this first version is almost never going to be the final cut. Think of it as a rapid-fire rough draft—a powerful foundation that you can start moulding and polishing. The goal isn’t perfection on the first try; it’s about getting a huge head start on the creative process.
This visual shows just how that initial script gets turned into a video.
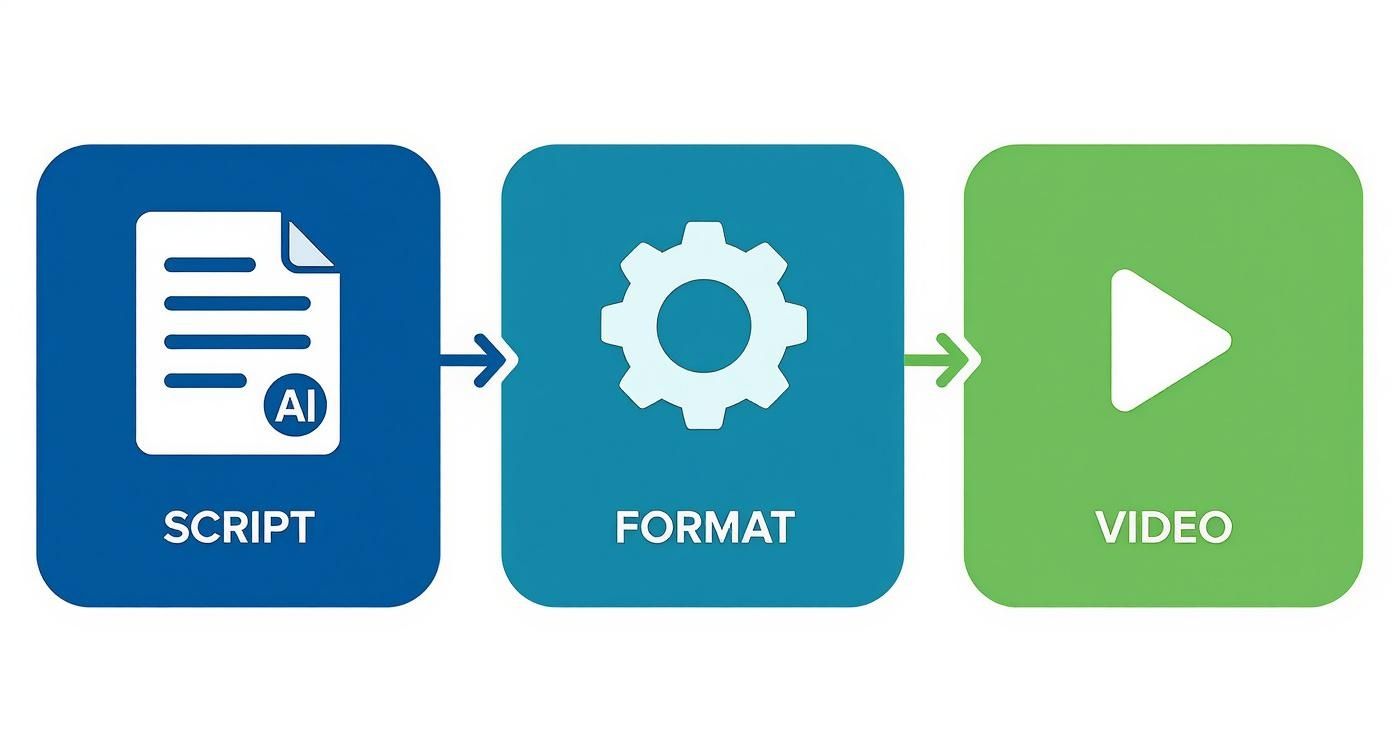
It really drives home how critical good script formatting is. That structure is what allows the AI to make sense of your text and produce a coherent video.
The Iterative Refining Process
Your first AI-generated draft is the canvas; now it’s your turn to be the artist. This is where your expertise comes in, as you tweak, adjust, and polish the AI’s work until it perfectly matches your vision.
You’ll likely find yourself doing a few common things:
- Swapping Out Visuals: Did the AI choose a clip that just feels off? No problem. Dive into the platform's media library and find something that fits the mood better. You can usually upload your own clips, too.
- Adjusting Scene Timing: Sometimes a scene flies by too quickly or drags on for too long. You’ll need to get in there and manually adjust the start and end points to get the pacing just right.
- Fine-Tuning the Narration: The AI voice might need a little coaching. You might have to regenerate a few lines with clearer instructions on tone or simply tweak the pauses between sentences to make the delivery sound more natural.
- Mixing the Audio: Is the background music drowning out the narration? Jump into the audio settings and lower the music volume so it complements the voiceover instead of competing with it.
Polishing the Final Output
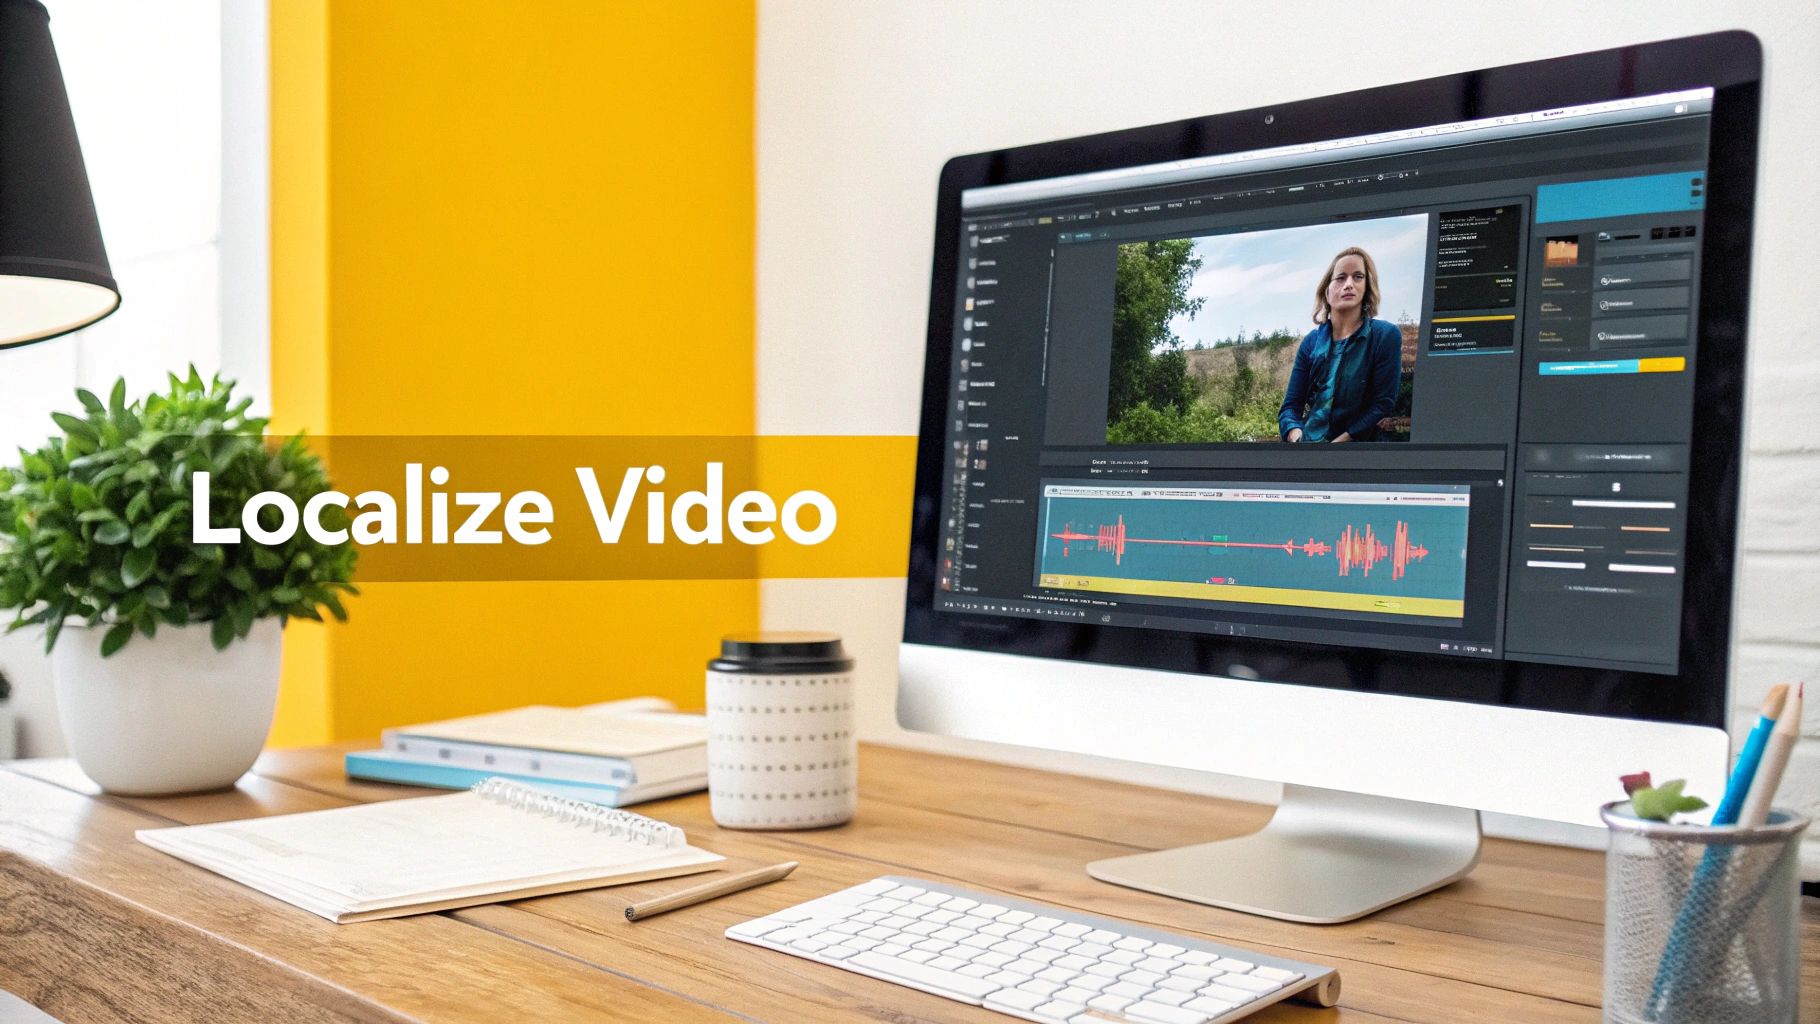
Once you’ve refined the main content, it's time to add those professional finishing touches. This is where a tool like TranslateMom can be incredibly helpful for adding polish and even localizing your video for new audiences.
When you’re happy with the video, you can bring it right into the TranslateMom Studio. Just upload the file or paste the link from YouTube, X, or TikTok to kick off a New Task. From there, selecting the Transcription service will generate perfectly synced captions for you. The editor’s visual waveform is a lifesaver, as it lets you visually drag the start and end points of each caption to ensure every single word appears on screen at the exact moment it's spoken.
This refinement stage is what turns a generic AI-generated video into a unique piece of content that feels authentic to your brand. It's that human touch that adds the final, crucial layer of quality.
The demand for this kind of efficient content creation is fueling rapid growth in the Canadian script-to-video AI market. Projections show the market jumping from USD 250 million in 2024 to an incredible USD 12.5 billion by 2034, with the media and entertainment sector leading the way. This explosive growth underscores just how essential these iterative and refining tools are becoming for creators across the country.
Taking Your AI Video to the Next Level with Localization
Creating an AI-generated video is an impressive first step, but the real artistry comes into play during post-production. This is your chance to add the professional polish that makes your content stand out and truly connect with audiences across the globe.
A single video can become a cornerstone of an international campaign with the right enhancements. For this kind of detailed work, a dedicated tool like TranslateMom is invaluable. It’s built for the nuanced tasks of captioning, translating, and dubbing, giving you granular control over the final product.
Getting Your Video Ready for a Global Audience
Your localization journey starts on the New Task screen in TranslateMom. This is where you'll bring your new video into the editing environment.
You’ve got a couple of easy ways to do this:
- File Upload: The simplest way is to just drag your video file directly from your computer into the browser. This works perfectly for videos you've just exported from your script to video AI tool.
- Link Import: If your video is already live on a platform like YouTube, X, TikTok, or Instagram, just paste the URL. The app will pull it in for you.
Once it's uploaded, you'll set up your project by selecting the video's original language (the Source Language) and the language you want to add (the Target Language). From there, you choose a service: Transcription for same-language captions, Translation for foreign language subtitles, or Dubbing for a new AI audio track.
Fine-Tuning in the Studio
The TranslateMom editor, or "Studio," is where the magic really happens. Here, you get to tweak every last detail of your video’s text and sound. One of the most helpful features you'll find is a visual waveform of the audio, which lets you see the rhythm of the speech.
You can click and drag the start and end points of each subtitle to line them up perfectly with the spoken words. No more captions that appear too early or linger too long. If you're translating, the Split View is a lifesaver—it shows the original text right next to your translation, making it so much easier to proofread and ensure accuracy.
Taking a few extra minutes to sync your captions with the audio waveform makes a world of difference. It's one of those small details that signals quality and keeps viewers locked in.
Customizing Subtitles and Adding AI Dubbing
Perfect timing is just the beginning. In the Style tab, you can customize your subtitles to match your brand's aesthetic by changing fonts, colours, outlines, and adding shadows. For social media videos, you might even want to try out "Karaoke" style animations. This highlights words as they're spoken, a tactic that's been shown to boost viewer engagement. You can even upload and position a brand logo directly onto the video from the Brand tab.
This is also where you can give AI dubbing a try. By choosing the Dubbing service, the platform will generate a completely new audio track in your target language. This is a game-changer for reaching audiences who would rather listen than read subtitles.
Understanding how to get the best results from this process is key. You can dig deeper into making a high-quality English translation with sound to see just how powerful AI dubbing can be. This final touch truly makes your video a versatile asset, ready for any market in the world.
Getting Your Video Out There
You've done the hard work—the video looks great, the voiceover is perfect, and it’s ready for a global audience. But the job isn't quite finished. Now comes the crucial last mile: getting it in front of people in the right way. This isn't just about clicking "export"; it's about making smart choices that will determine who sees your video and how they see it.One of the first decisions you'll face is how to handle your subtitles. It seems like a small detail, but it has a huge impact on user experience and platform performance.
To Burn or Not to Burn? Subtitle Choices
Should you permanently embed subtitles into your video file, or provide them as a separate file? The answer really depends on where your audience is watching.
For social media platforms where videos often autoplay on mute—think TikTok, Instagram Reels, or X (formerly Twitter)—"burning in" your captions is the only way to go. This process permanently etches the text onto the video, so it's impossible to miss. In a tool like TranslateMom, this is dead simple: just hit the Export Video option. The system will render a brand new video file on its servers with your customized captions and logo baked right in, ready for you to upload.
Platforms like YouTube, however, play by a different set of rules. They prefer separate subtitle files (like SRT or VTT) because it gives viewers more control. Your audience can toggle captions on or off, or even switch between different languages you've provided. For this, you’d use the Download Subtitles feature in TranslateMom to get a simple text file that you upload alongside your main video. We get into the nitty-gritty of this in our guide on how to add subtitles to your video.
Making Your Video Discoverable
With your final video files in hand, your focus should shift to discoverability. You want the algorithms on platforms like YouTube and Google to understand what your video is about so they can show it to the right people.
- Titles Are Everything: Your title needs to be compelling, clear, and include the main keywords someone would use to find your content.
- Don't Skip the Description: This is prime real estate. Write a few paragraphs that explain what your video covers, making sure to naturally include your primary and secondary keywords.
- Tag, You're It: Use a healthy mix of specific and broad tags relevant to your topic. This is another signal that helps the platform categorize your content correctly.
This final strategic push is more important than ever. As the script to video AI space grows, so does the competition. In Canada alone, the AI market is expected to reach USD 8.28 billion by 2025, fueled by an insatiable demand for scalable video content. You can explore more about Canada's growing AI market on Statista.
A fantastic video that nobody sees doesn't make an impact. Taking the time to craft your titles, descriptions, and export settings is just as critical as the creative process. It’s the final step that turns a great script into a video that actually performs.
Frequently Asked Questions About Script-to-Video AI
Diving into script-to-video AI for the first time usually brings up a handful of questions. It's smart to get a feel for what these tools are truly capable of—and what their limitations are—so you can set realistic expectations and get the best possible results. Let's break down some of the most common things people ask.
How Much Creative Control Do I Actually Get?
One of the biggest myths is that the AI takes over and you're just along for the ride. The truth is, you have a ton of creative control. It’s far more productive to think of the AI as a super-efficient production assistant, not the final director.
While the AI will generate a first draft based on your script, you can (and should) jump in to override its decisions. You’re in charge of the final cut.
- Tweak the Script: You can edit the wording, adjust the timing, or add new lines directly in the editor.
- Swap Out Visuals: Don't like a scene? You can easily replace the AI's chosen stock footage with your own clips or browse the library for something better.
- Refine the Voiceover: You can have the AI regenerate a line with a different tone, or even switch to a completely different voice actor that better fits your brand.
- Brand Everything: Add your logo, apply your brand's colour scheme, and set your preferred fonts.
The AI does the grunt work of putting everything together, but you’re always in the driver's seat, guiding the creative vision.
Can the AI Really Match My Brand's Visual Style?
Yes, but it needs your help. Most modern platforms are built for branding. You can usually upload a complete brand kit—your exact colour palette, fonts, and logos—which the AI will use to keep everything consistent.
But the real secret to getting the visual style right is in your script. Your scene descriptions act as powerful prompts. The more detail you provide, the better the AI can match your vision. For example, instead of a generic instruction, try something like: "[Visual: A bright, modern office with lots of natural light and green plants.]" This gives the AI clear direction.
Remember, the quality of your video is directly linked to the quality of your instructions. A detailed script is like a creative brief for the AI, leaving less to guesswork and giving you a much more polished result.
Is the Video Quality Good Enough for Professional Use?
Without a doubt. The output quality from today's leading script-to-video tools is impressive and absolutely ready for professional use cases. We're talking high-impact marketing campaigns, polished social media content, corporate training videos, and in-depth educational material.
Most platforms let you export in high-definition resolutions like 1080p or even 4K. This means your final video will look sharp and professional on any screen, from a large desktop monitor to a smartphone. The technology has come a long way and can consistently produce content that meets demanding professional standards.
Ready to add that final polish and take your AI-generated videos global? Start with TranslateMom to effortlessly add accurate subtitles, translations, and AI dubbing. Break language barriers in seconds.